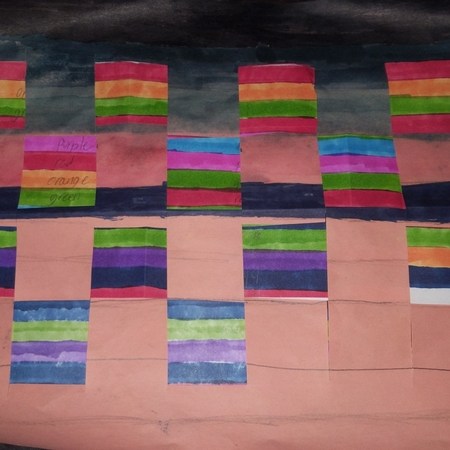
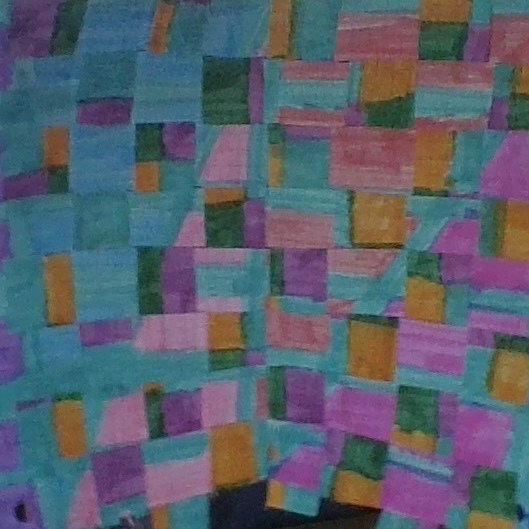
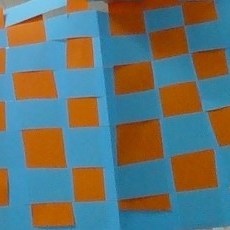
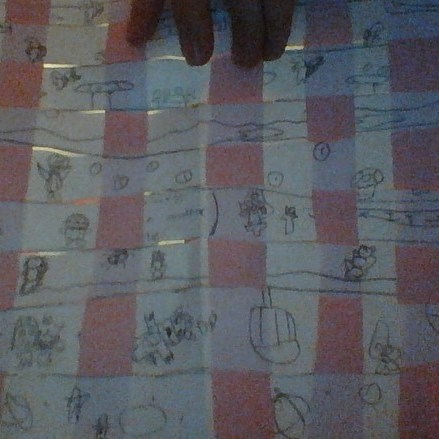
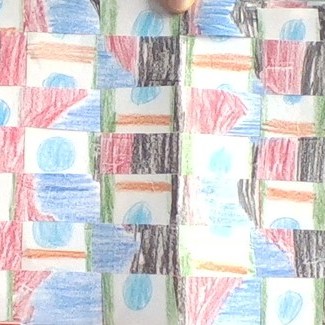
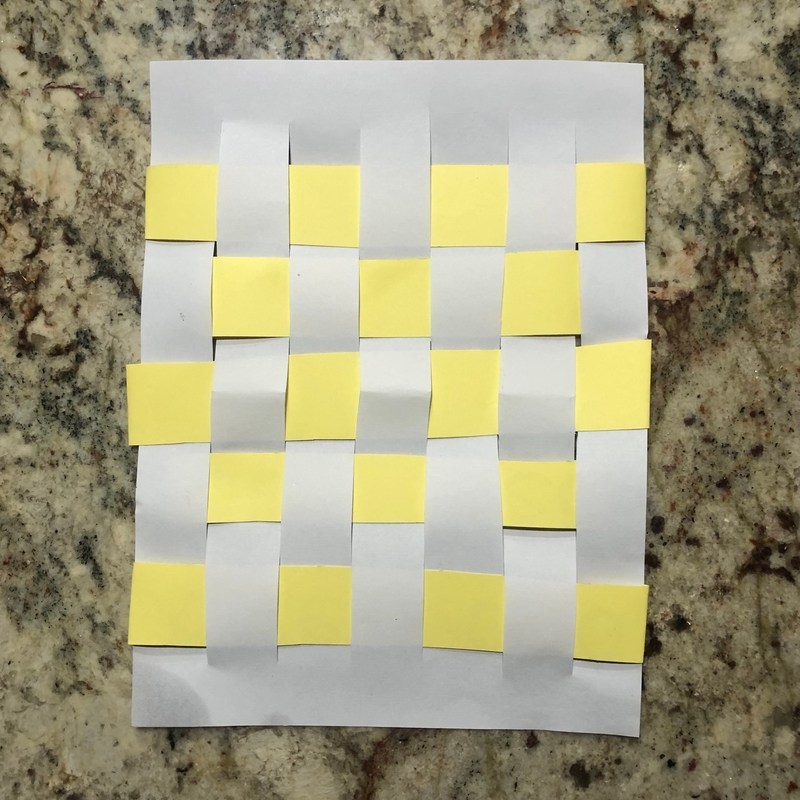
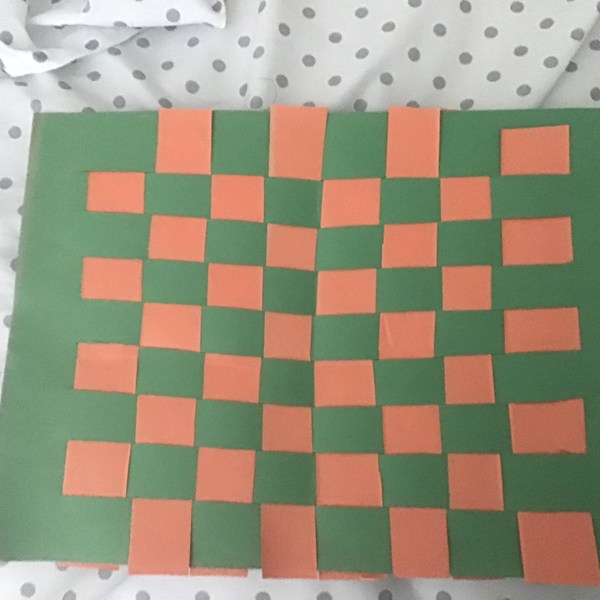
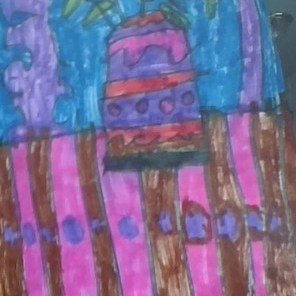
A few weeks ago, I taught a lesson on paper weaving to lower and upper elementary. We looked at textiles from the Shipibo Conibo tribe and discussed how different textiles are created. Then, we looked at the weaving process and learned that to weave, we need to follow an over, under, over, under pattern. Students decorated their papers to create their own patterned textiles to prepare for weaving, then they cut out slits in one paper for the loom, and strips from the other paper for weaving strips.
I think it was a bit difficult for students to understand the weaving process virtually. I had videos, step by step photo directions, and live demos of the weaving process, but after teaching this lesson, I think weaving might be easier to see and understand in person. I would love to do another weaving lesson once I teach in person, hopefully with yarn! Regardless of the challenges that we face when doing virtual school, I think the weavings turned out amazing!
Some students lost their decorated papers, so they just used construction paper or notebook paper.
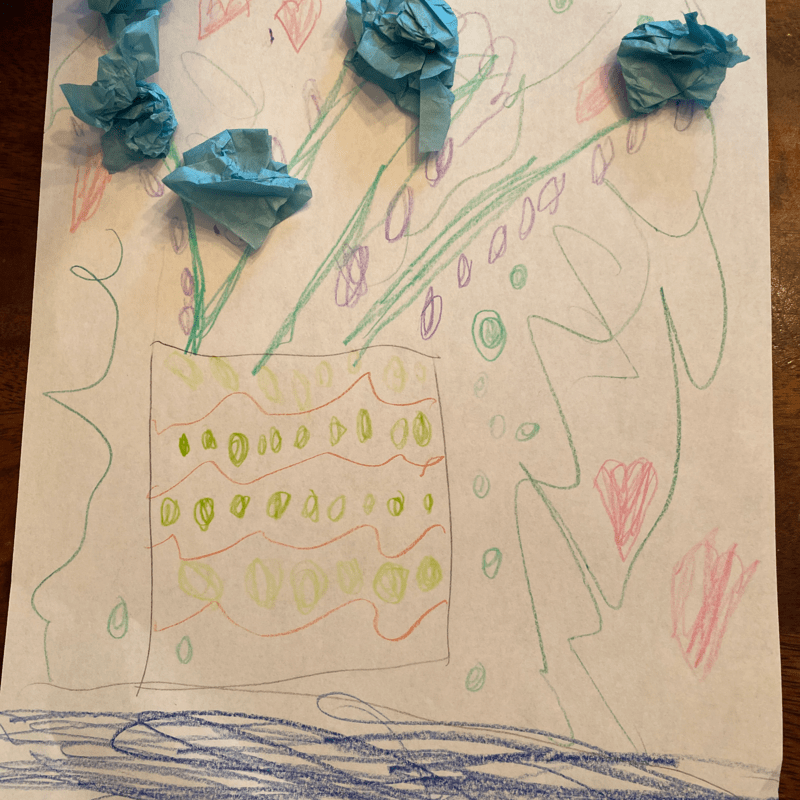
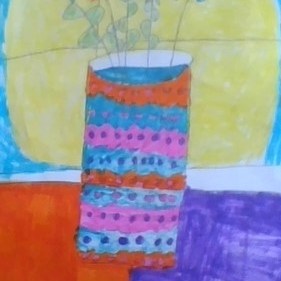
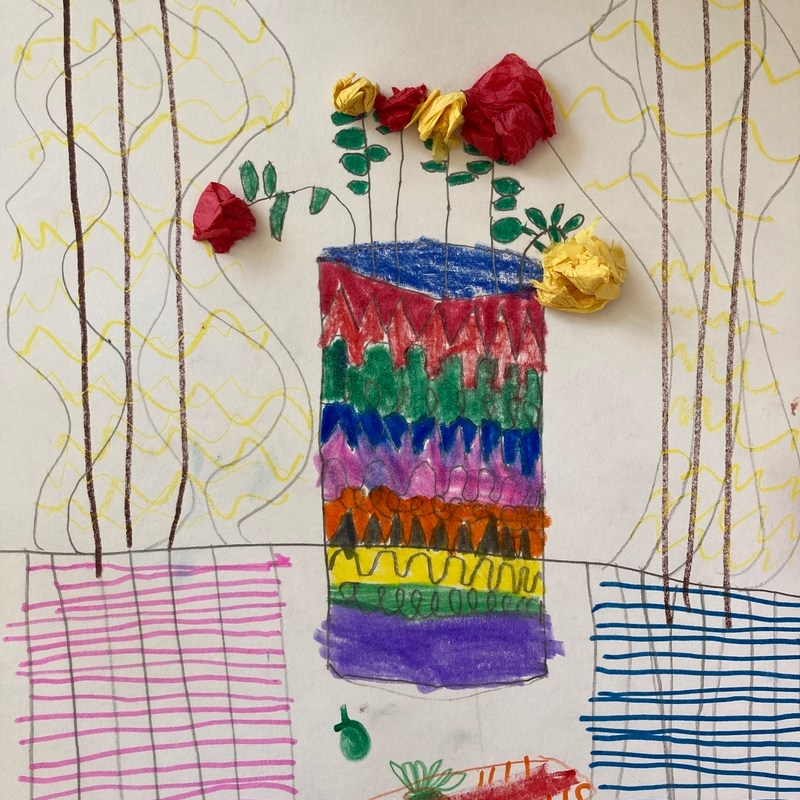
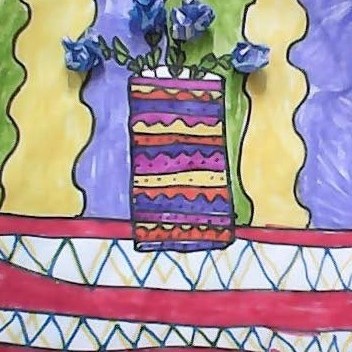
Lower elementary learned about still life art and created their own still life vase with paper crumpled flowers. Again, another lesson I wish I could do in person so we could paint and use tissue paper, but I love how they came out anyways.
Day 1
Warm-up – thumbs up or thumbs down – have you heard of still life art before?
Introduction to still life art
Still life freeze game – I showed students pictures of still life art/photography and some photos of animals or things that move, and students stayed frozen like a statue for still life images and moved around for non-still life images.
My high school art teacher had a ton of awesome lists of sketchbook ideas that we used for inspiration. I loved those lists so much that I wanted to come up with my own lists for my students. A lot of the ideas came from different drawing exercises I did during college and from looking back at old sketchbooks and different techniques/themes I used, and also from looking at other peoples’ sketchbooks on Pinterest or in books (The Sketchbook Project).
A MASSIVE LIST OF SKETCHBOOK IDEAS
DRAWING AND PAINTING FROM OBSERVATION
Fabric – drape a piece of fabric/clothing over a chair. Shine light onto it and draw the folds and wrinkles. Or draw a pillow
Crumpled paper, origami, tissue paper, tissues, wrapping paper, brown paper bag
Trash, the contents of a trash can, recycling bin, the trash bin by the curb waiting to be picked up
Powerlines, electrical towers, electrical outlets, fire hydrants
Things you wear – your favorite shirt, clothes, shoes
Draw objects that mean something to you (stuffed animals, family heirlooms, cultural objects, etc.)
Food – Illustrate your favorite family recipe, draw your breakfast, lunch, dinner
Still life – set up a bowl of fruit, a vase of flowers, houseplants, etc.
Anatomical Illustrations – look at Da Vinci’s sketchbooks, anatomy textbooks, and models of the human structure and draw
Natural forms – Make detailed observations/ botanical illustrations of flowers, plants, trees, tree bark, pinecones, leaves, acorns, shells, mushrooms, lichen, moss, etc.
Pets – draw your pet (cat, dog, lizard, pet rock, etc.) from observation
Reflections in water, shiny objects, metal
Draw a small object really large, or a large object really small
Zoom in – draw a fruit, plant, food, technology object (motherboard, wires) up close. Use a magnifying glass to observe the object even closer and to help you see all the details
Zoom out – Draw an object that is really far away (at the end of a road, looking down from a tall building, etc.)
Look up – draw the ceiling, the open sky with the clouds, looking up from under a tree
Draw the sky at different times of the day, label the time
Monochromatic Drawing – collect objects that are the same color and paint/draw them in using colored pencils, pastels, chalk, watercolor, tempera, acrylic, etc.
PEOPLE/FIGURES
Draw yourself from the first mirror you can find
Look down and draw your entire body, without looking in a mirror (it will be a headless self-portrait)
Draw your face in different expressions – smiling, frowny, wrinkling your brow, with your tongue out, etc.
Draw yourself upon first waking up
Draw yourself in a mirror, include all the background space and objects (put the mirror somewhere interesting)
Draw your friends, family members, siblings, teachers
Draw your classmates during another class, people at their desks
Draw your hands holding objects – pencils, keys, food, etc.
Draw your feet with socks, shoes, or without socks
Do gesture drawings of athletes at a football, soccer, ice hockey, or baseball game
Draw the inside of your mouth (try drawing it from observation without a reference image, it’s more challenging!)
Facial features – Practice drawing your eyes, nose, mouth, ears, hair, etc. using different materials/ techniques
FROM IMAGINATION AND MEMORY
Illustrate a dream you had. Keep a dream log in your sketchbook for ideas
Read a fairy tale, myth, or book. Illustrate what you think the characters or scenes would look like
What does the inside of your mind look like?
Surrealism – Combine a landscape with an interior space or change the scale of an object and put it somewhere unexpected
Inanimate objects as living objects
Think about a place you haven’t been to in a while. Try to remember what was in the space (furniture? People?) – try to draw the space from only your memory, using no reference photos
Think about a place that no longer exists (an old swing-set in your backyard, woods that were cut down, etc.), try to draw this place from your memory, make up details you can’t remember
Nostalgia – draw moments that you think back on fondly, draw from old childhood photographs, old home videos, etc.
Divide the page up into several boxes (they can be carefully measured out and drawn with a ruler, or messier and more sporadic). In each box, draw a moment from your day (sort of a visual journal/ record of your day). Write down your thoughts if you want.
EXPERIMENT!!
New material – using a material you’re not as familiar with, try out different strokes, techniques, patterns, drawings, swatches
Mixing colors – make a color scale, take notes on which colors were mixed together, group colors that look visually appealing together
Plastic bag monoprint – paint on a plastic bag with watercolor, tempera, or acrylic paint. Scratch lines into the paint with the back of the brush, and print it onto the page
Fruit/ vegetable monoprint – cut a fruit or veggie in half, ink it, and print it onto your page. Experiment with other objects that you think would make a nice print
Collagraph – Cut out a piece of cardboard the same size as your sketchbook page (or smaller). Glue felt, buttons, pipecleaners, foam pieces, etc. onto the cardboard. You can also use hot glue or Elmer’s glue to make designs. Once everything is dry, roll the cardboard plate with ink and print the design into your sketchbook. Draw on top if you want.
Leave a page of your sketchbook outside, keeping it in place with some rocks, and see what happens to it (how will rain, dirt, weather, etc. affect it?). Then, paste it back into your sketchbook and draw on top of it
Mood Drawing – make a page related to an emotion/feeling (happiness, sadness, loneliness, joy, anger, etc.). Consider how colors and subject matter affect mood.
Nonobjective art – completely fill the page with shapes, dots, colors, patterns
Doodles – make a page of doodles, sketches, and ideas that you jot down during free time
Automatic drawing – make a drawing in your pocket as you’re walking somewhere, close your eyes and draw, draw while listening to music paying attention only to the music
DIFFERENT WAYS OF DRAWING
Draw something, then flip your sketchbook upside down. Draw something else on top of your first drawing, use a different color/material if you want, or let the drawings blend together.
3D Drawing – Using markers or colored pencils, find 2 colors (red and green or red and blue work well) and draw something, then draw the same thing on top shifted slightly to the right or left. If you have 3D glasses, see what the drawing looks like while wearing them
Composite Drawing – Draw a three-dimensional object from one view in one color, then turn the object to a different view and draw it using a different color. Repeat as many times as you want.
Layering – Take several pieces of parchment paper and draw something on each paper. Layer the drawings on top of each other, experimenting with order, and paste them into your sketchbook
Draw something using only your nondominant hand.
Attach your drawing material (pencil, charcoal, etc.) to a long stick. Hold the stick from the farthest end, and try drawing
String art – draw an object/ scene using string/yarn. Apply glue to the page and follow the lines with the string/yarn.
Draw something 4 or more times, each time using a different material/medium/color/technique
Mark-making – Try making marks by dipping forks, sticks, toothbrushes, string, etc. into ink/paint and drawing with them
DISTORTION AND ABSTRACTION
Take a photo of something using a fish eyes lens and draw it
Observe an object, draw it realistically and then in different stages of abstraction
Find an object with an interesting shadow. Draw/paint the shadow only, making sure to pay attention to subtle shifts in color & value
Place an object in a clear container filled with water. Move the water around so it distorts the object. Draw it
DESIGNS
Typography – Create your own letters from A-Z. Name your typography alphabet based on the mood/ feel of the letters
Sketch out a pattern. Transfer the pattern to wrapping paper, fabric, wood, etc.
Using an Xacto knife, cut out a design into the whole page
Zentangle
Create a stamp or stencil and apply on the page
Make a collage based on a theme – fashion, nature, technology, etc.
Find an image from a magazine with interesting colors. Make color swatches below the image of the main colors. On the next page, make your own drawing/painting using the colors you found.
Cut out pieces of similar colors from a magazine to create a pattern/mandala/design
Make a 3D/ anamorphic drawing
An idea for a new product, design, clothing/fashion, fashion illustration
GO SOMEWHERE! DRAWING AT PLACES
Go to a museum/ gallery and sketch the sculptures, people, galleries, artworks
Go to the park, do gesture drawings of people, draw the ducks, the lake, the trees
Go to the zoo – draw the animals, the people, the habitats
Go to a local figure drawing session and draw from models
Go to the mall – sit down somewhere quiet and sketch the people passing by or the interior structure/architecture of the mall
While you’re at Starbucks or grabbing coffee/lunch, sketch your food/drink, the people in the café
Go to a city, draw the buildings, people, traffic, cars, construction sites
When you’re on a family vacation, paint/ draw where you go (beach, mountains, city, etc.), draw while on a hike
Traveling – while you’re in the car, plane, bus, etc. – draw what you see outside the window or the inside of the vehicle
RESEARCH
Research an artist. Paste in pictures of the artist’s work and take notes. Study the artist’s work and make some sketches practicing similar techniques to the artist or sketches inspired by their work
Art History – make a timeline of art history, include fun facts, images, key artists
Art Movement/Period – find an art movement/period that interests you. Research it further, take notes and make sketches about the artists and information about the movement/period
BACKGROUNDS/ STARTING A DRAWING – Draw or paint on top of these initial layers
Use leftover paint from another project to apply background color to a page.
Drip watercolor or ink onto the page. Once dry, try to draw or paint something using the shapes left on the page.
Paste in pieces of tissue paper, overlapping to blend colors if you want
Scratchboard – apply colors using oil pastels or crayons, then add a thick layer of black oil pastel on top. Scratch into the page to create a drawing/ design
Paste in a photo you have or an image from a magazine and draw the rest of the scene/ complete the drawing
Apply a wash of watercolor to the negative space of a drawing
Take notes of observations, feelings, ideas, thoughts, etc. and incorporate them into the drawing or somewhere on the page
Paint the page black. Draw over it with white pencils/charcoal, white oil pastel, or use it as a base for a painting
Tone the page – apply a layer of charcoal, chalk pastel, or pencil to the page and soften with a paper towel
Reductive Drawing – apply a layer of charcoal (it can be a light layer or a thick dark layer). Erase into the page to create the drawing. Add in more charcoal as needed or to draw in details.
Write over the entire page. Draw or paint on top
Paste/ collage in old class notes, pages from planners, or pages from other sketchbooks and draw/paint on top
Paste in old photographs or photocopied photos you have and draw/paint on top of them
Paste in an old map and draw/ paint on top
Paste in dried leaves, flowers, plants and draw around them/ on top
Paste in old ticket stubs, brochures, letters, stamps, etc. and draw around/ on top them
Stitch into the page, incorporate these marks into your drawing
Put your sketchbook under a plant or something else with a distinct shadow, and trace/ color the shadow onto your page. Draw/ paint on top
Weave cardboard, magazine pages, or scrap pages together and draw/ paint on top
Paste in fabric, magazine pieces, thread, yarn, parchment paper, etc. and draw on top
Add flaps or extra pieces of paper that fold/ pop out of the sketchbook
If you know how to knit or crochet, make a small swatch and paste it into your sketchbook. Paint on top of it
Draw something on a separate piece of paper. Tear it into strips or pieces and paste into your sketchbook. Paint on top.
Tape off sections of the page. Paint over the tape with watercolor then peel off
Wrap aluminum foil over a thin piece of cardboard. Use a dull pencil to scratch designs into the foil, paste into your sketchbook
Paint watercolor wash onto a page and apply crumpled plastic wrap to the page, letting it dry then peeling it off to create texture
Watercolor wash with kosher salt sprinkled on top
Splatter and drip paint onto the page
Use a sponge to create texture
Apply a layer of tempera or acrylic as a base, then scratch designs into it with the back of the brush
Sprinkle sand, dirt, charcoal powder into glue or paint and apply to the page
These are some of the different ways students can reflect on their own art and respond to their peers’ art.
Post-it Note Critique (Padlet is a great virtual option)
Have students pair up. Give each student 2 post-it notes.
Allow students time to look at the other person’s artwork. Then, have students write the components they believe are successful on one post-it note, and something that could be improved on the other post-it note.
Gallery Walk
Tell students to lay their artwork out on their tables and push in their chairs.
Next, allow students to walk around the classroom looking at everyone else’s work.
Once everyone has returned to their seats, ask the students which works stood out to them and why. Ask questions related to the assignment, such as which work used movement well?
Traditional Studio Critique
Have students put their artwork up on the wall. Talk about one artwork at a time, encouraging students to comment on the artwork’s formal qualities (elements and principles) and also the content of the artwork (interpretations, meaning, analysis).
For the first critique, hand out a worksheet on Feldman’s model of art criticism to help prompt student response.
Traditional Critique with a Twist
Have students put their artwork on the wall just like a traditional critique. Then, have each student stand in front of an artwork that is not their own.
The student will then have to talk about the artwork and justify the choices made as if they made the artwork. Encourage students to have fun, be creative, and make up fun stories.
Written Reflection
After students are finished with the assignment, have students reflect on their artwork and the process. Have 2-3 reflecting questions on a worksheet.
6. Critique Cards
Write different questions and ways of responding to art on index cards. During the critique, students draw a card and answer the question.
A few weeks ago, I taught a multi-day lesson on GIFs, stop motion, and appropriation to my middle school students.
We began by going over the history of the GIF and its invention in 1987 (everyone was quite shocked how long ago GIFs were invented). Then, we discussed appropriation in art and I had students share their thoughts on whether or not they believed appropriation in art is okay. We looked at Richard Prince’s Cowboy (a cropped, re-photographed version of a cigarette ad) and questioned at what level is art appropriation vs. inspiration vs. plagiarism. I also showed students some of Richard Prince’s artwork from his Instagram series, in which he printed out and scaled up random photos from Instagram, presented them in a show, and then sold them. This also prompted a great conversation on the value of art and whether or not it should be valued as it is.
Then we shifted the conversation from appropriation by famous artists (like Richard Prince), to appropriation in mainstream, pop-culture images produced by the general public (memes, GIFs, etc.). Are memes/GIFs on the internet okay to create if it’s not your own source material? We also discussed fair use images and videos vs. copyrighted ones.
After discussing appropriation, we briefly went over the stop motion process and how it’s used to create animation.
For this assignment, students had the choice of either appropriating images/videos to create a GIF, or to digitally or traditional draw out frame by frame a short, stop motion GIF. Most students used the following GIF makers (below) and either drew out each frame by hand and took photos to input into the GIF maker, or they drew out each frame digitally within Pixilart.
If I were to teach this lesson again, I would make sure to explain how to set up Pixilart and other GIF makers so the aspect ratios/pixels are larger so they don’t come out so pixelated.
Lesson Overview:
Objectives:
Respond to art made with appropriation/stop motion by participating in class discussion
Create a GIF using appropriated or original images/video.
Reflect on GIF by writing an artist statement
Day by Day Breakdown:
Day 1 – Intro to GIFs. Discuss appropriation. Discuss stop motion. Intro to assignment, brainstorm ideas.
Day 2 – Continue brainstorming ideas for GIFs. Demo how to use GIF makers. Look at examples of GIFs on the internet.
Day 3 – Draw out storyboard/plan for GIF. Begin assembling materials to create GIF.
Day 4/5 – Finish creating GIF. Write artist statement.
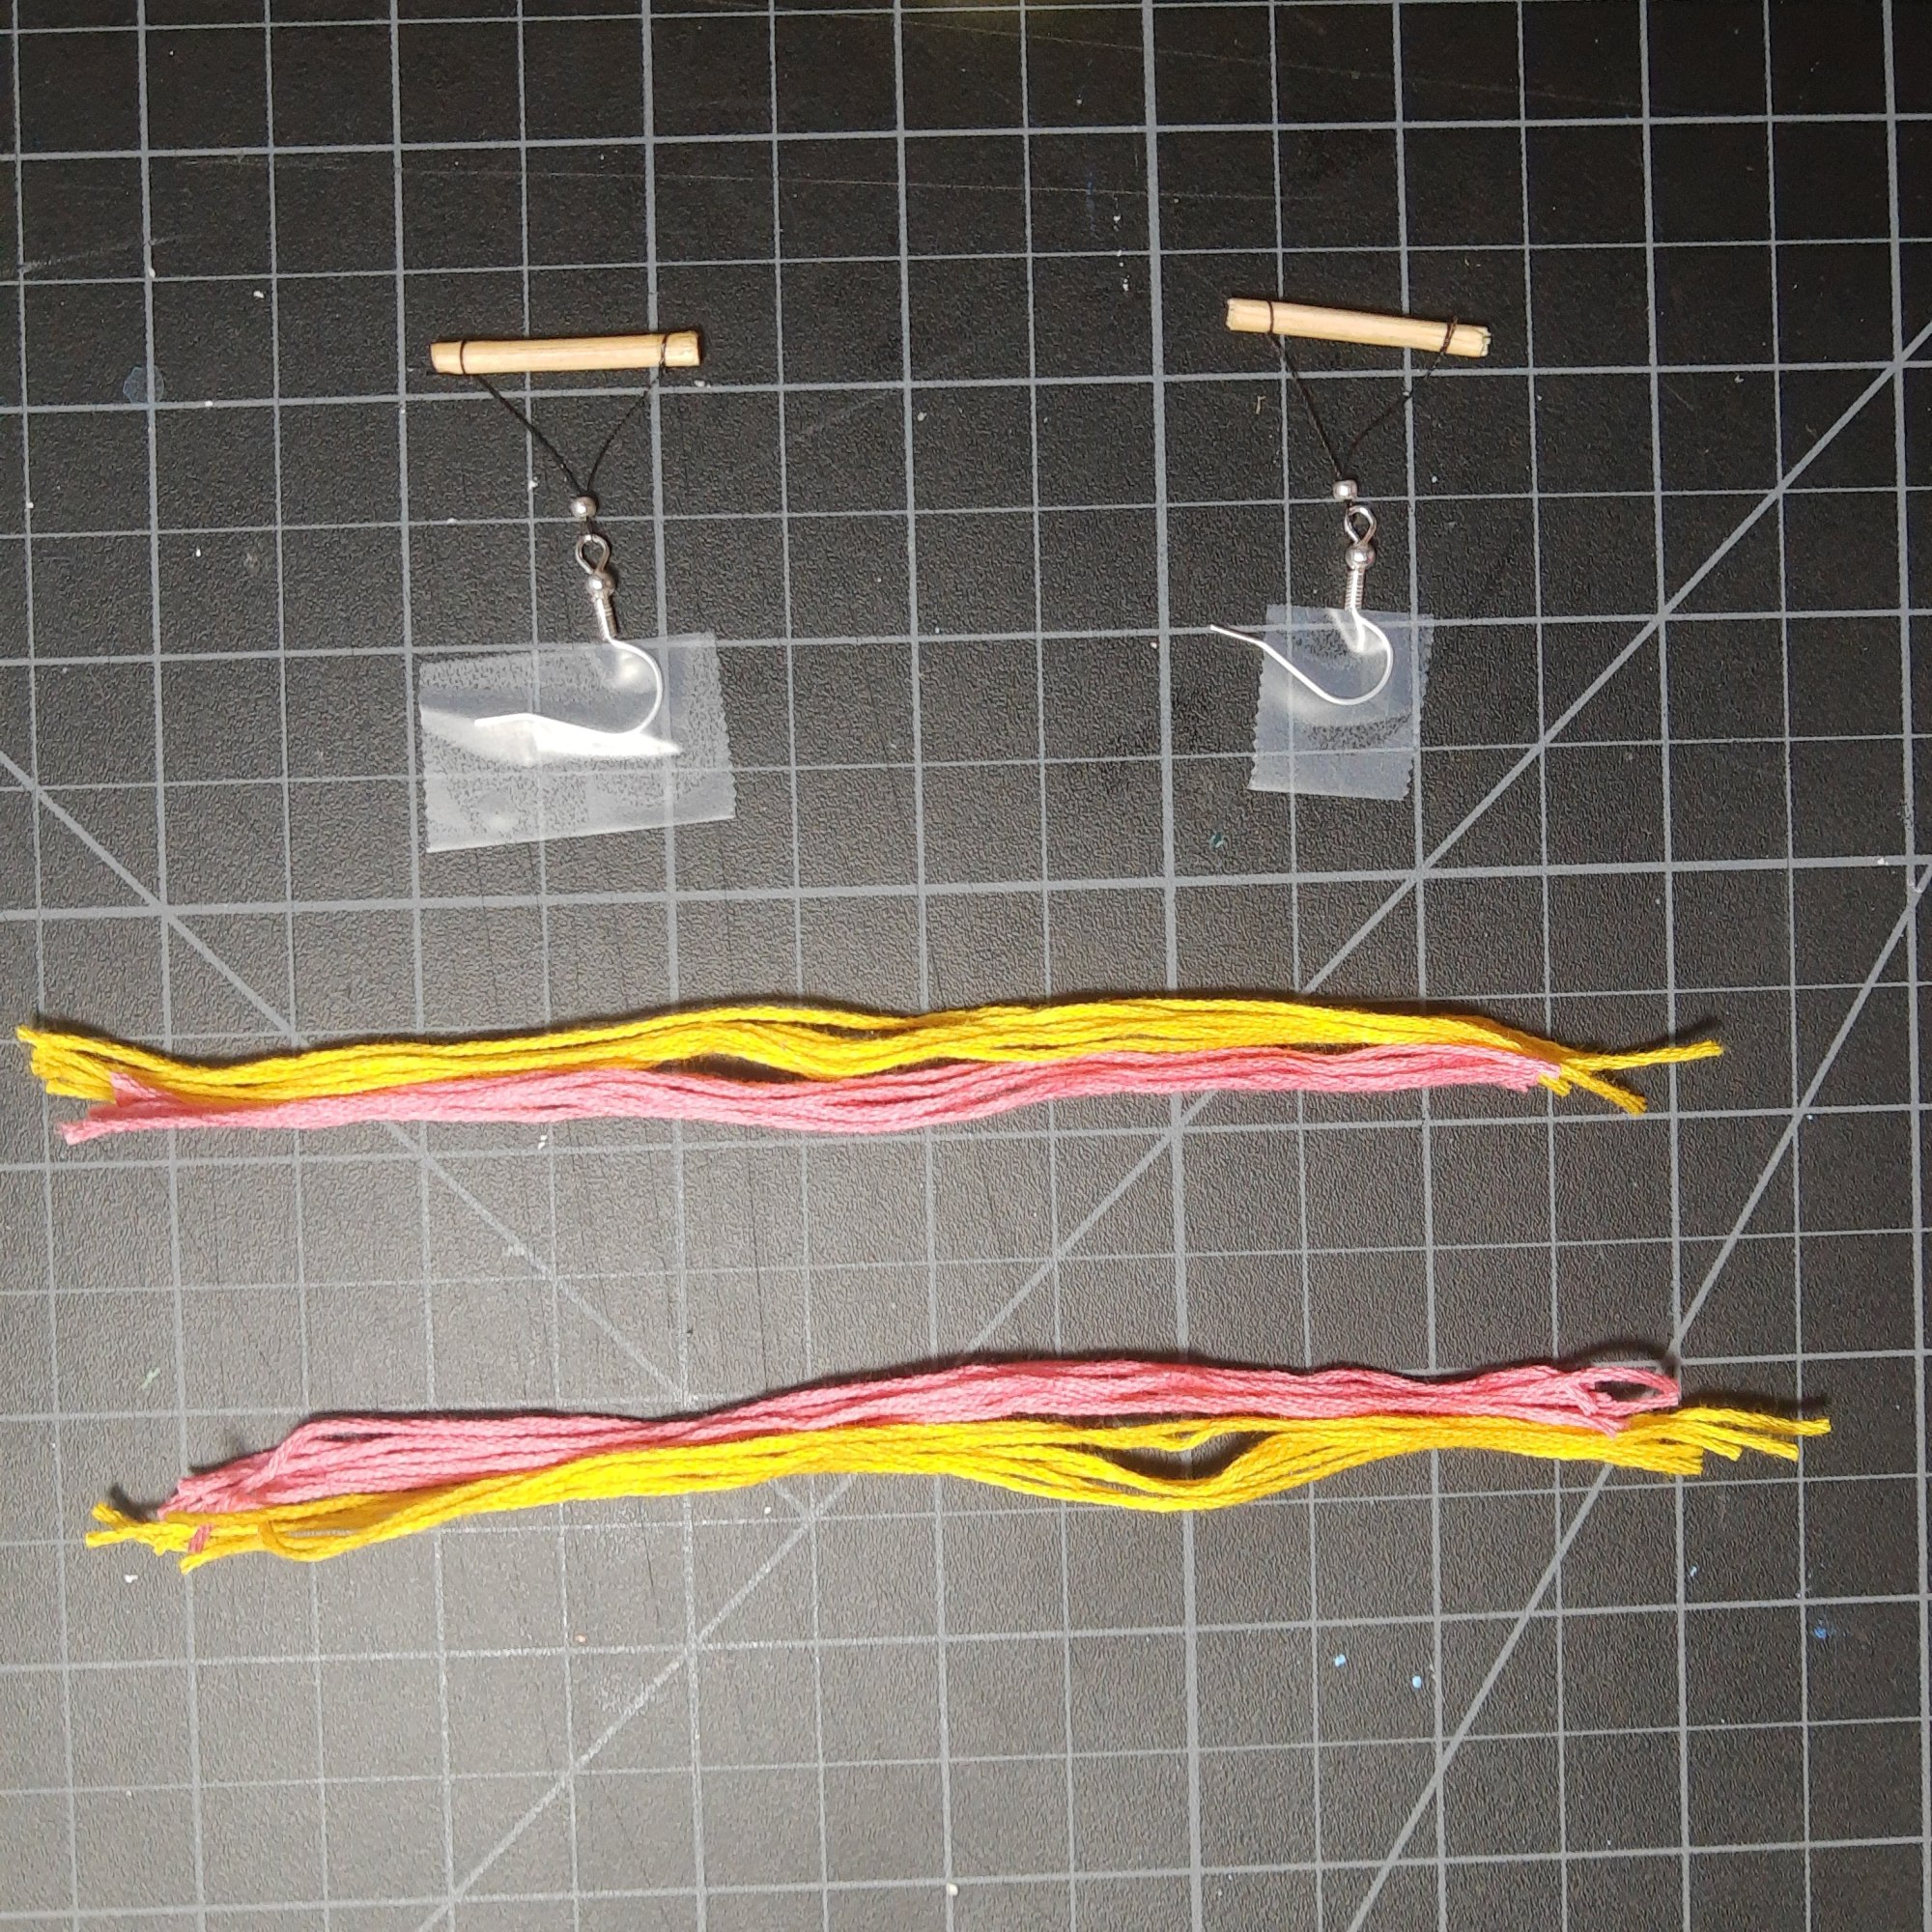
I made this pair of woven tapestry earrings using embroidery thread, yarn, pieces from a wooden skewer stick, thread, and fishhook earrings.
How I Made My Earrings:
First, I cut off 2 4 cm pieces from a wooden skewer stick. I tied thread onto each side of the stick. I slid a crimping bead onto the loop, and then attached the earring hooks to the thread loop. I crimped each bead in place below the hook.
Then, I taped down both my earring hooks to a board and cut out 12 pieces of embroidery thread measuring about 11cm in length.
I tied each thread onto the stick, knotting it once in the center, until all the threads were attached.
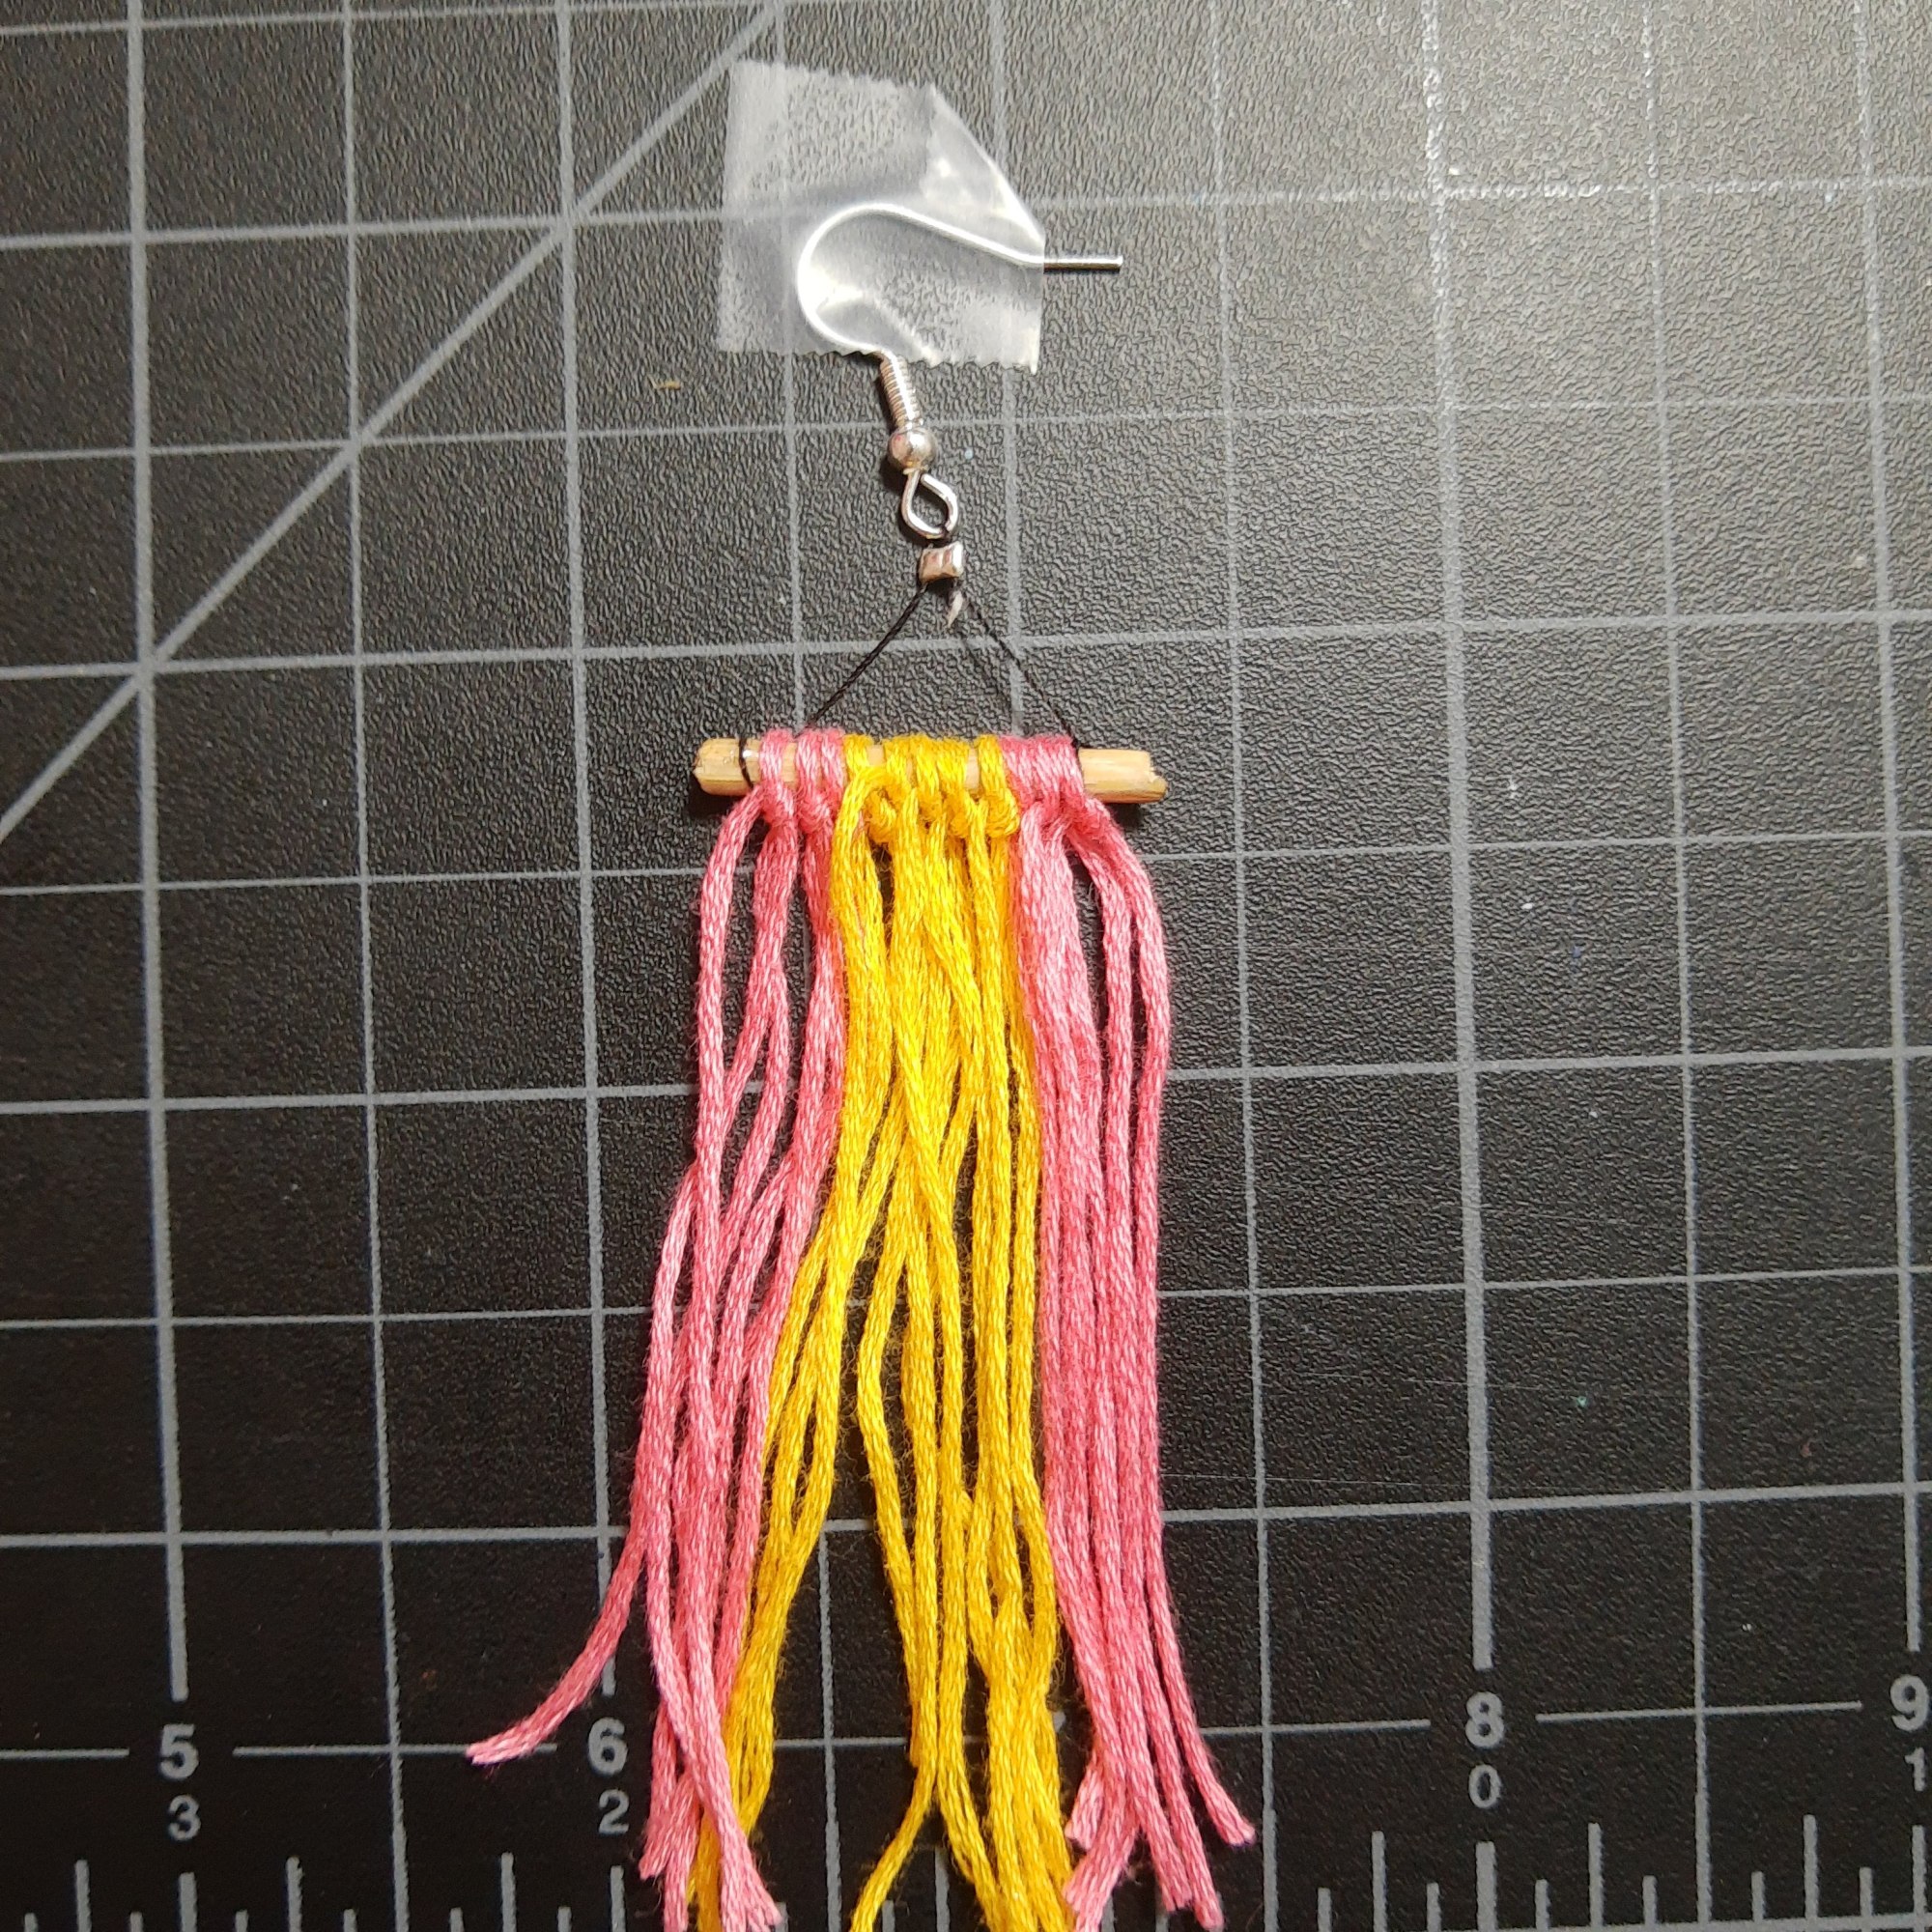
I smoothed out the threads so they laid flat and even on the board, and then…
…I taped the ends of the threads onto the board
Then I began weaving. I threaded a piece of embroidery thread onto an embroidery needle and went under, over, under, over, etc. until I made it to the end of the row.
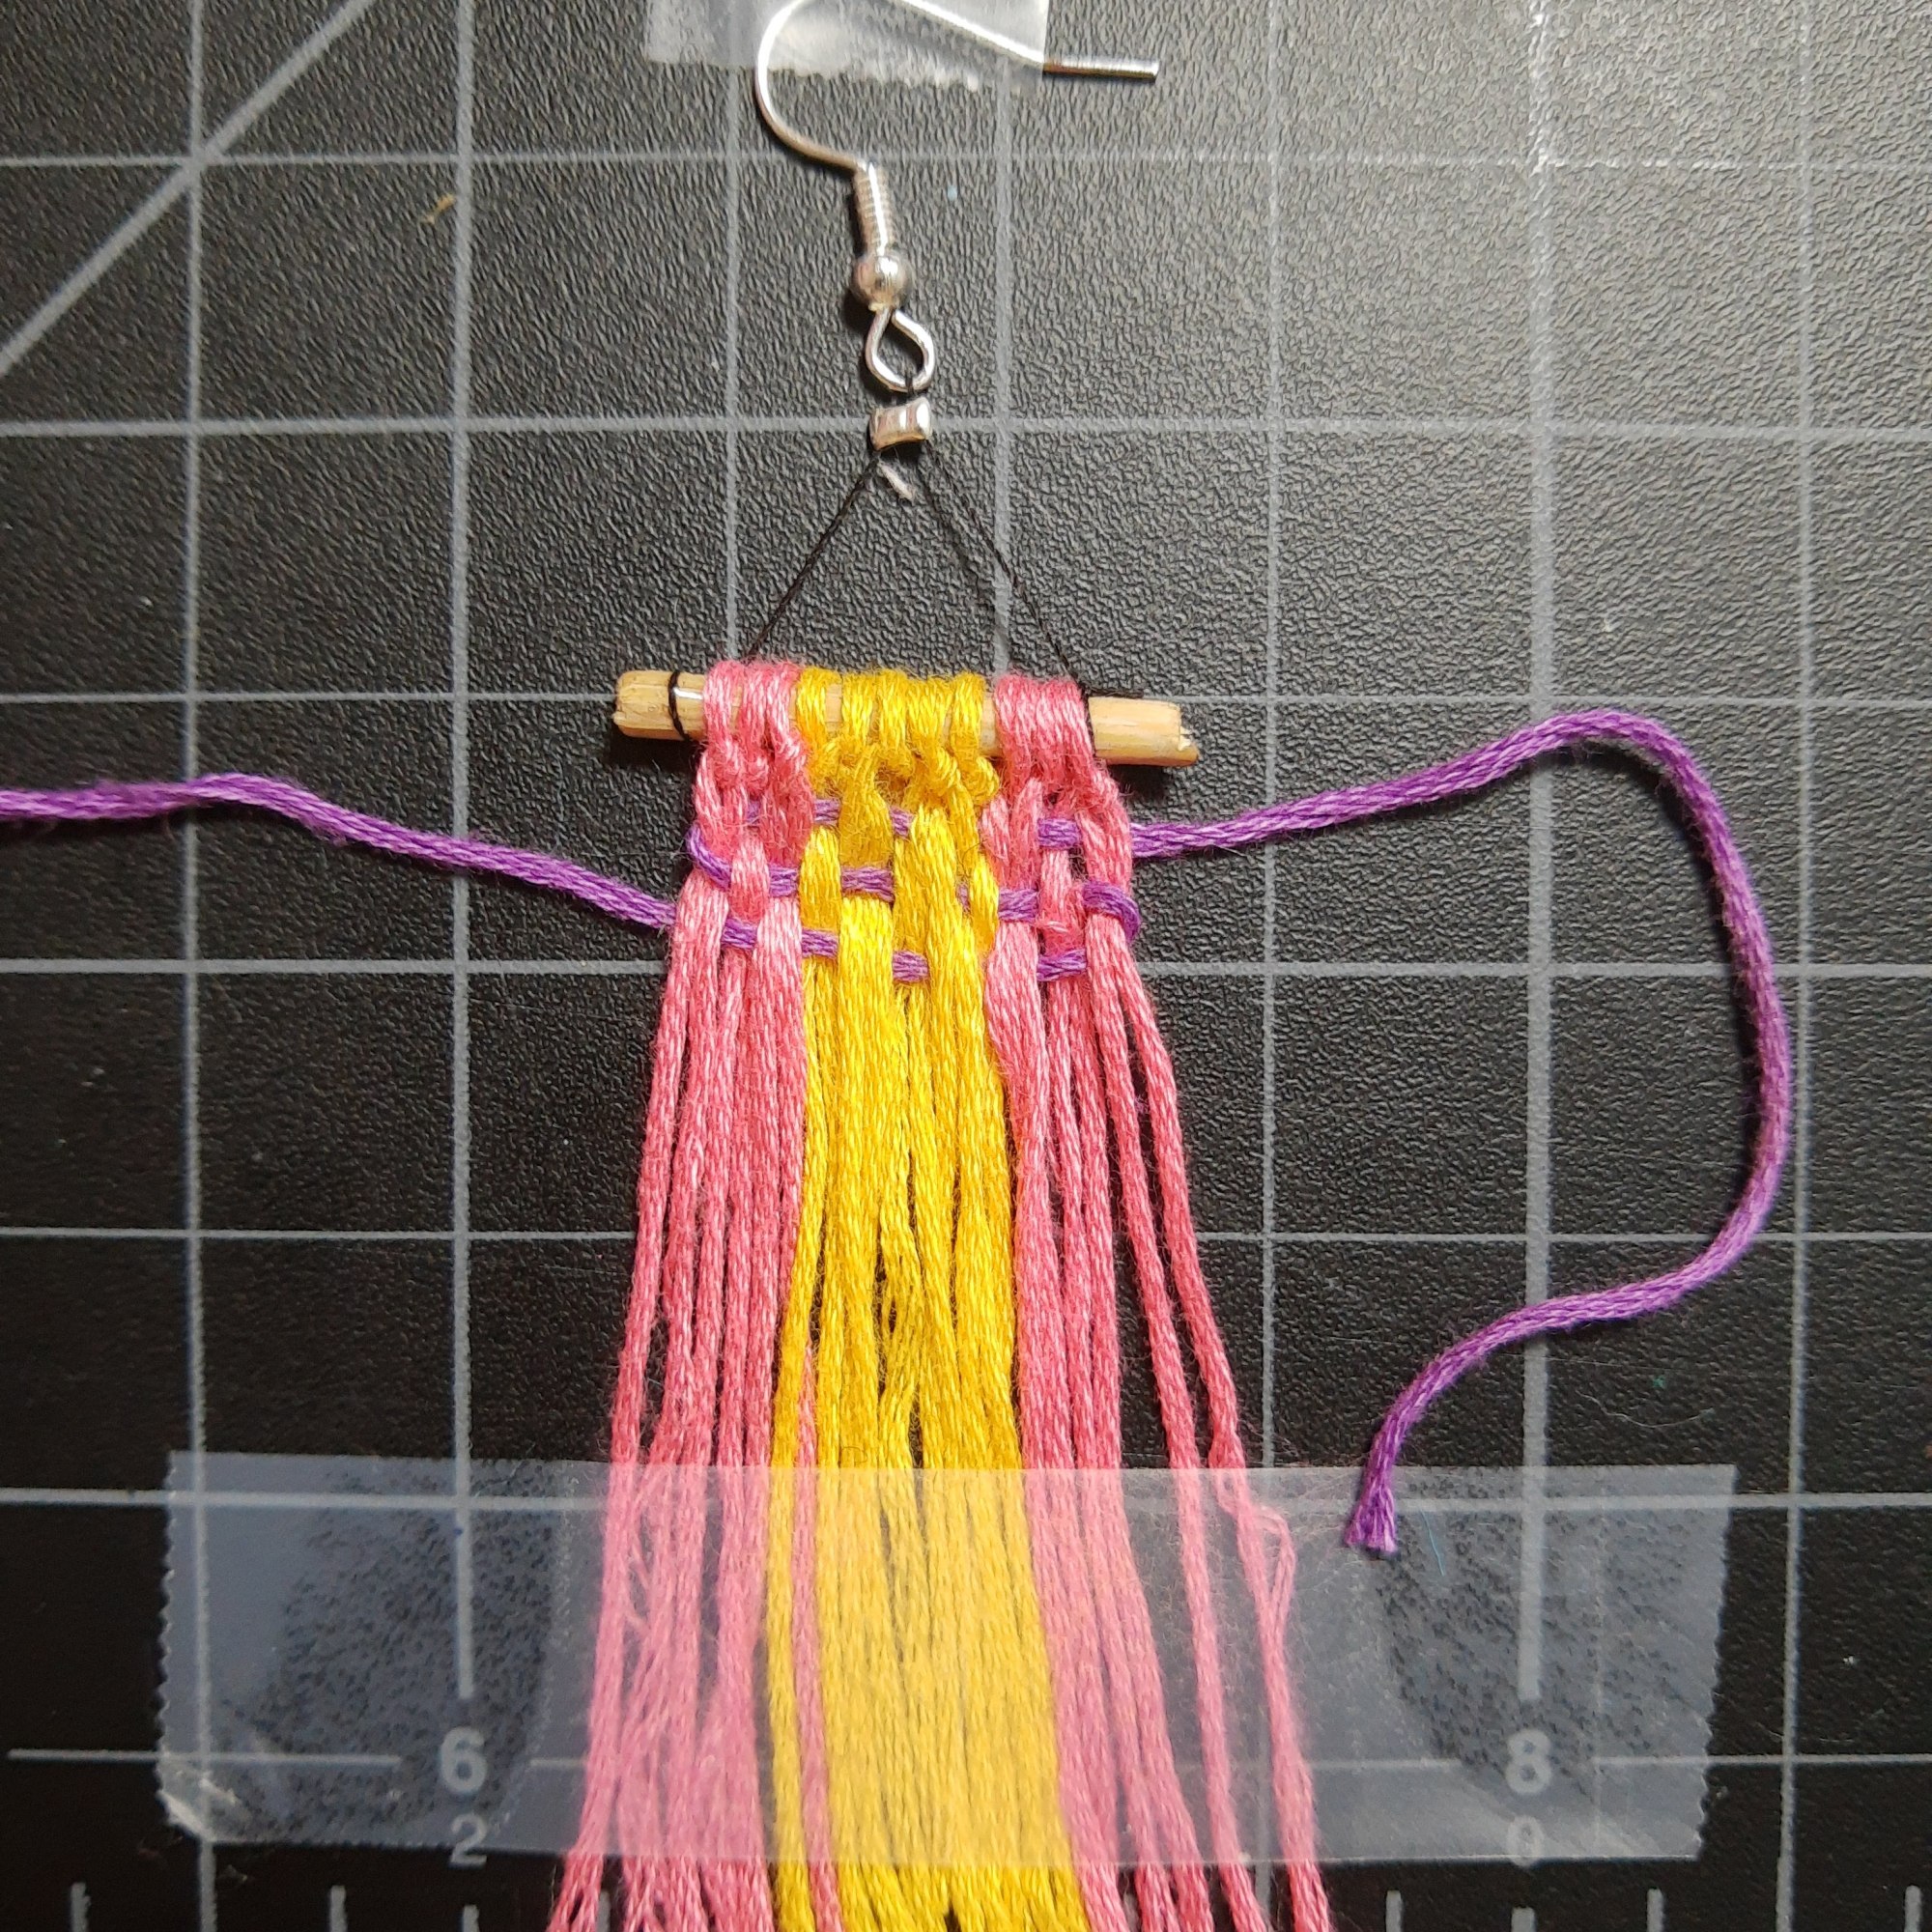
I wove a few more rows using the purple embroidery thread.
Then I switched threads and added a chunkier yarn to give the weaving more texture and dimension
When I finished weaving, I tied off the end of the yarn and trimmed the ends of the weaving so all the threads were an even length.
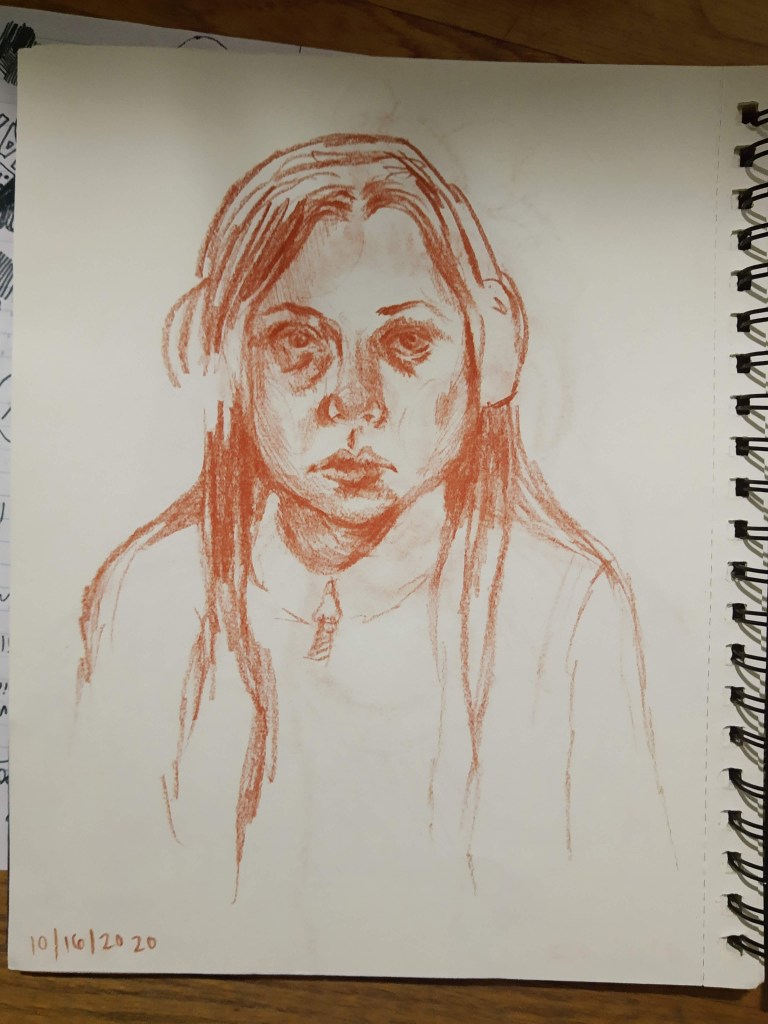
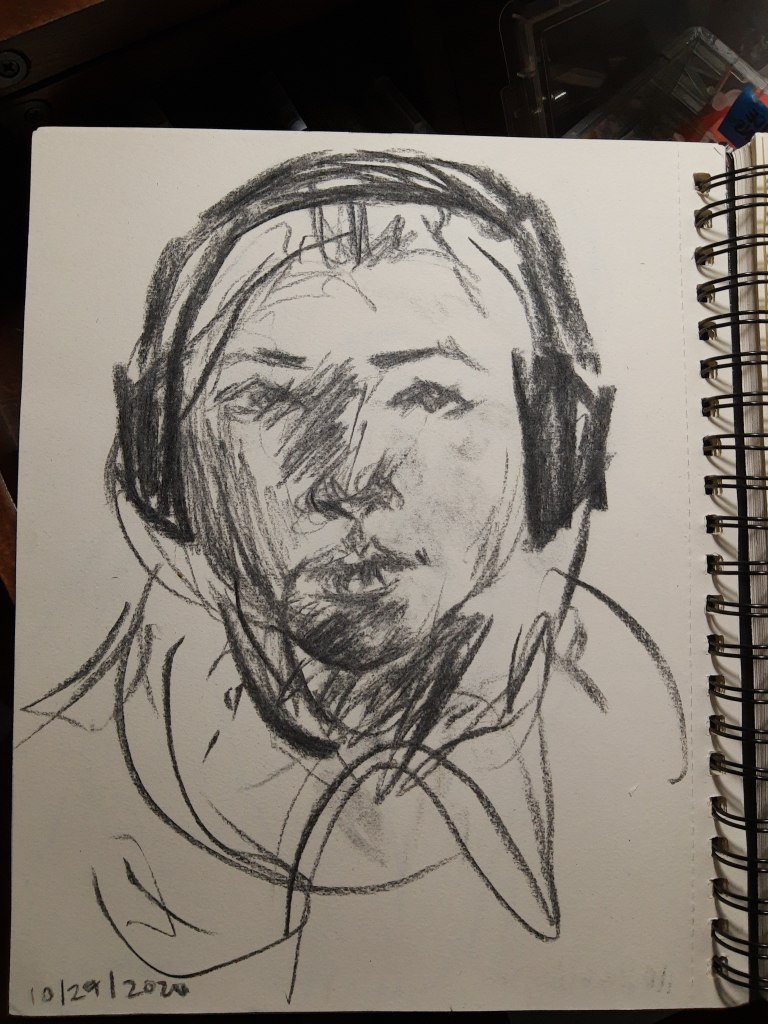
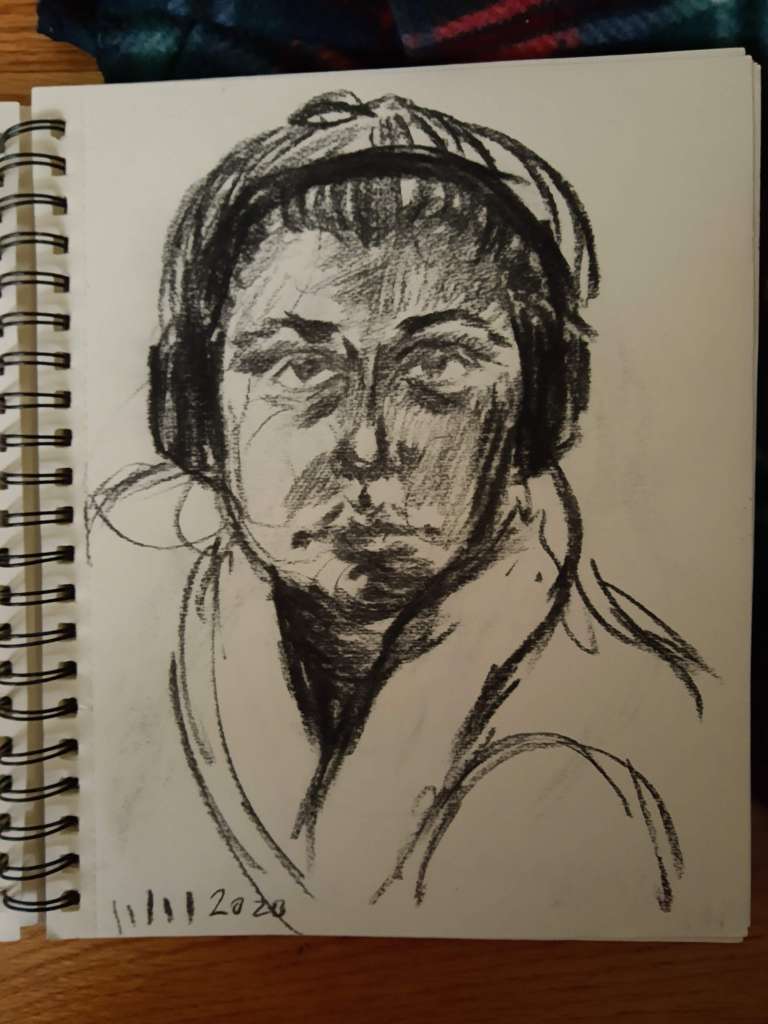
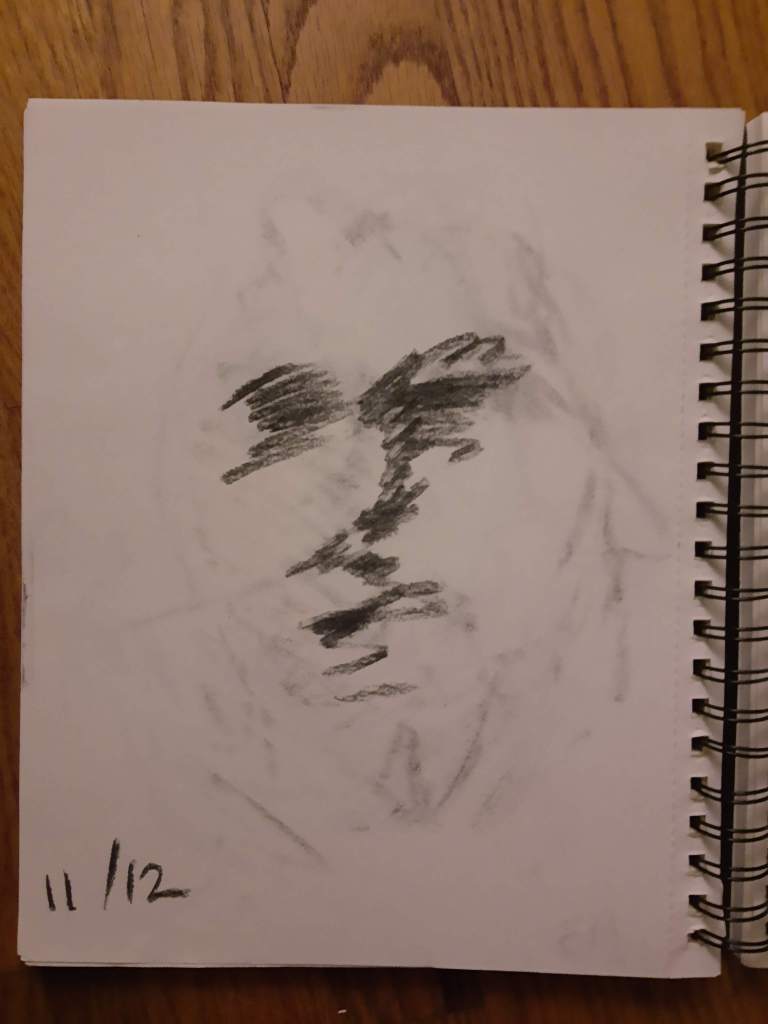
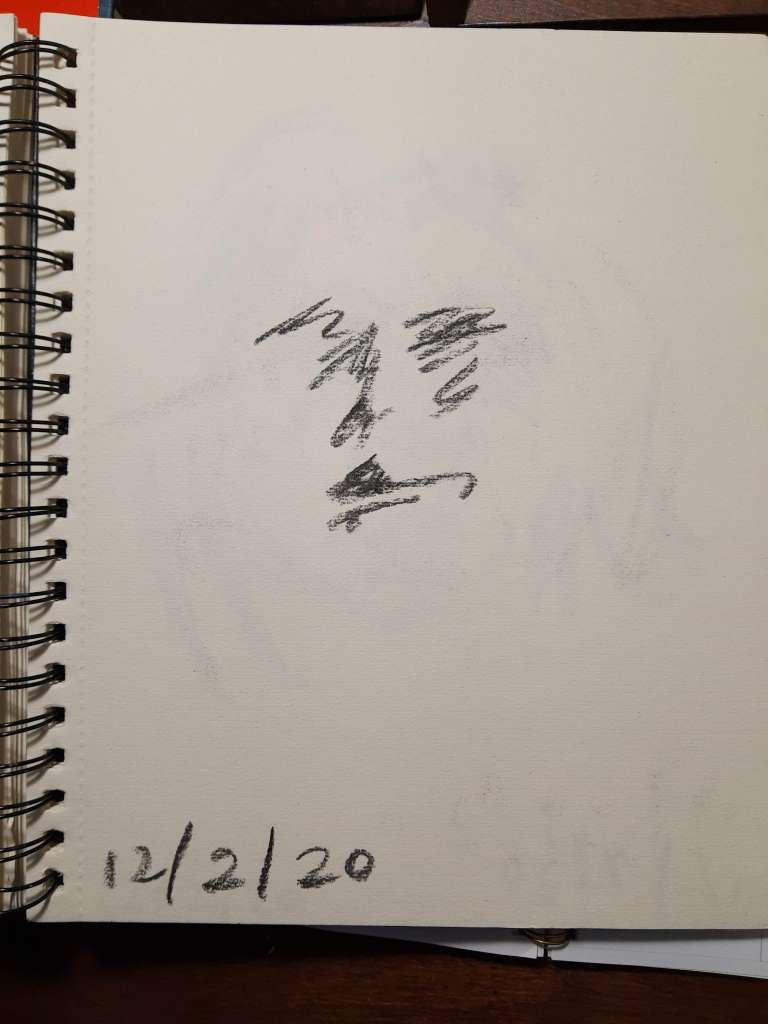
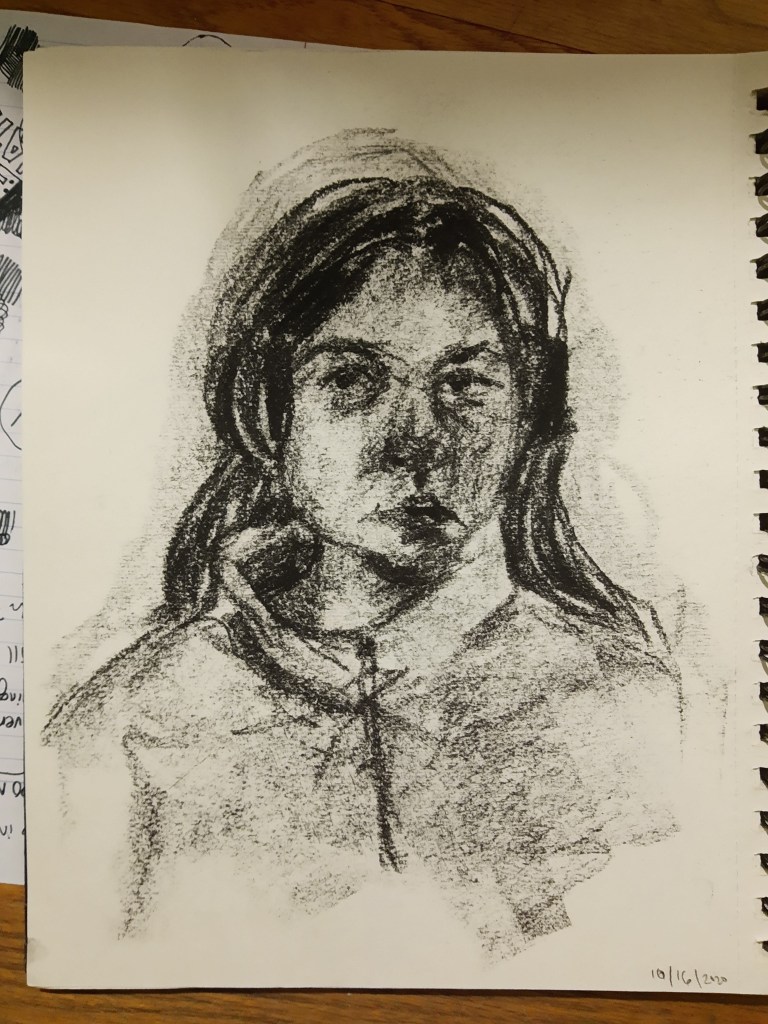
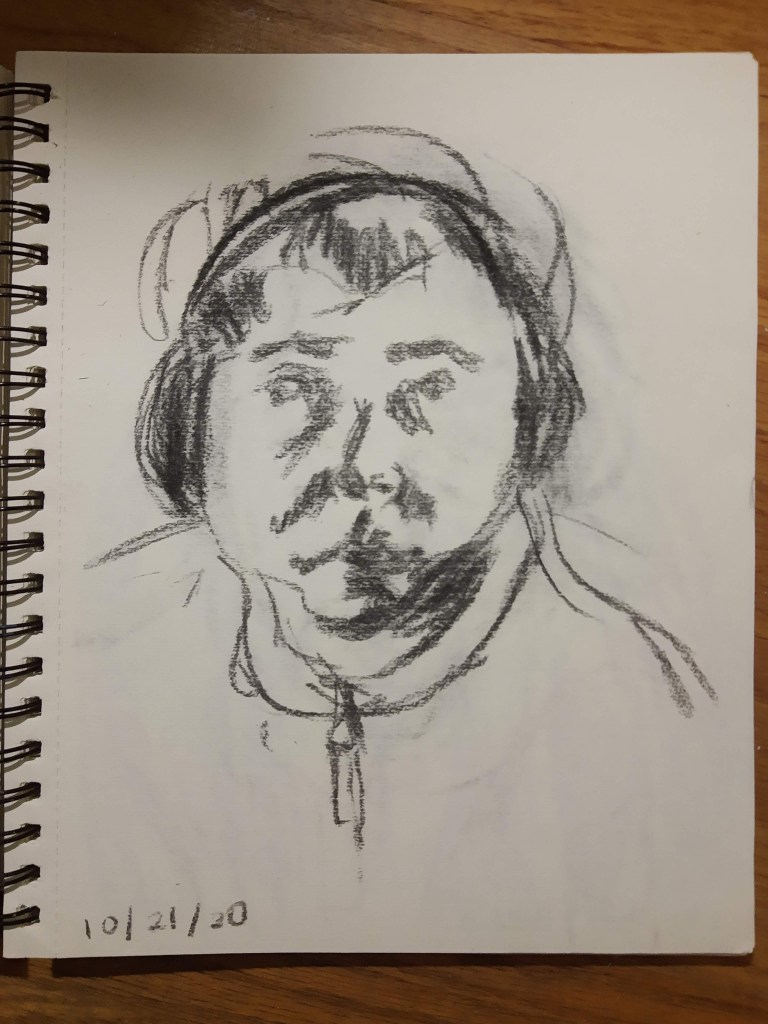
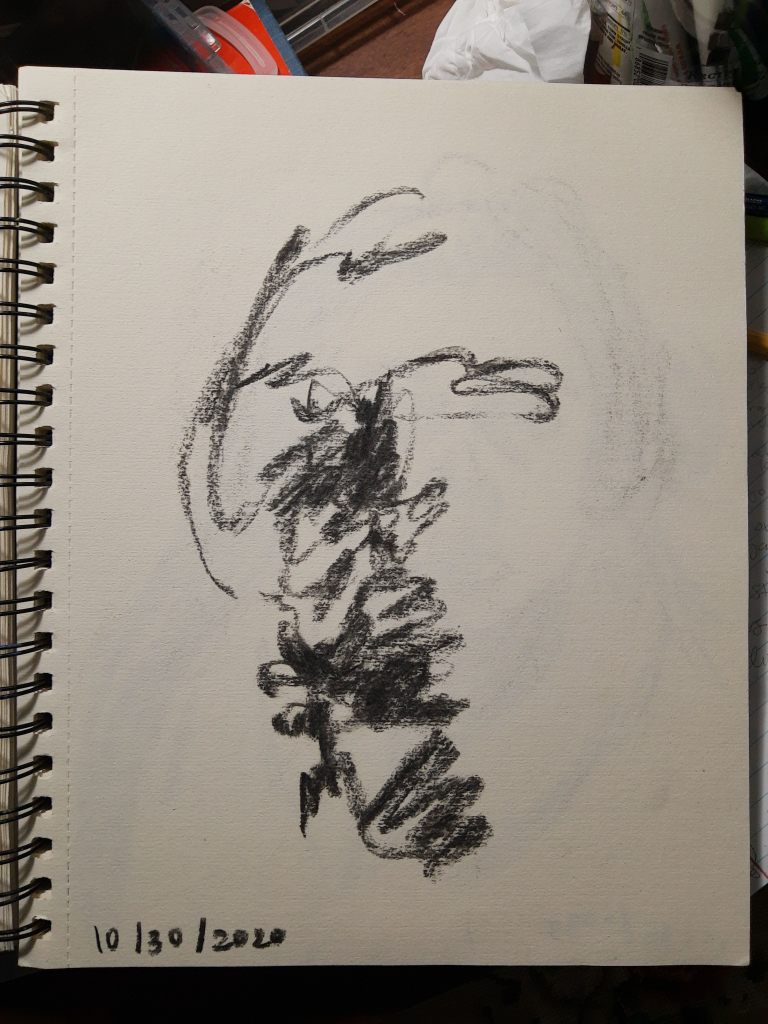
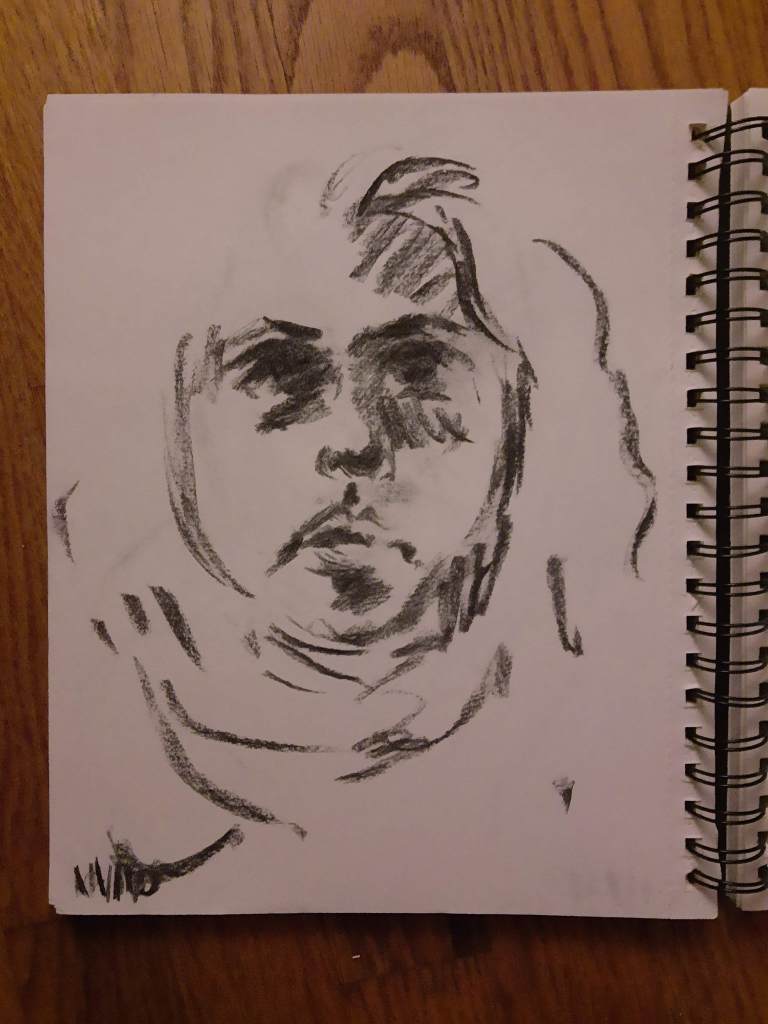
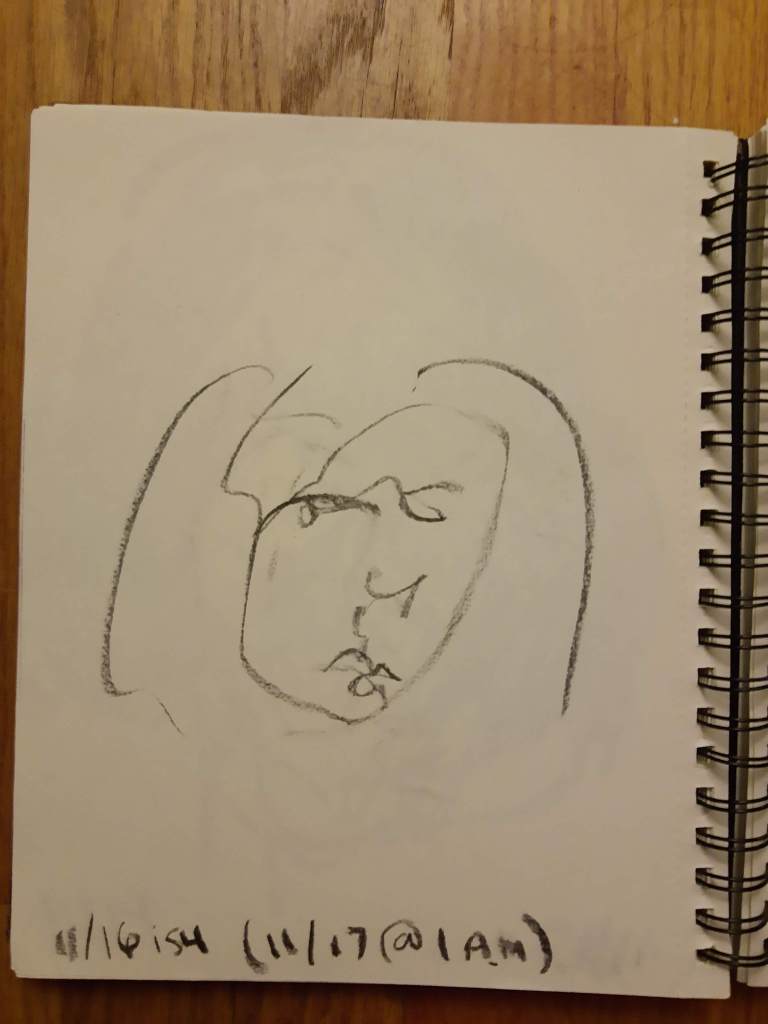
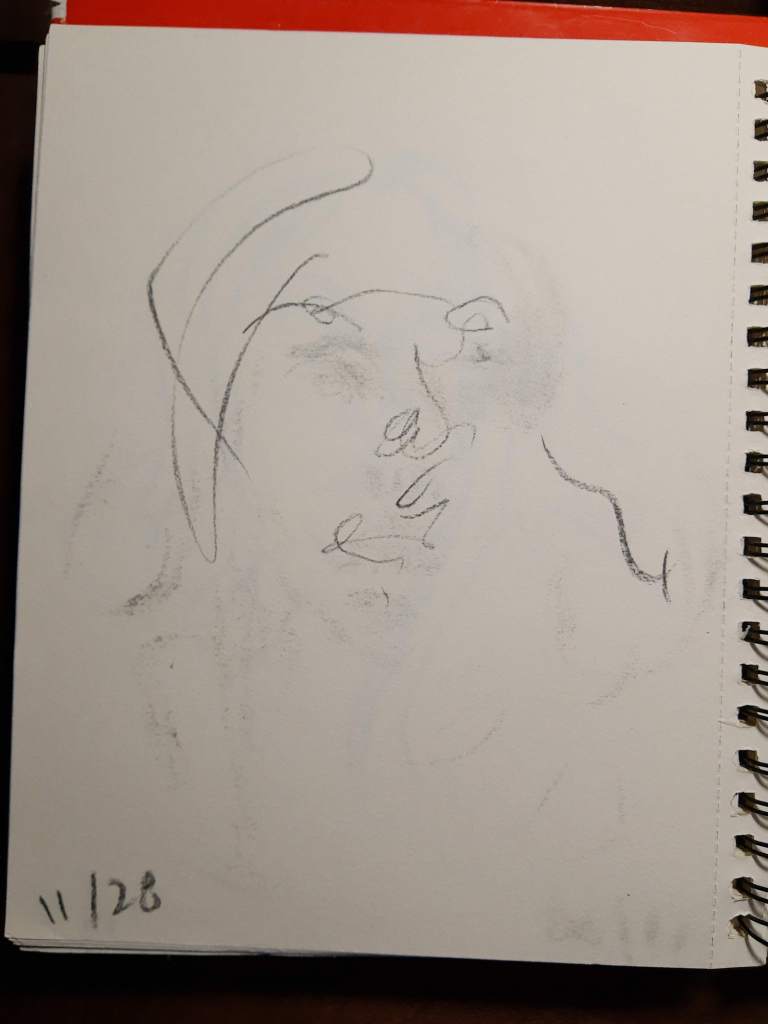
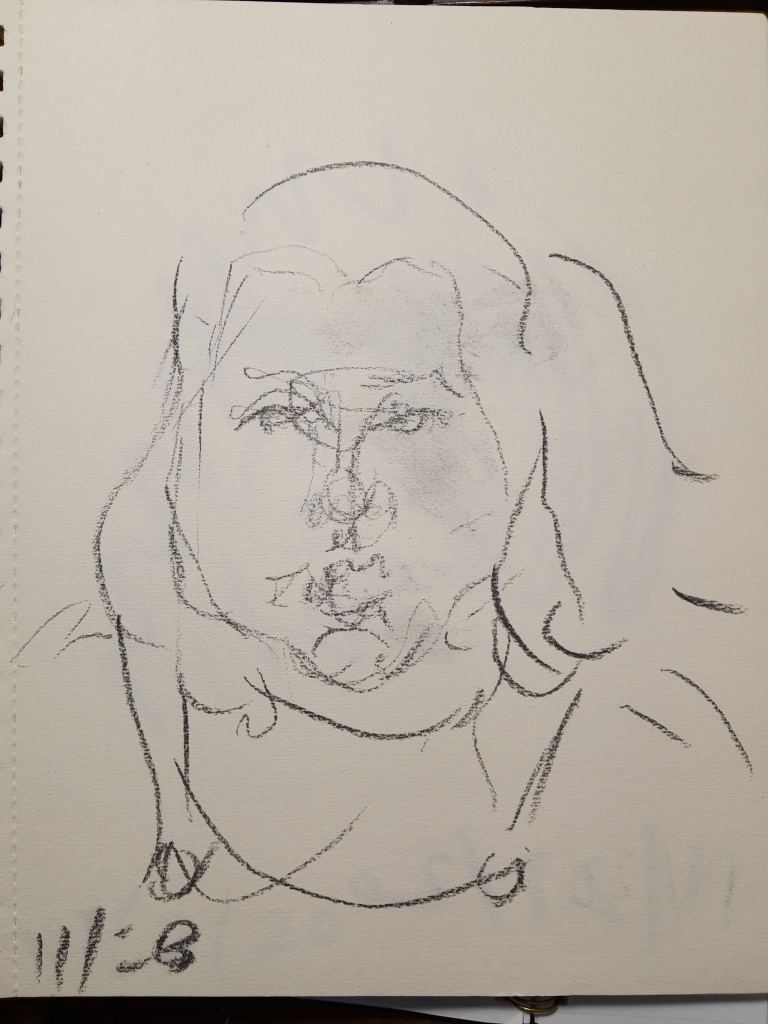
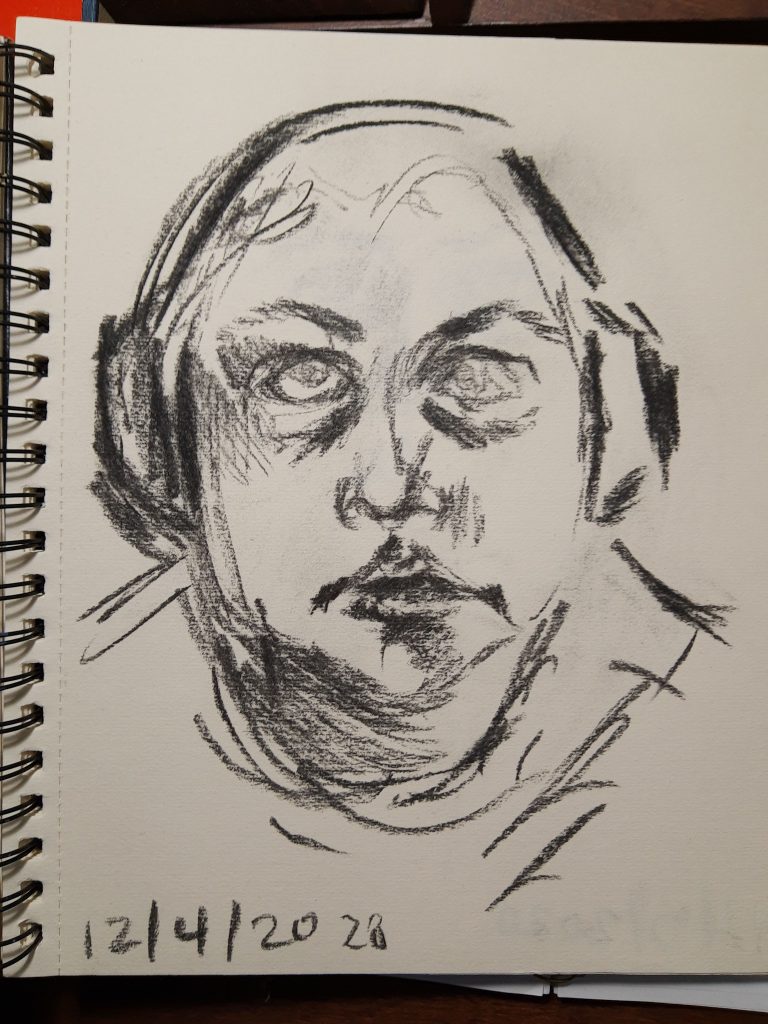
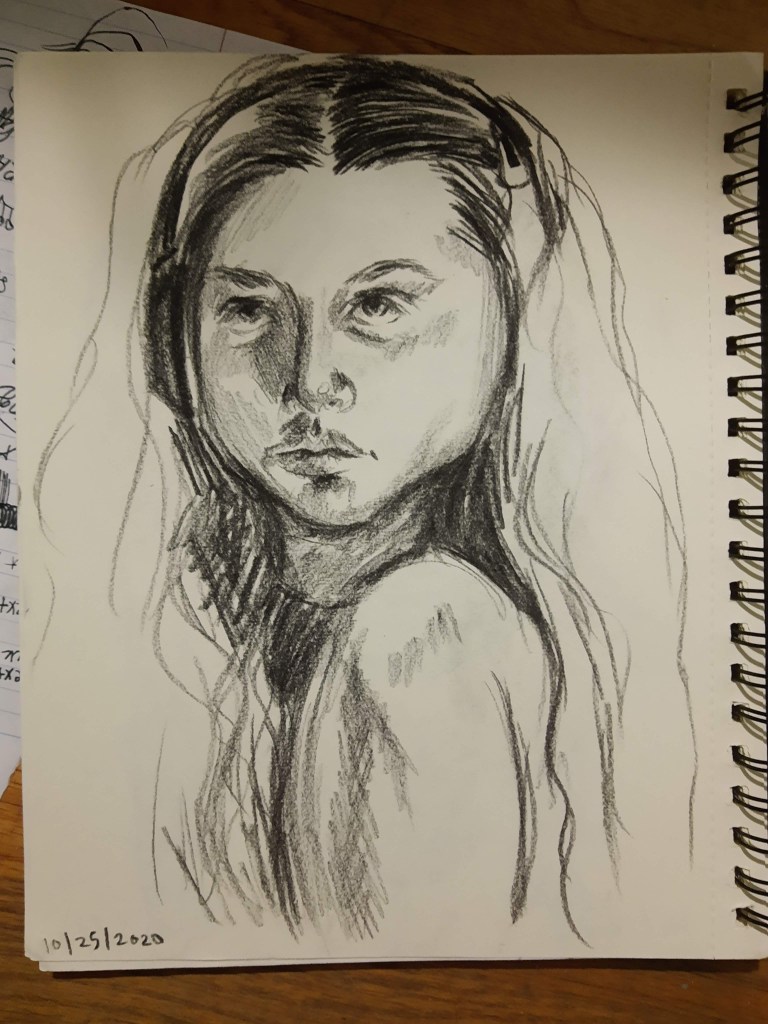
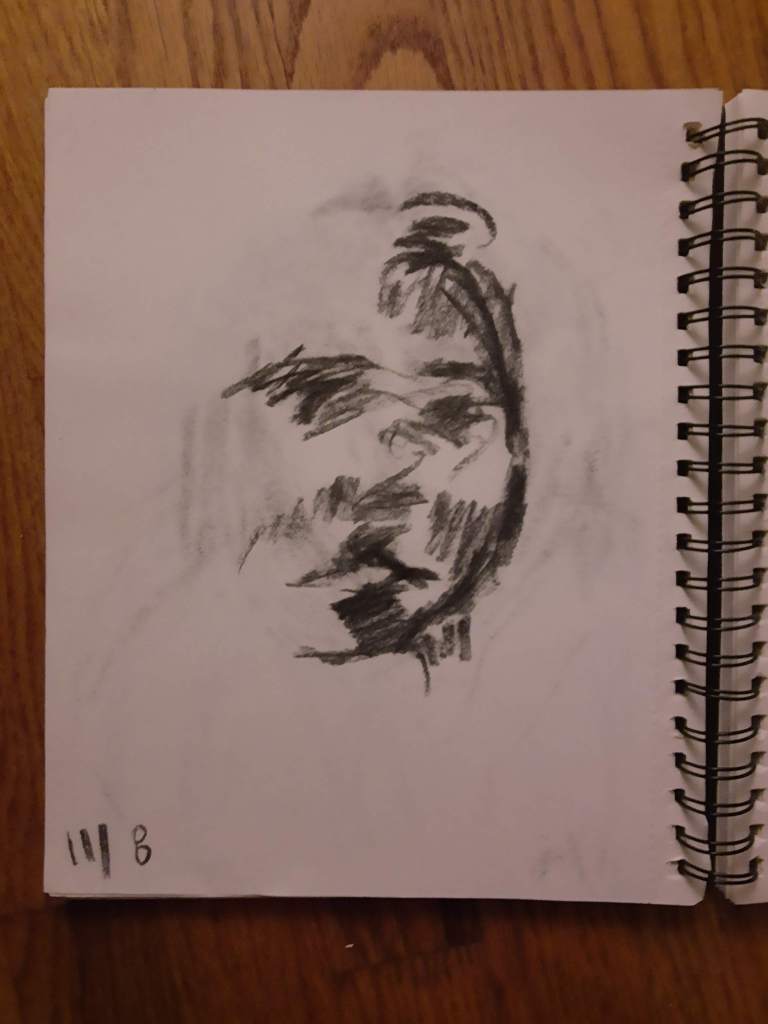
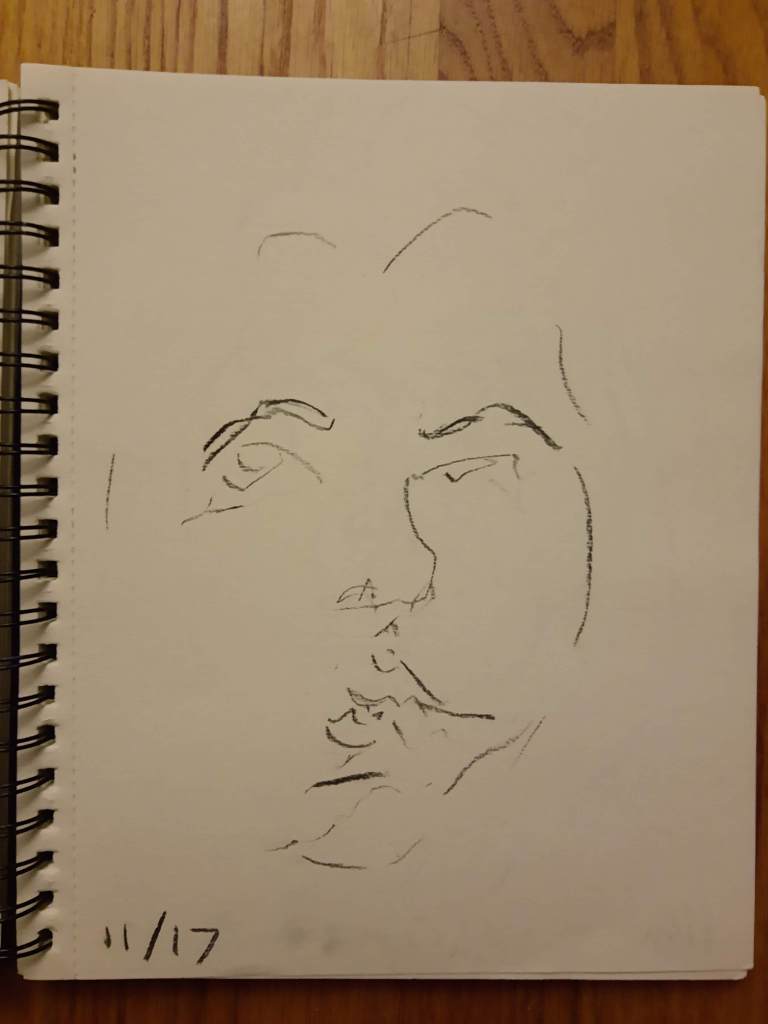
Because I already had an alarm set for 8pm each day, I decided I might as well draw every night when my alarm went off. And I was pretty consistent for a month and a half, and then I stopped. I made myself draw even when I didn’t want to draw. Some drawings are more gestural, some are just a few marks, and some I spent more time on. Some drawings really suck – the eyes are too close or too far from each other, the proportions are off, the nose looks flat and squished. Some drawings I spent 5 seconds on, some I spent an hour on. Some I drew in the dark. When I skipped a few days, I made it up by drawing more than one self-portrait over the next few days. At the end, I was skipping more and more days and I was spending less time on my drawings, so I thought it would be a good place to stop. I’m going to draw myself every day again soon. I want to fill that sketchbook with bad self-portrait drawings. My favorite drawing is the one from 10/22/2020 because I stopped caring about details and focused on shadow and gesture. Here are my daily self-portrait drawings from 10/15/2020 – 12/5/2020:
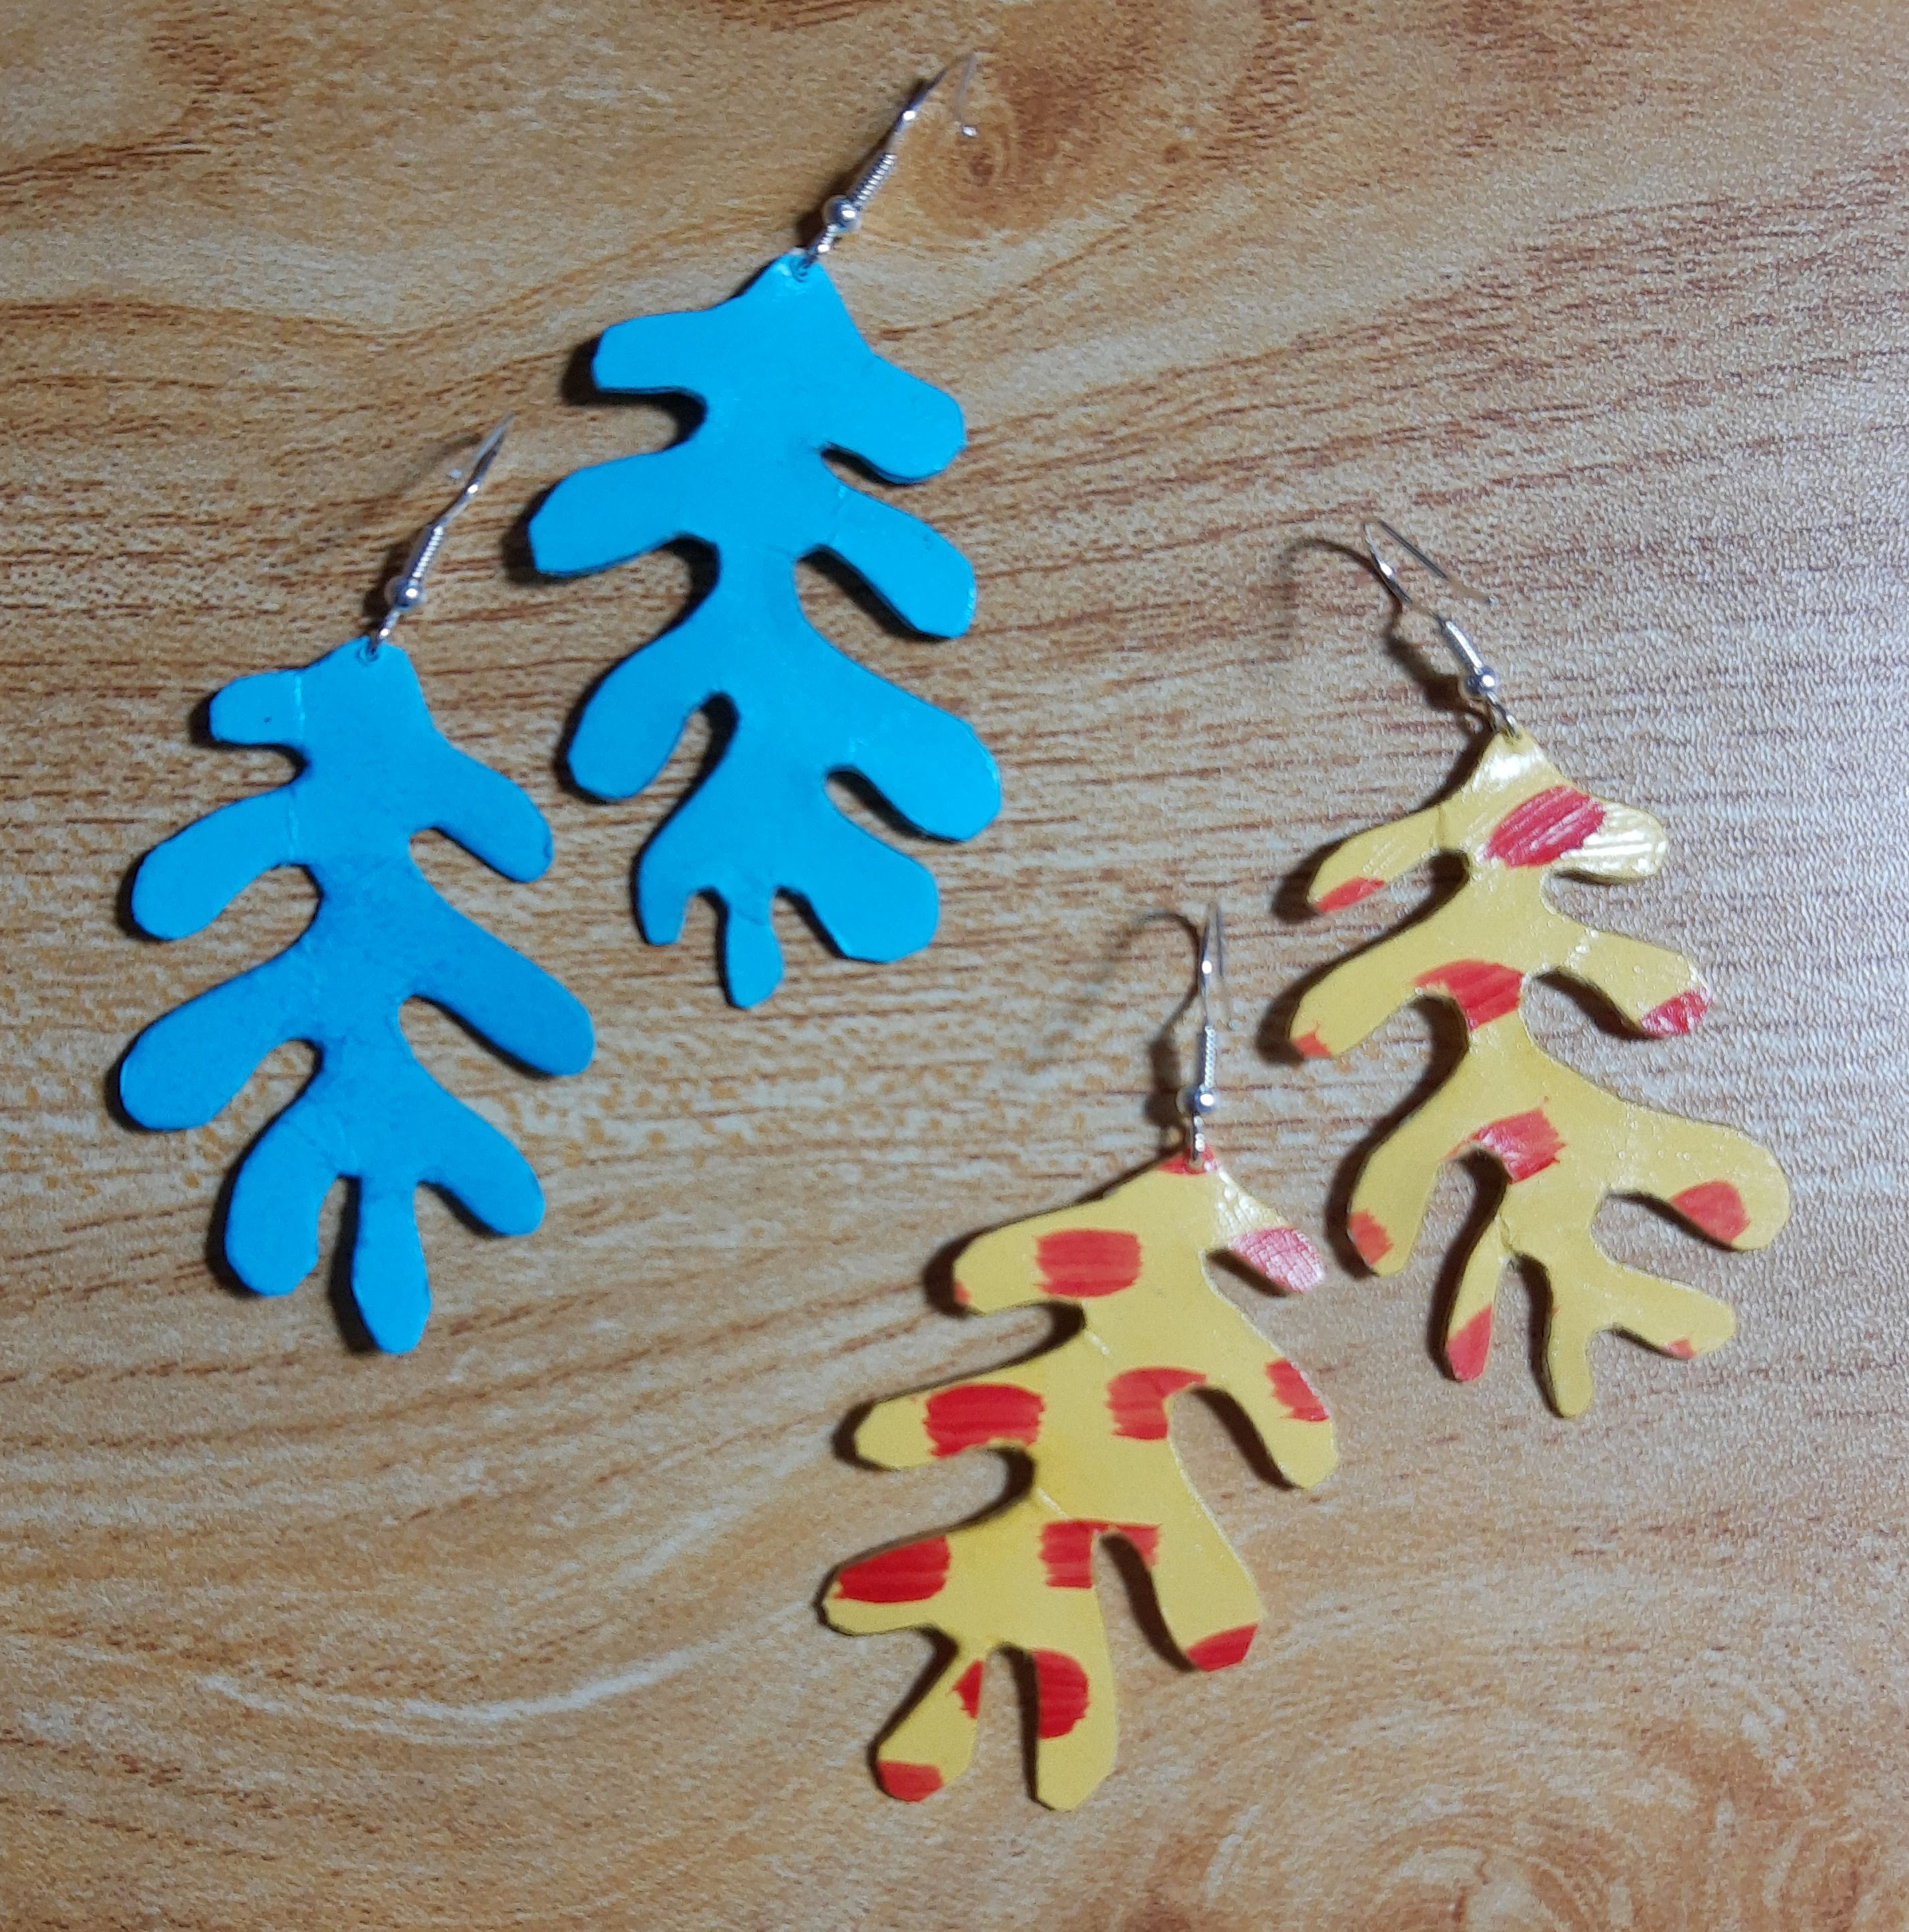
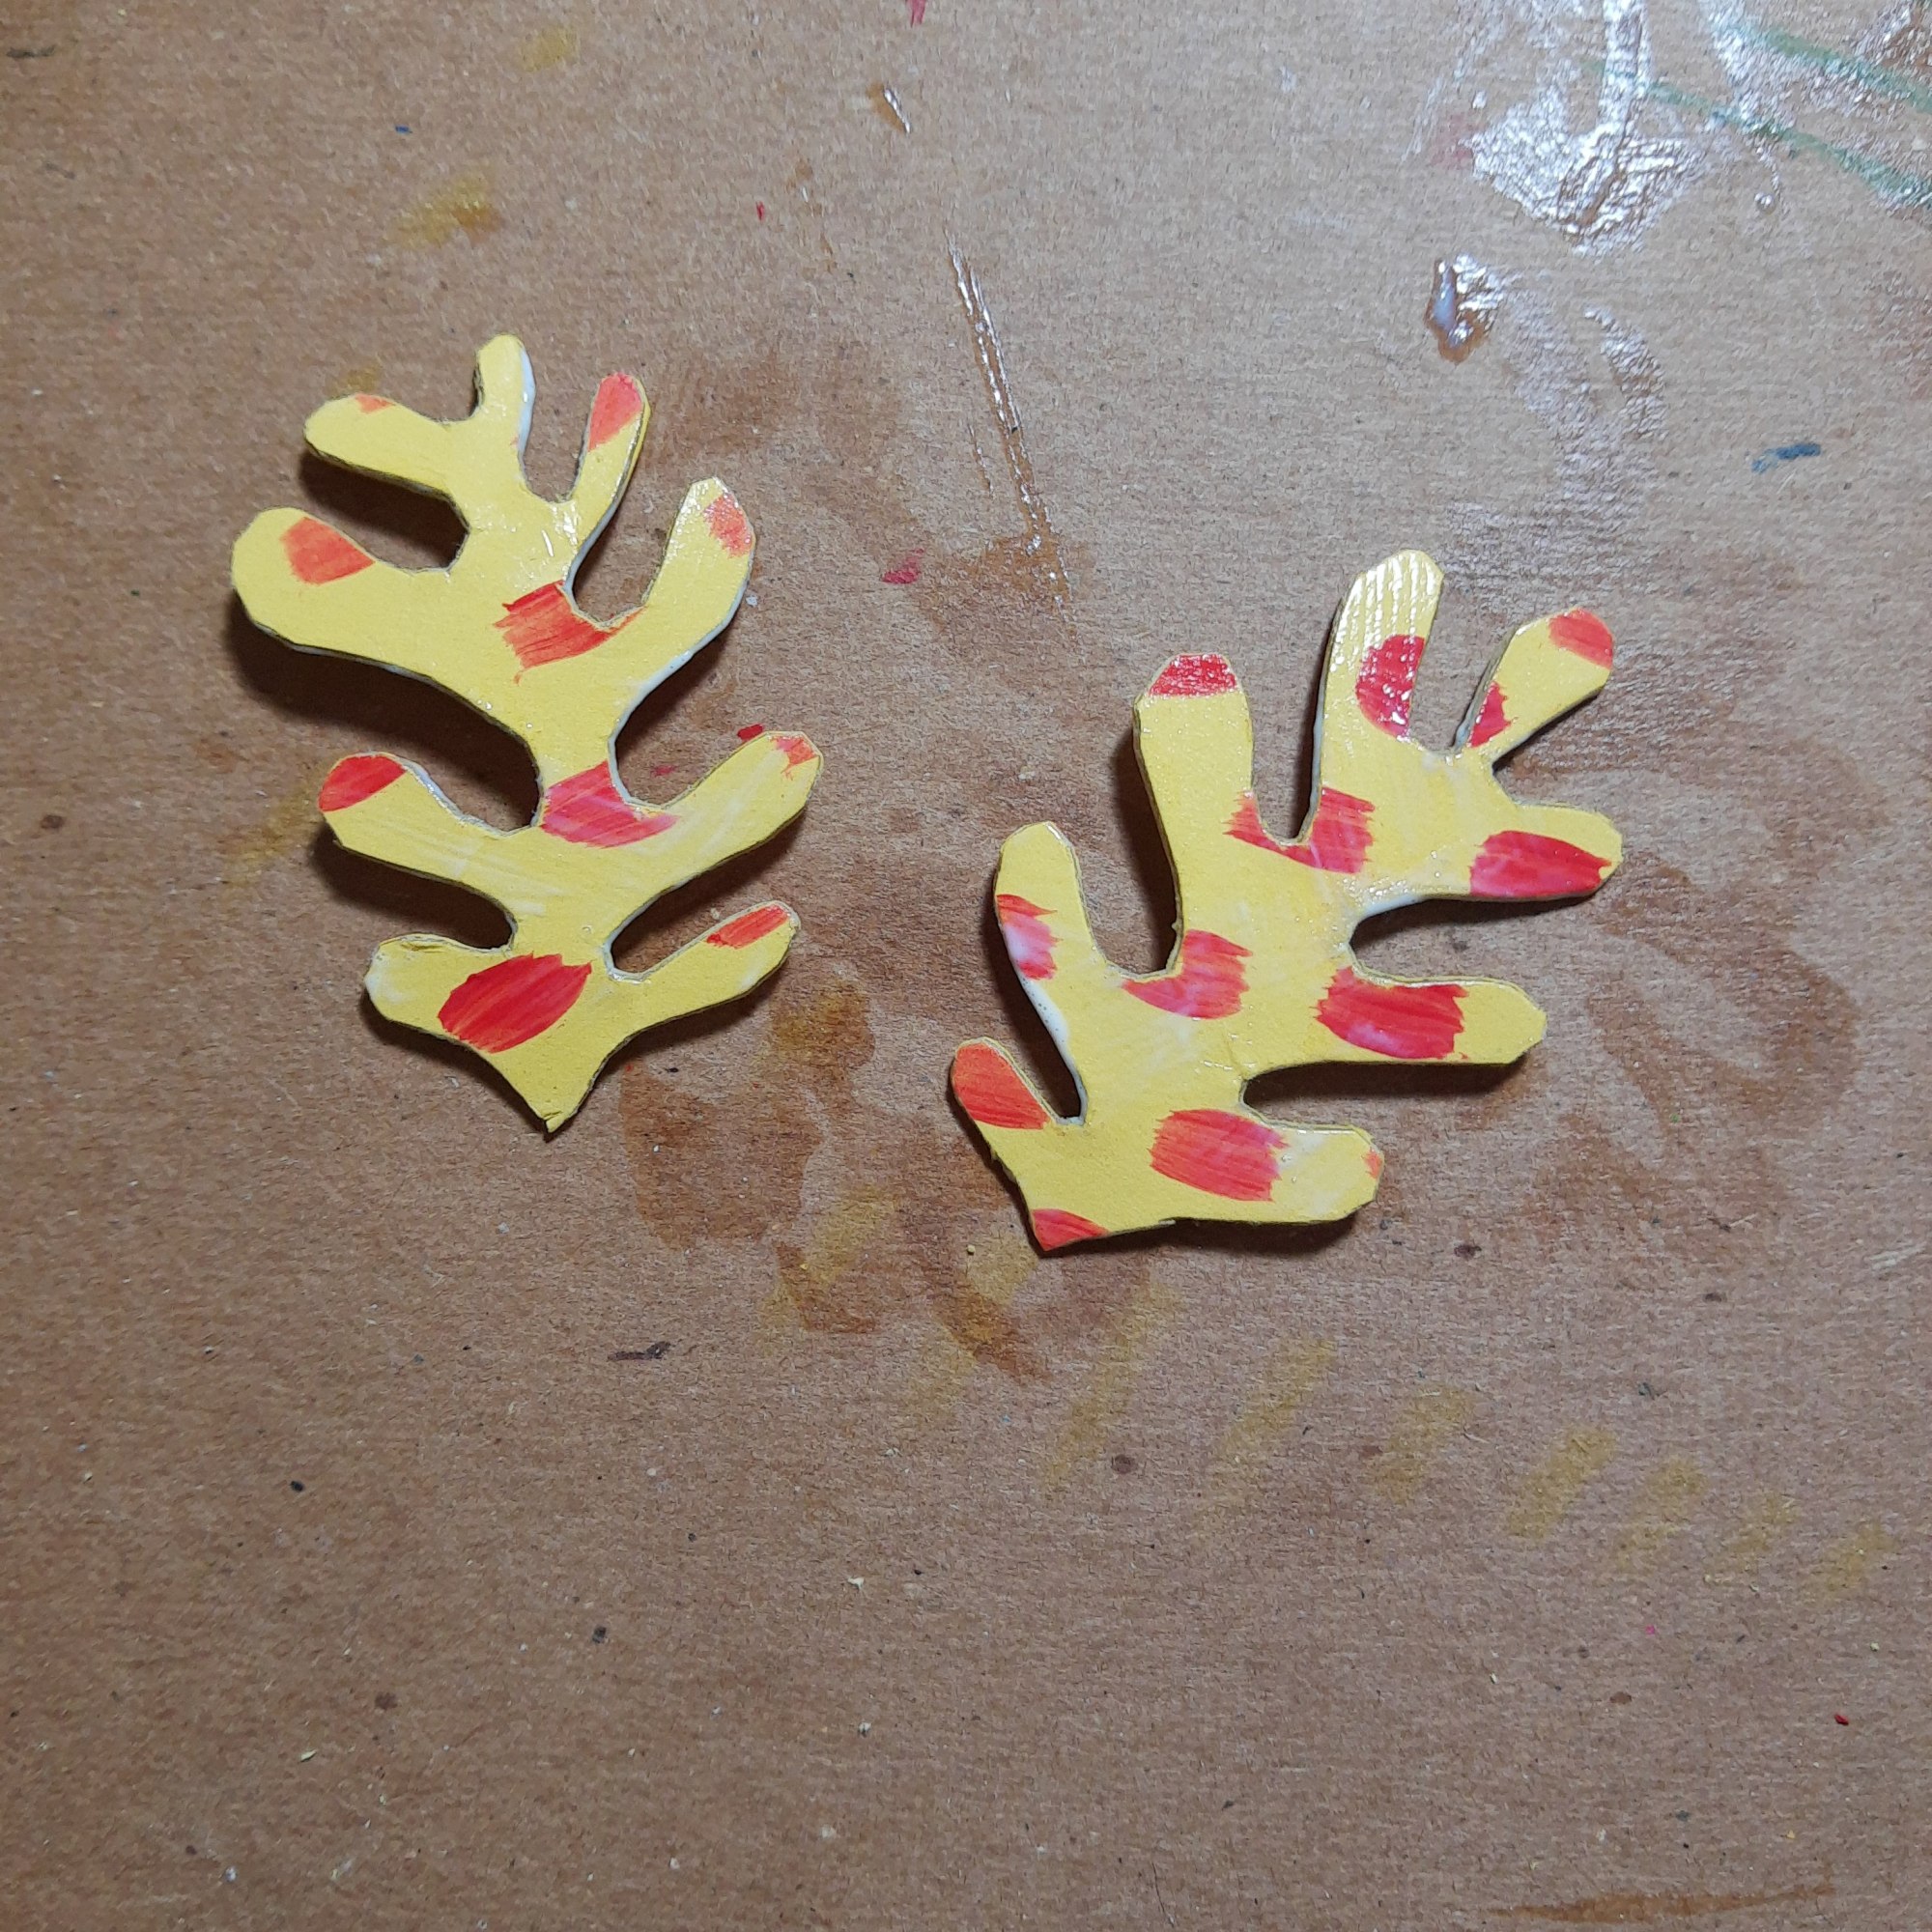
The first set of earrings I made were Matisse collage inspired earrings. I saw a lot of Matisse-inspired earrings on Pinterest and I loved the idea so I made some of my own.
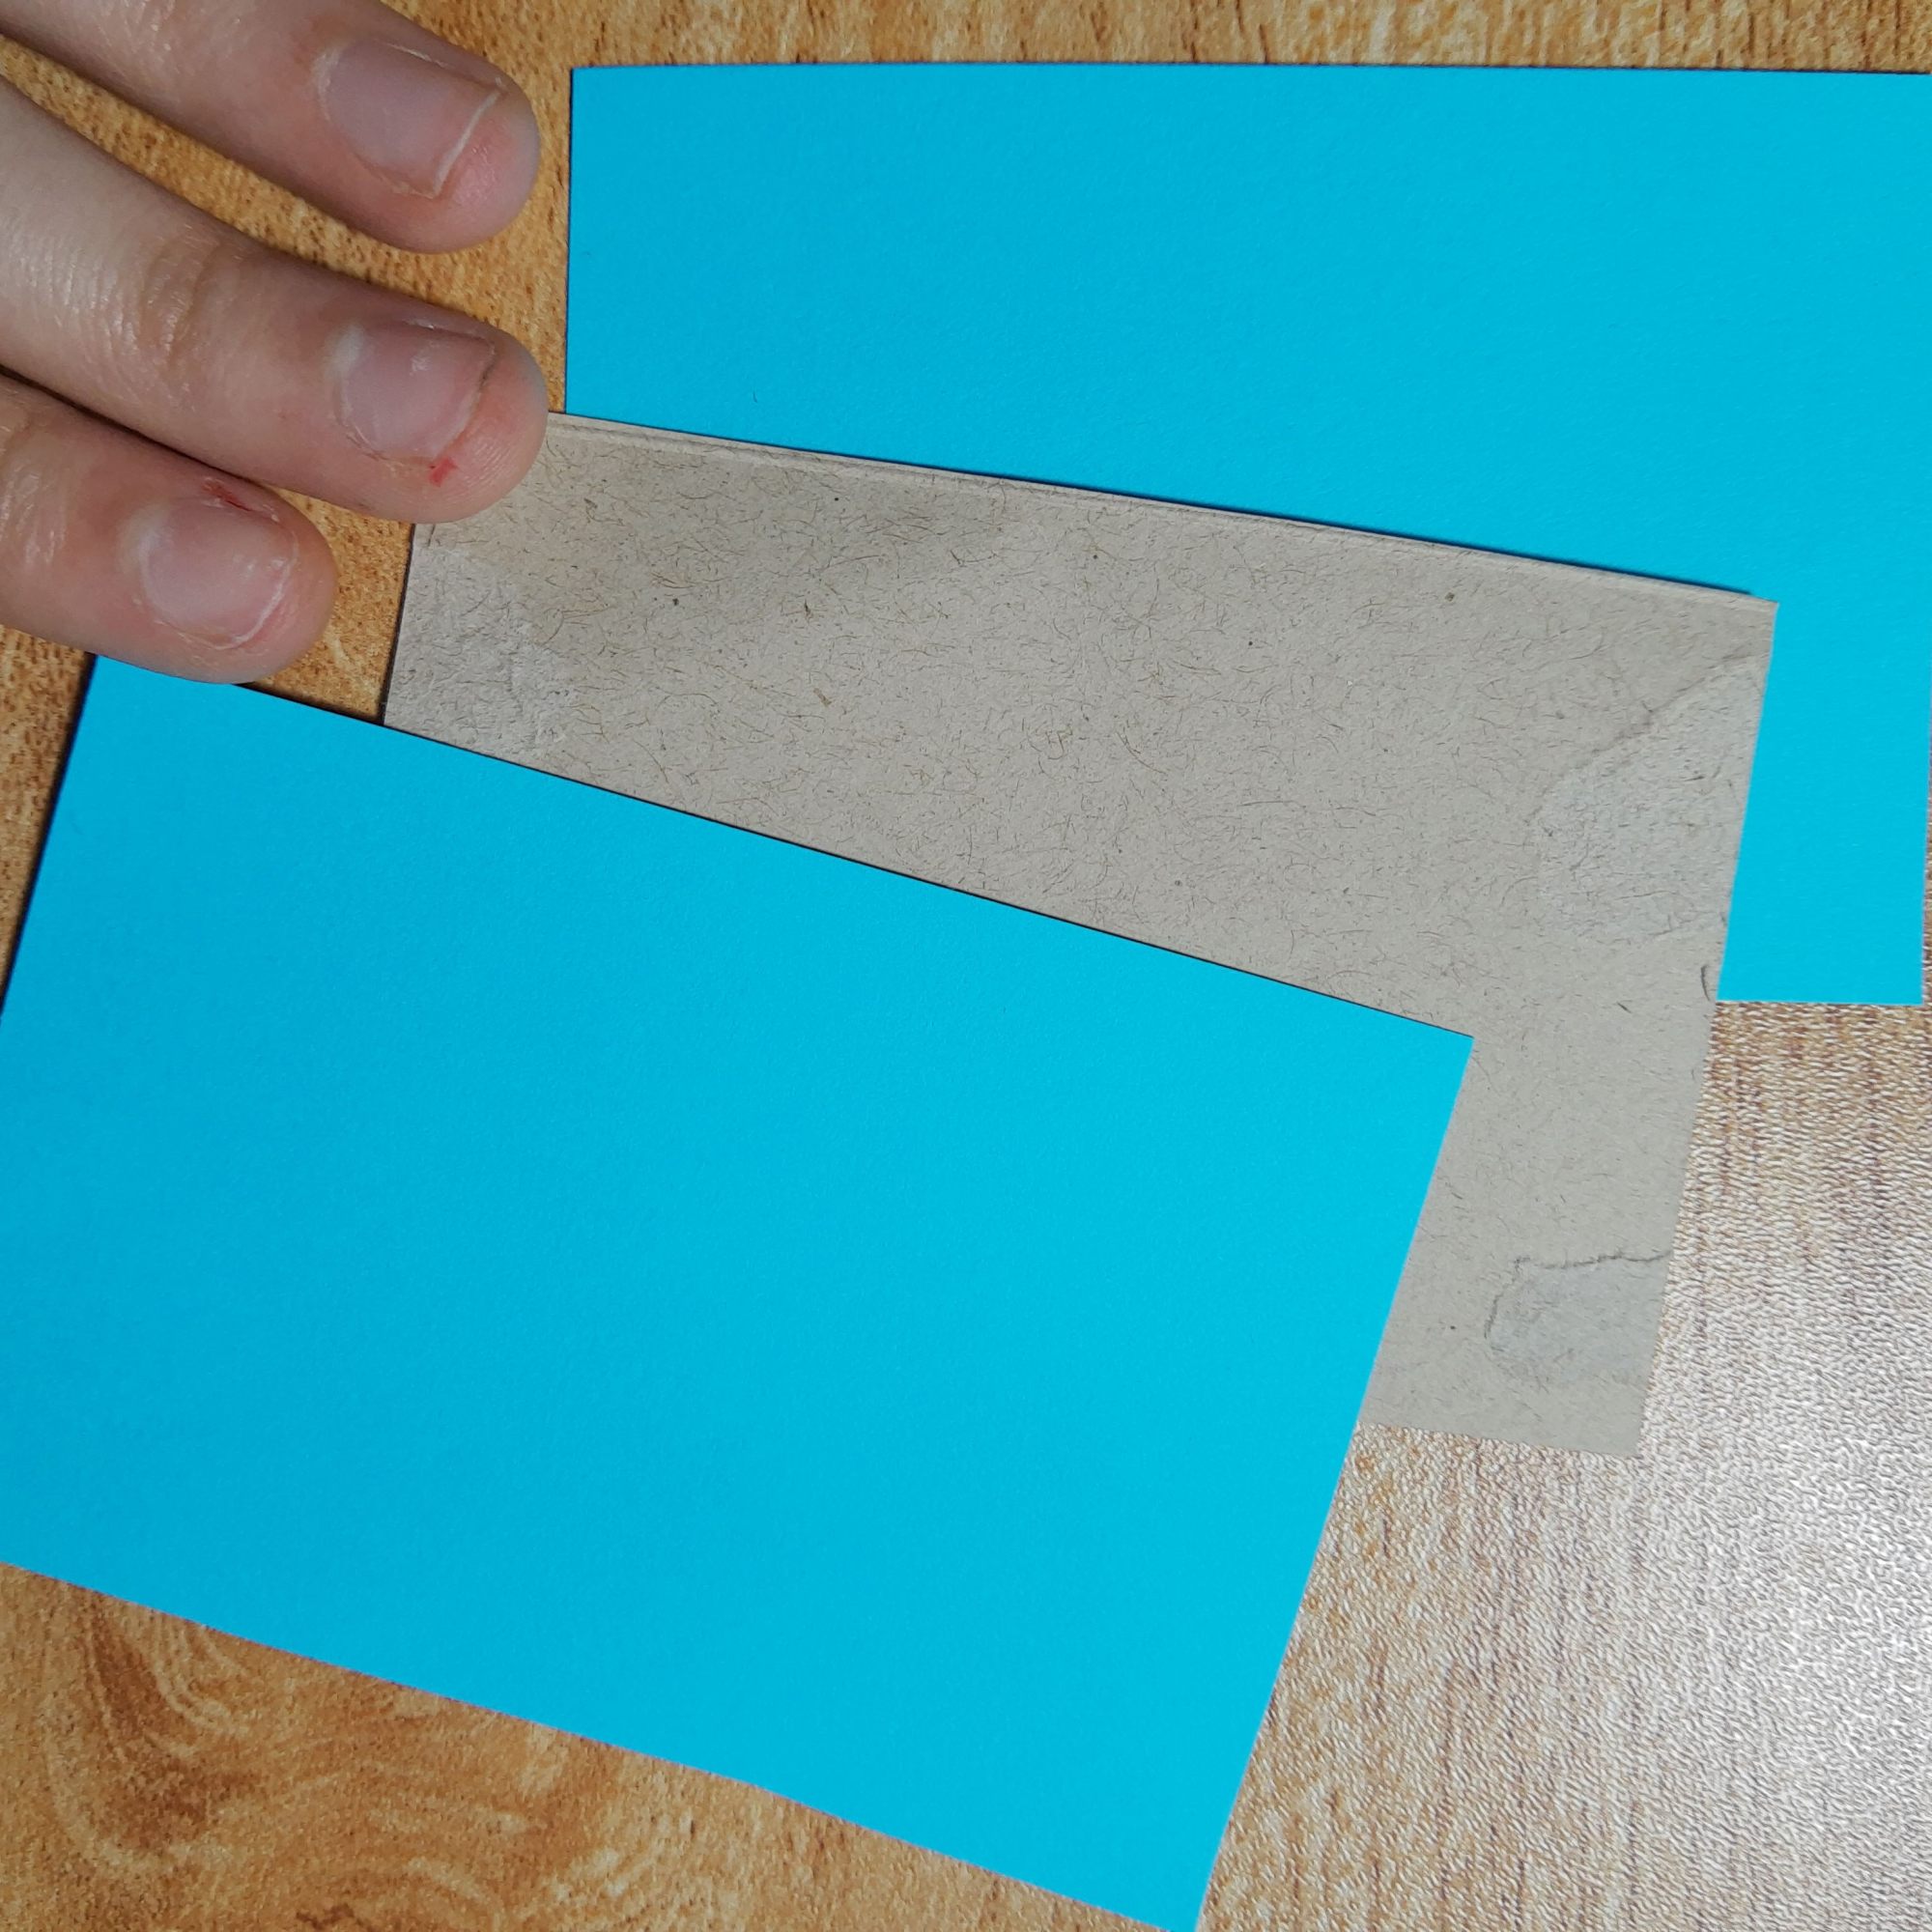
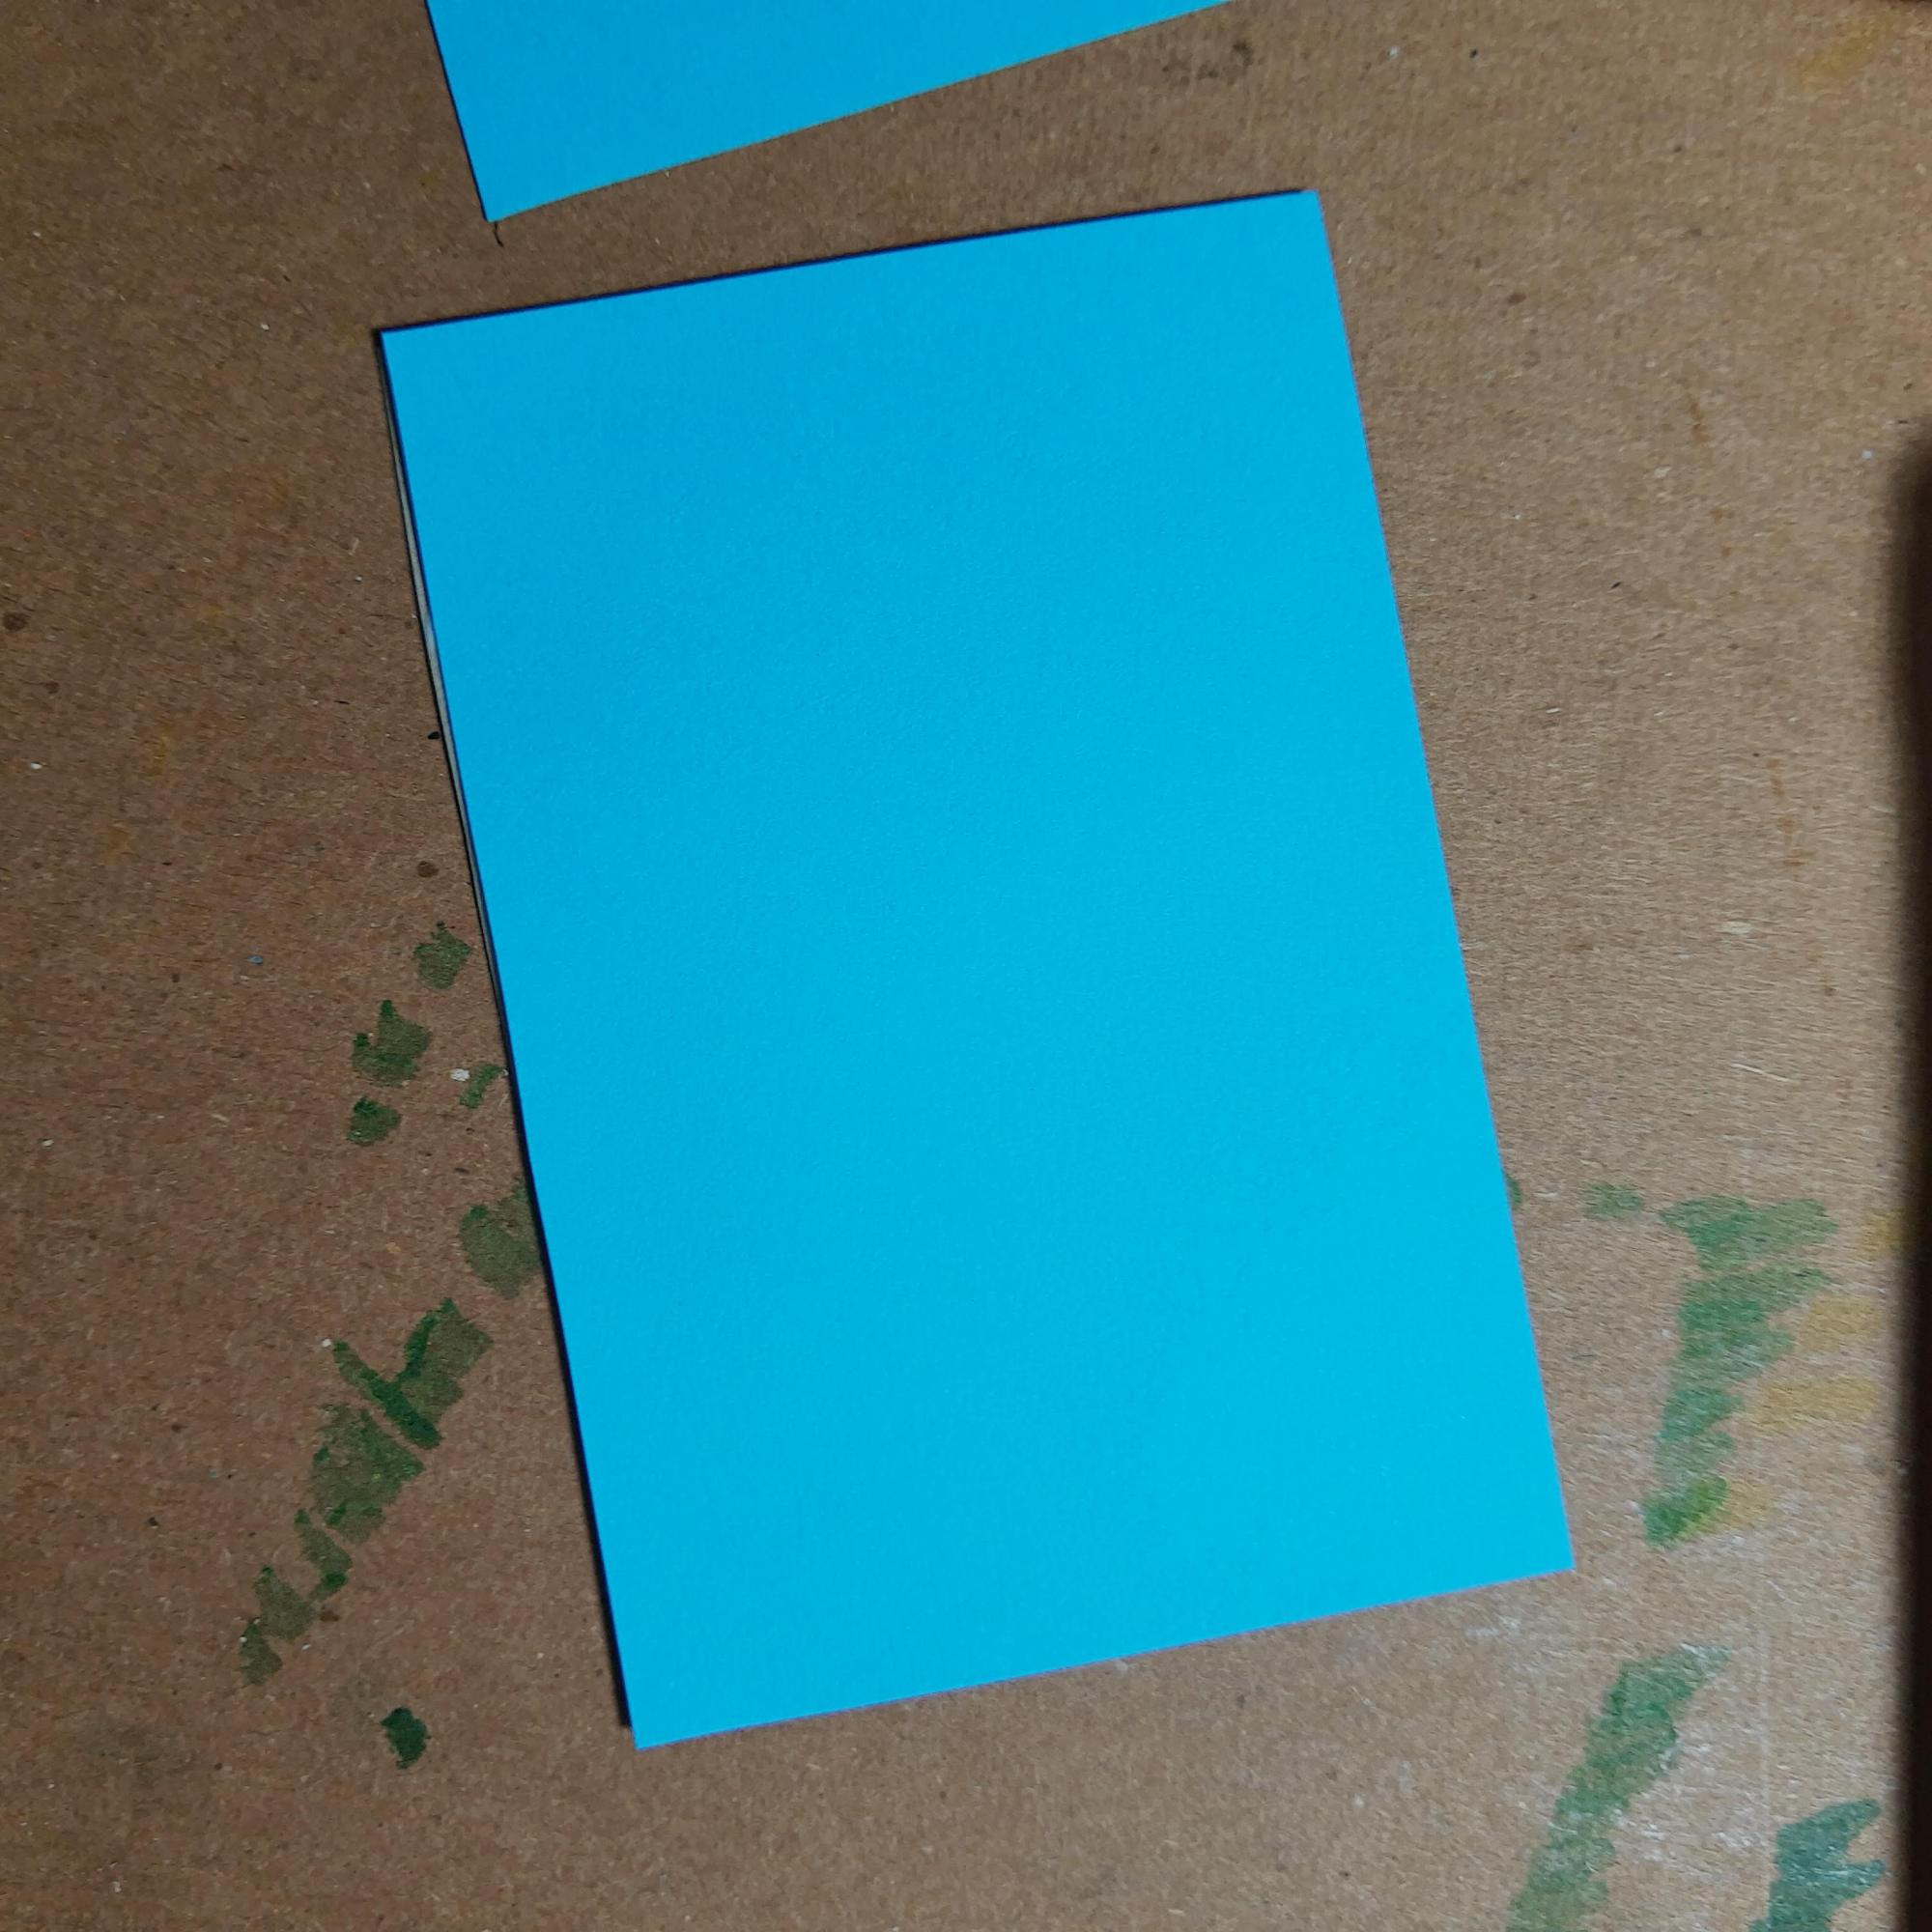
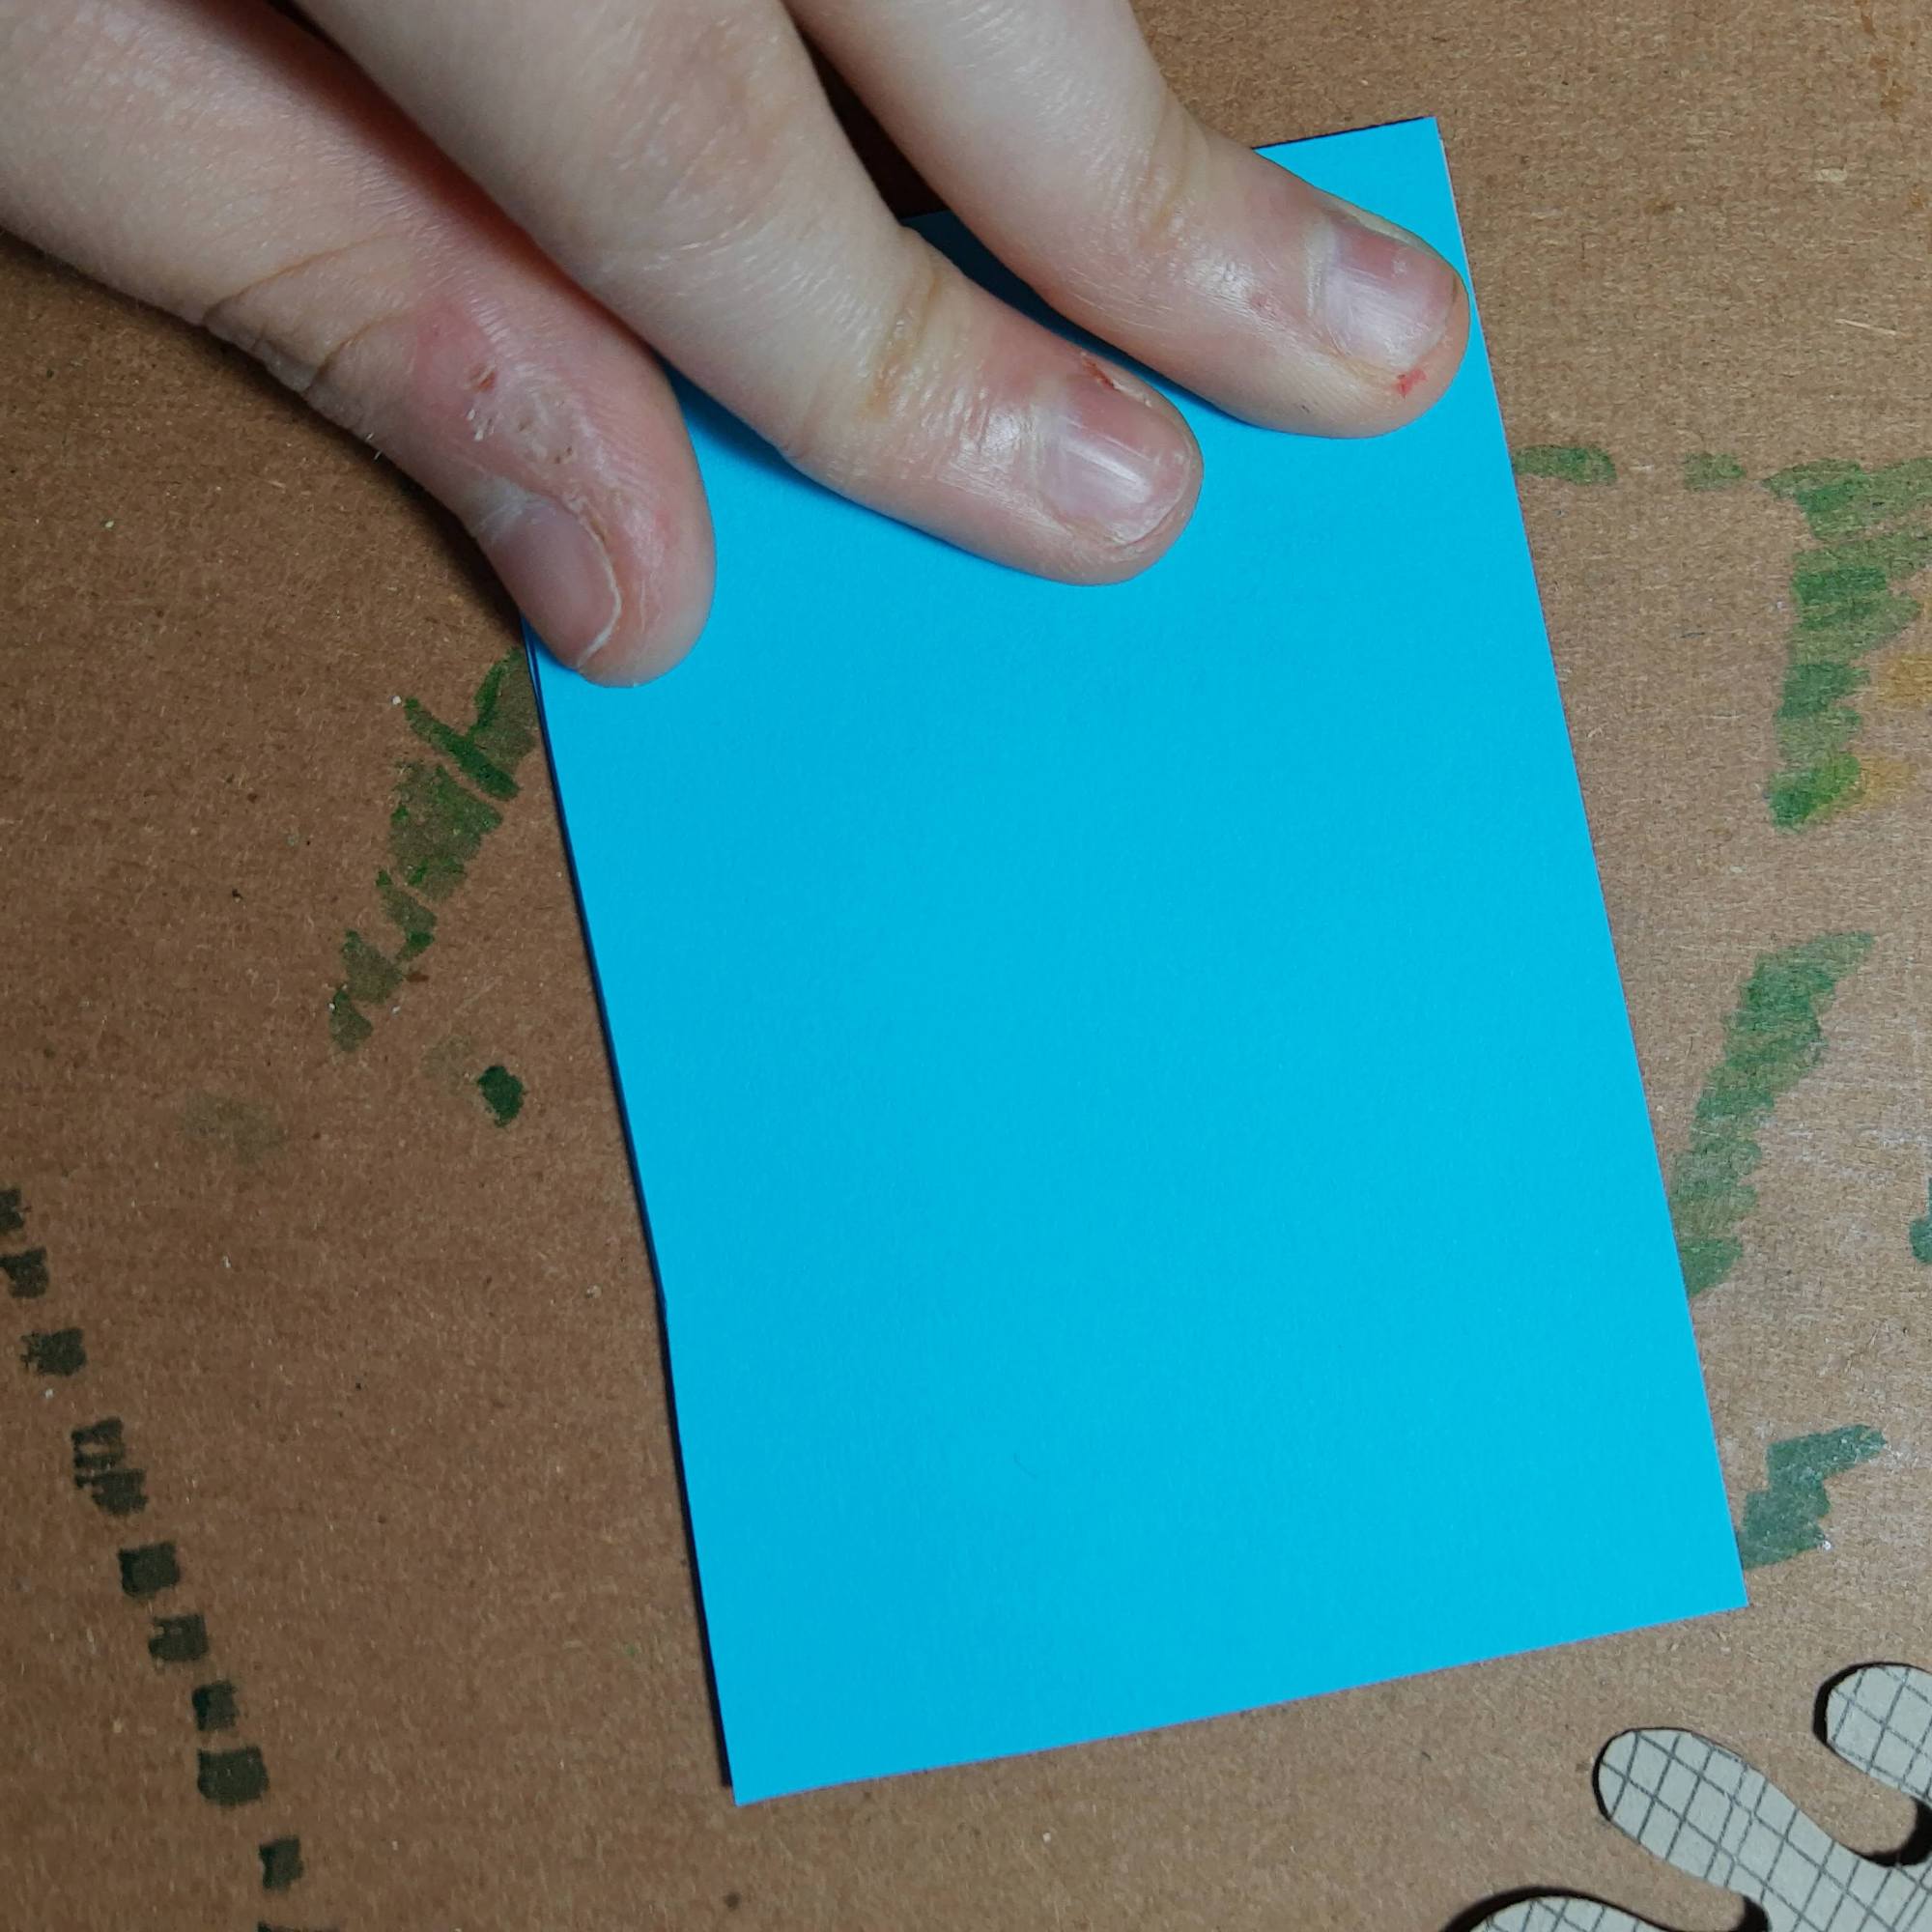
To make paper earrings, you need 3 thick, cardstock type pieces of paper, or two pieces of paper with a piece of thin cardboard in between. Using only paper works a lot better though when you cut out the earring shapes.
How I make paper earrings:
Cut out 3 pieces of the same size of cardstock paper
Mod podge each layer together
Put the paper layers under a heavy book until dry
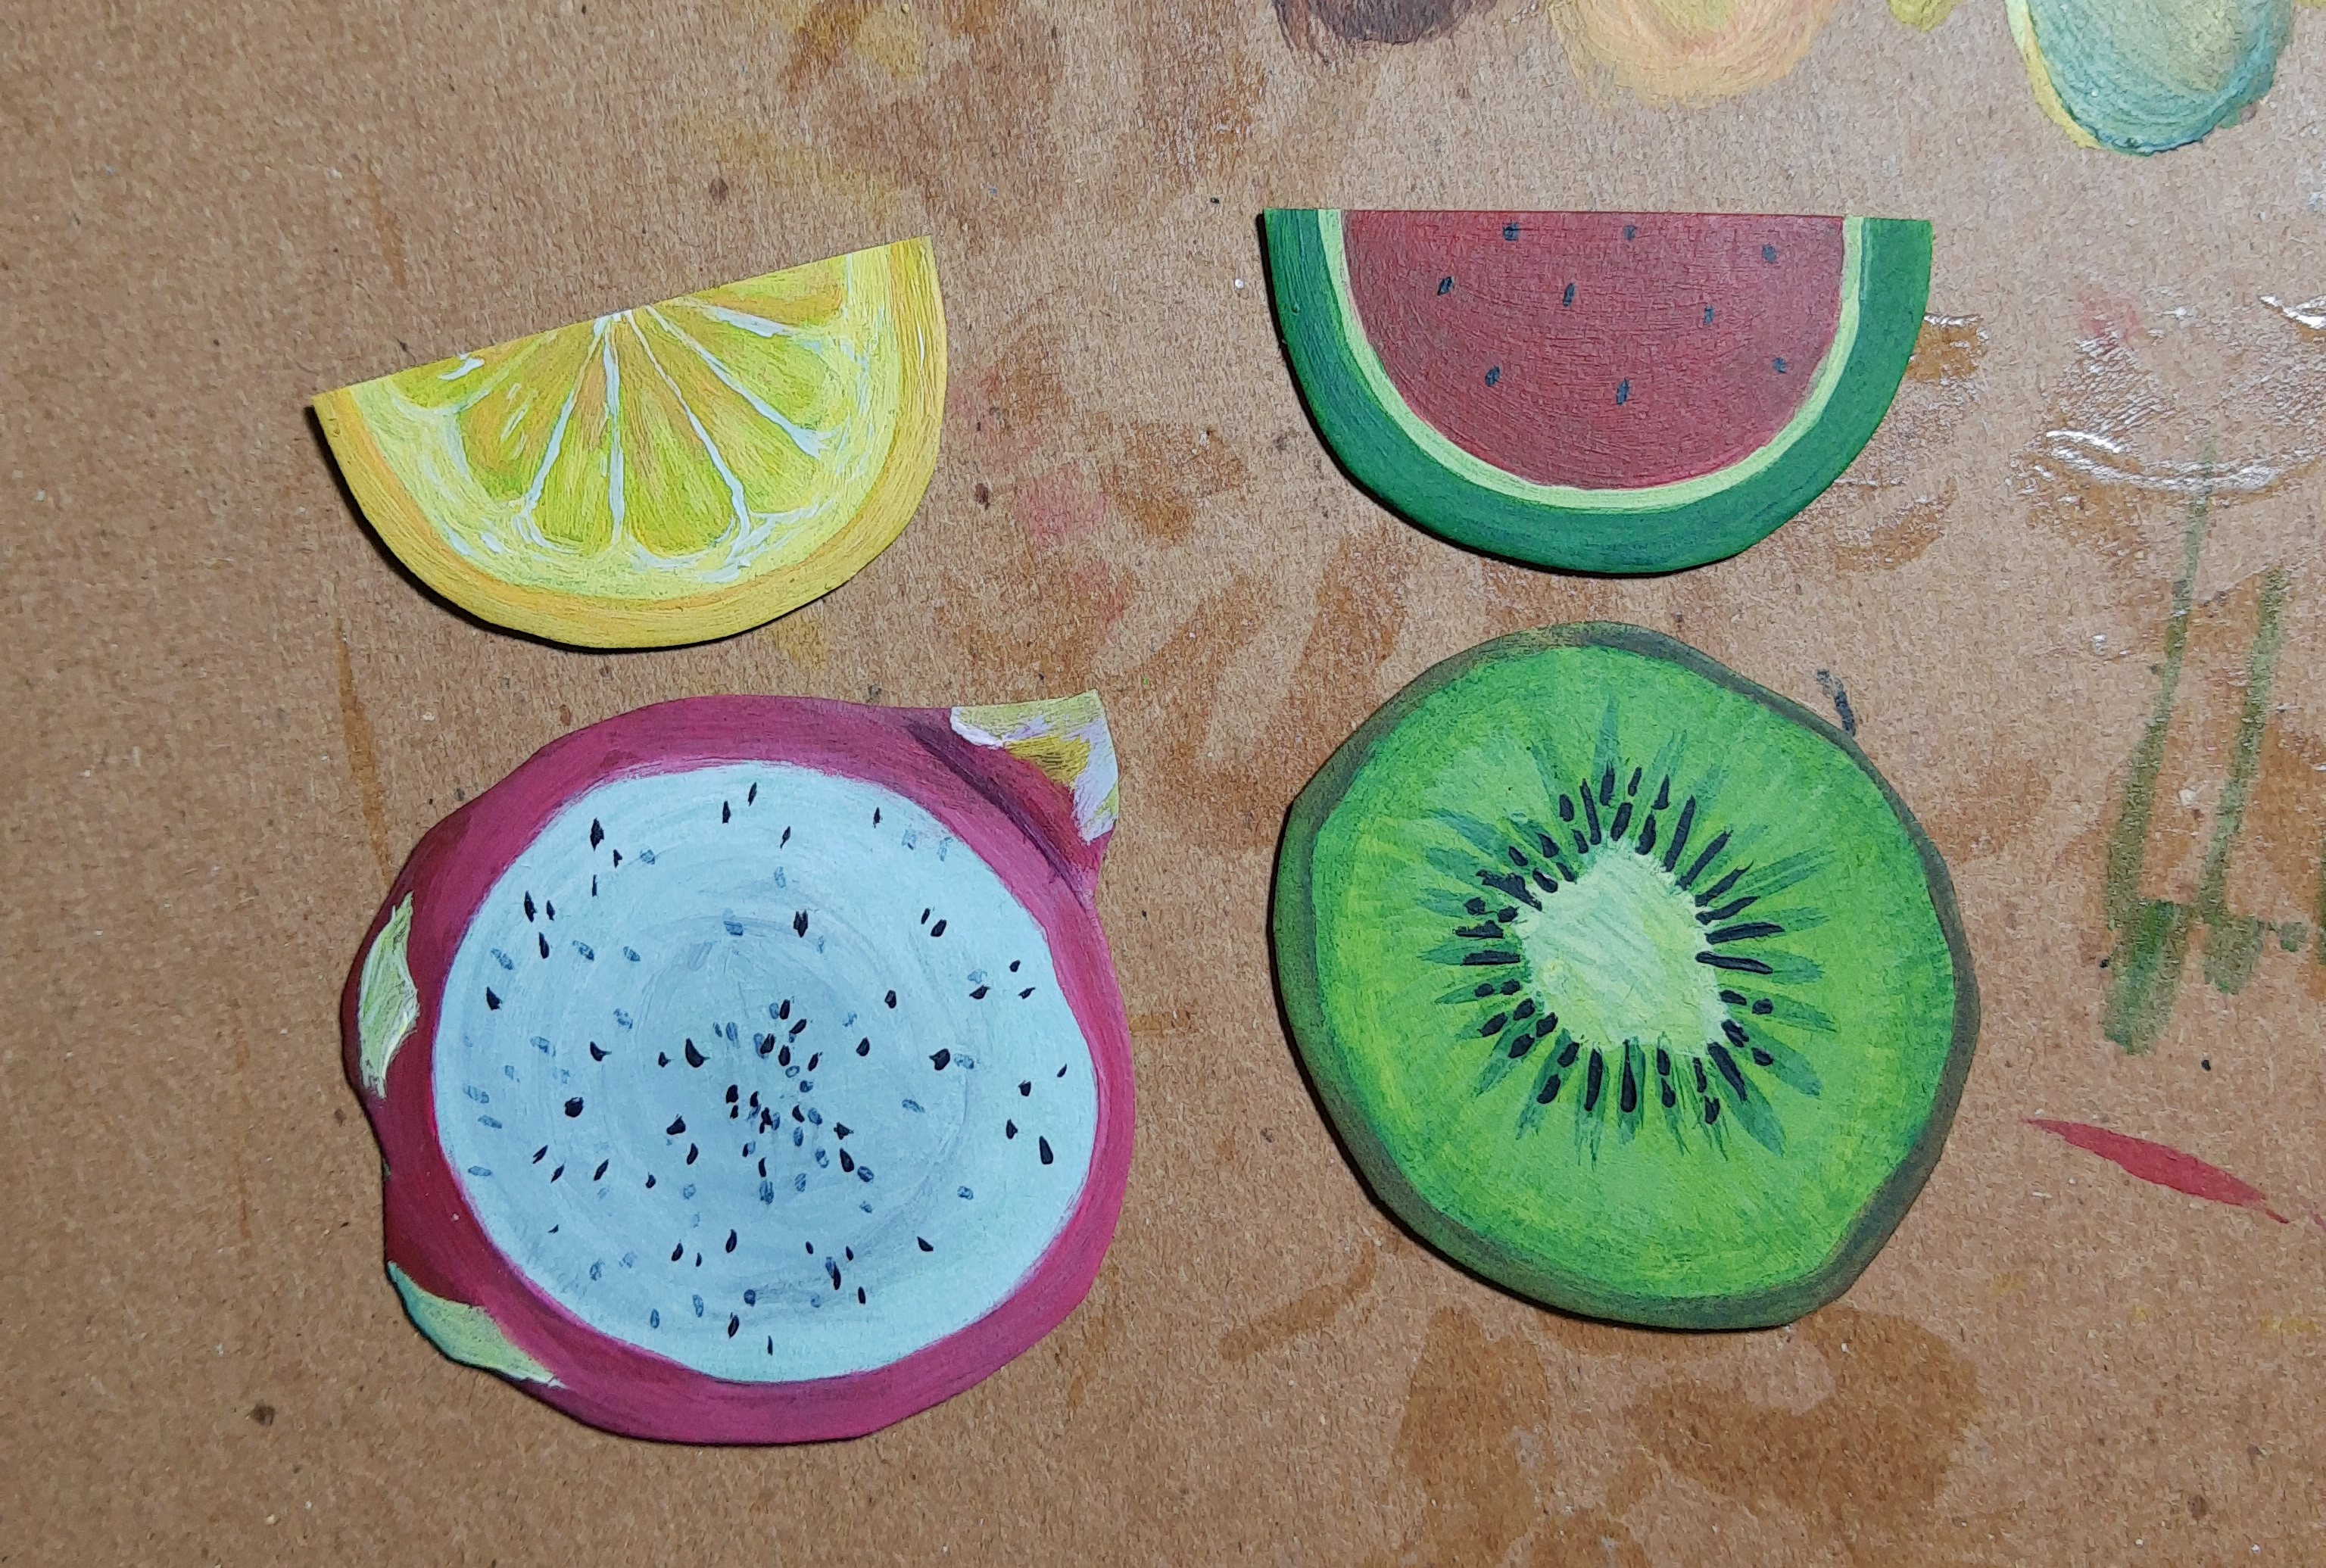
Figure out what shape or painted design you want to create for your earrings. For the Matisse earrings, I painted dots on one of the papers. For my fruit earrings, I painted fruit on each side of the paper
Cut out the shapes from the paper
Apply a matte or gloss varnish to the paper so it is secure
Poke a hole using a pin/needle in the top of the paper shape
Poke through the hole with a jump ring or earring hook and fasten
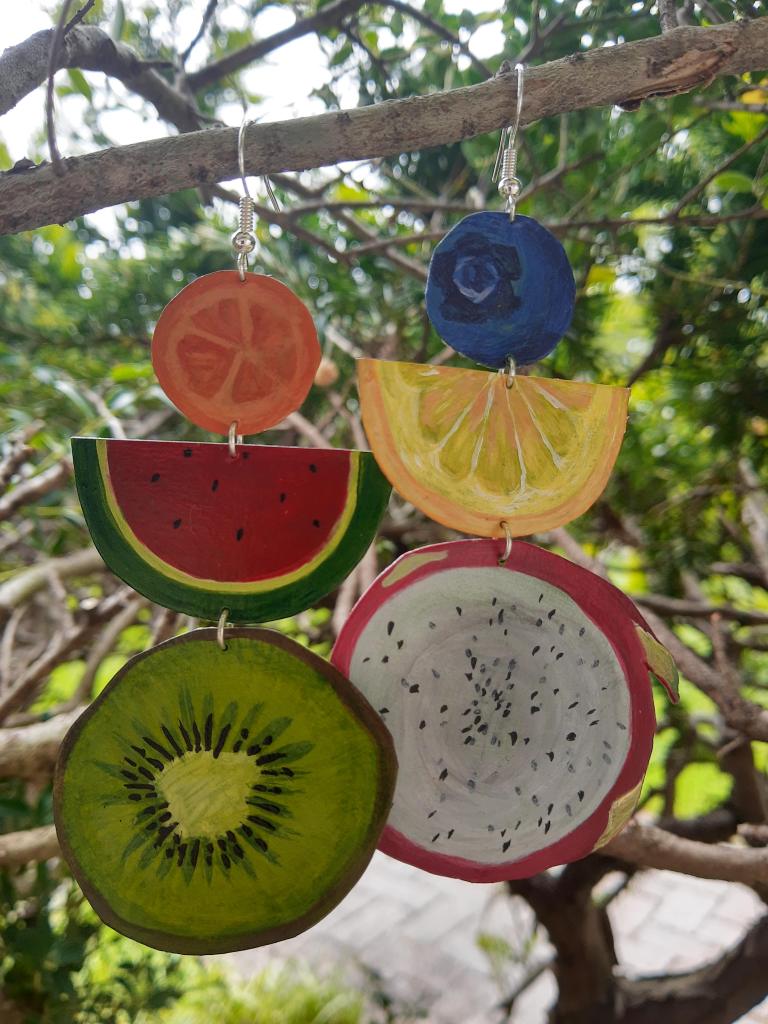
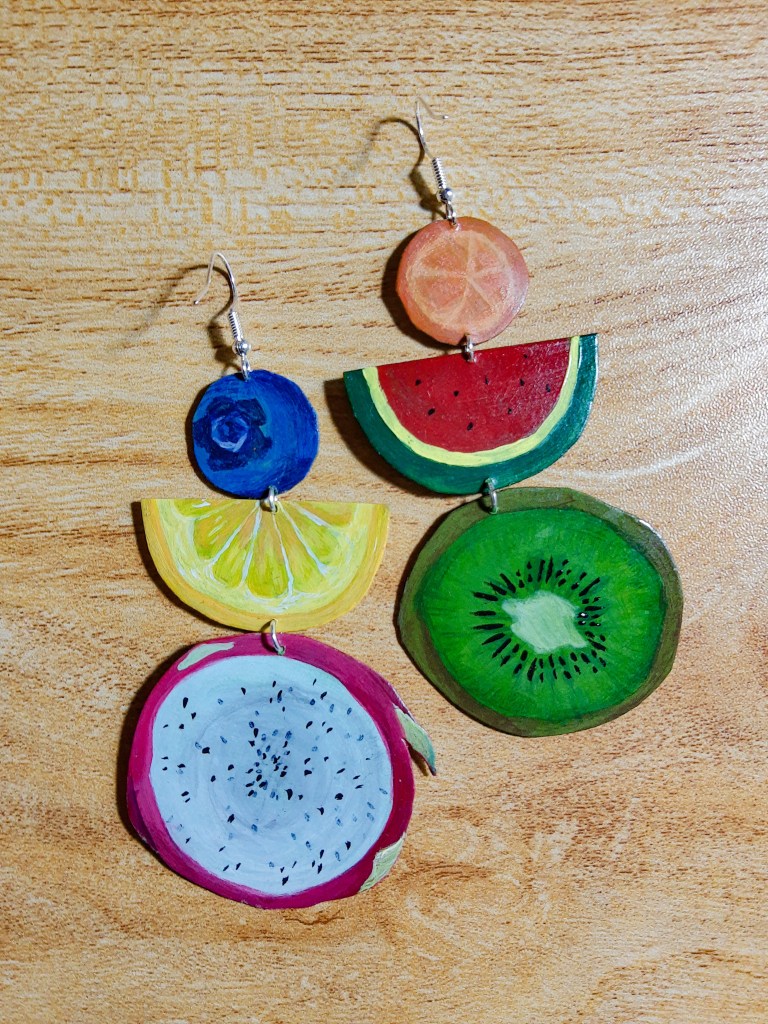
Next, I made a pair of fruity paper earrings. I followed the same steps above, but I added a lot more detail with paint. I LOVE how these turned out. I love how I can create fun and unique earrings using only paper and paint.
Unrelated – this week I’m teaching lessons on polka dots and Aboriginal art to my elementary students, and today I wore a full polka dot outfit to match my lessons and I’m very pleased. I am slowly achieving my goal of becoming Ms. Frizzle 🙂
Some of the process (I didn’t really take any other process pics, I mostly just painted fruit)
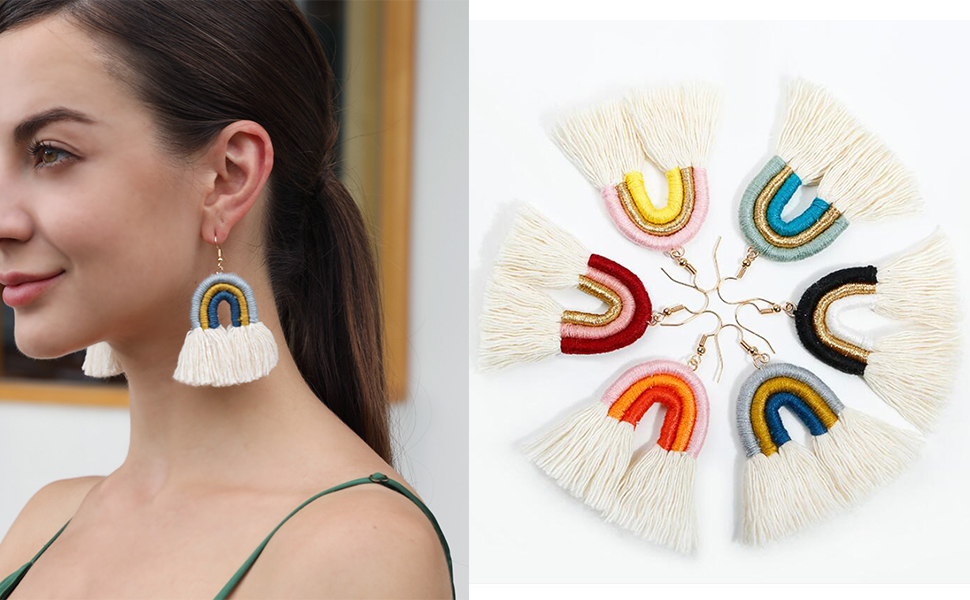
I was inspired by these earrings I saw on Pinterest: Earrings
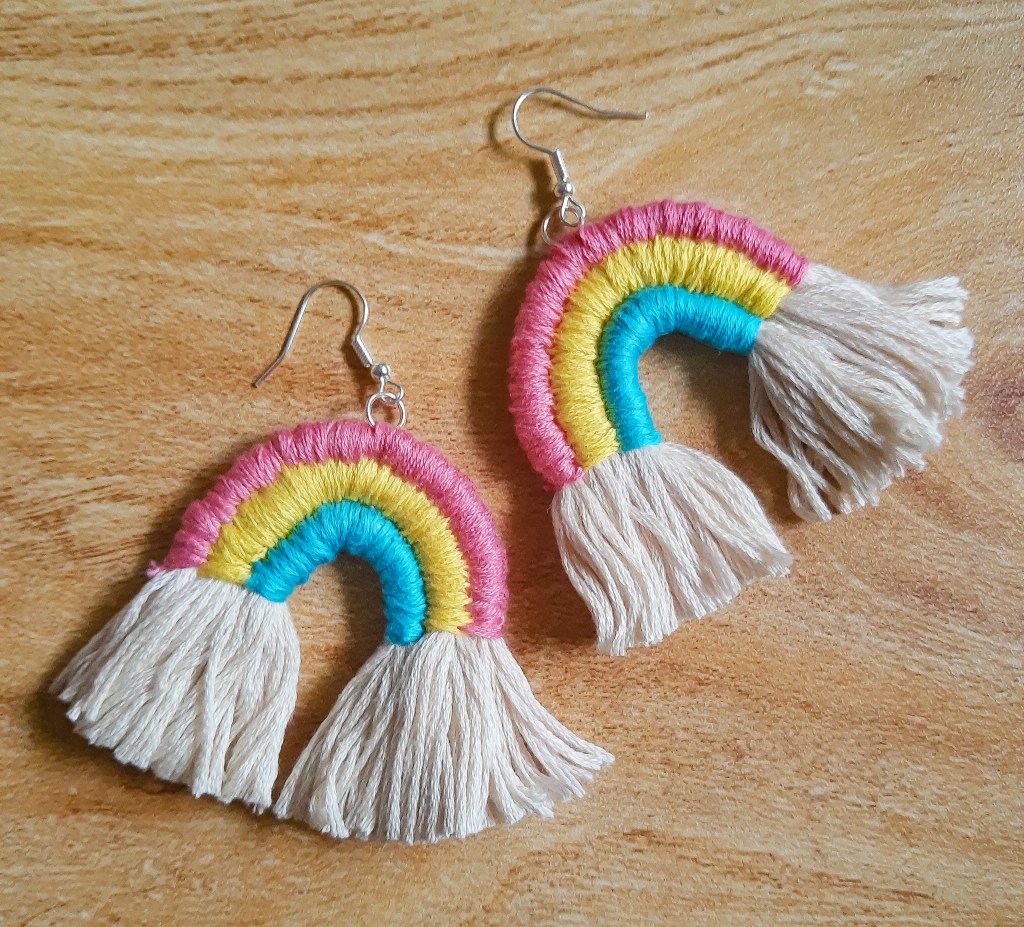
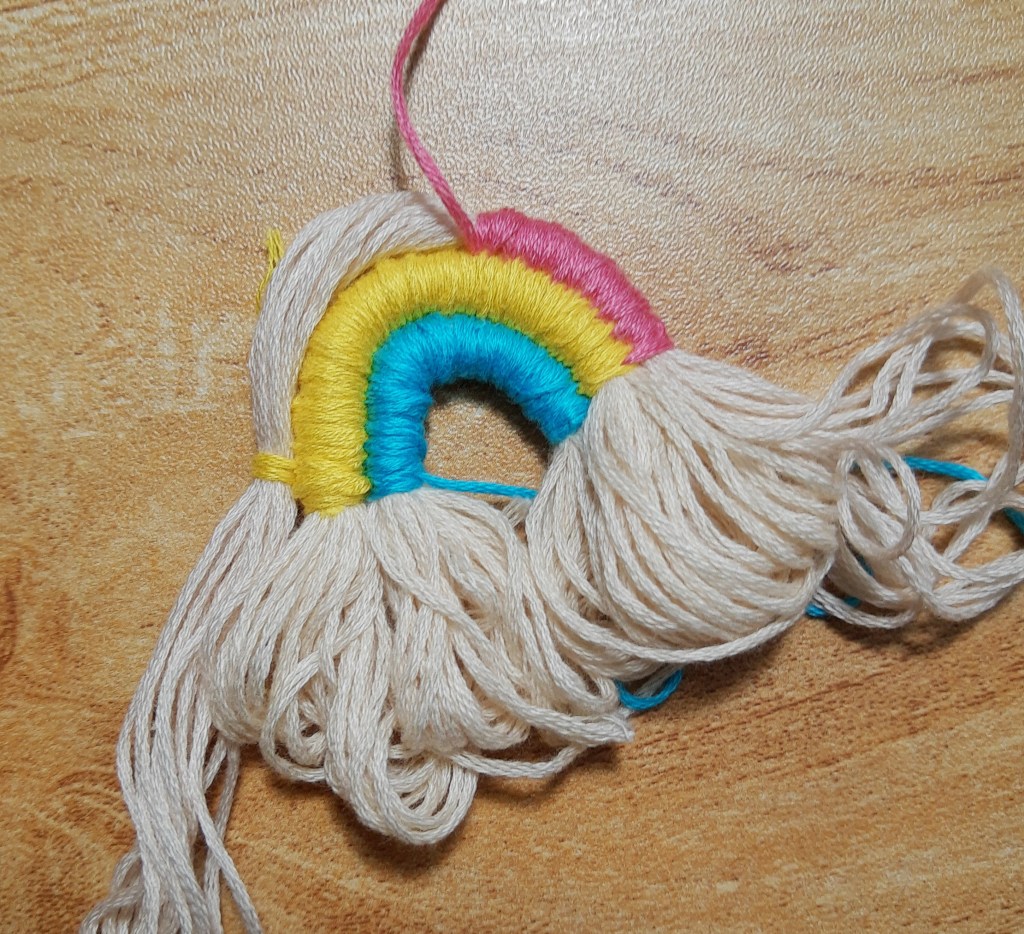
I found a pair of earrings I really liked from Amazon, so I decided to try to make them on my own, since I already had a ton of embroidery thread laying around. They are actually very simple to create.
embroidery thread (one neutral color & 3 colors for each arc of the rainbow)
jump rings
earring hooks
scissors
embroidery needle
Process:
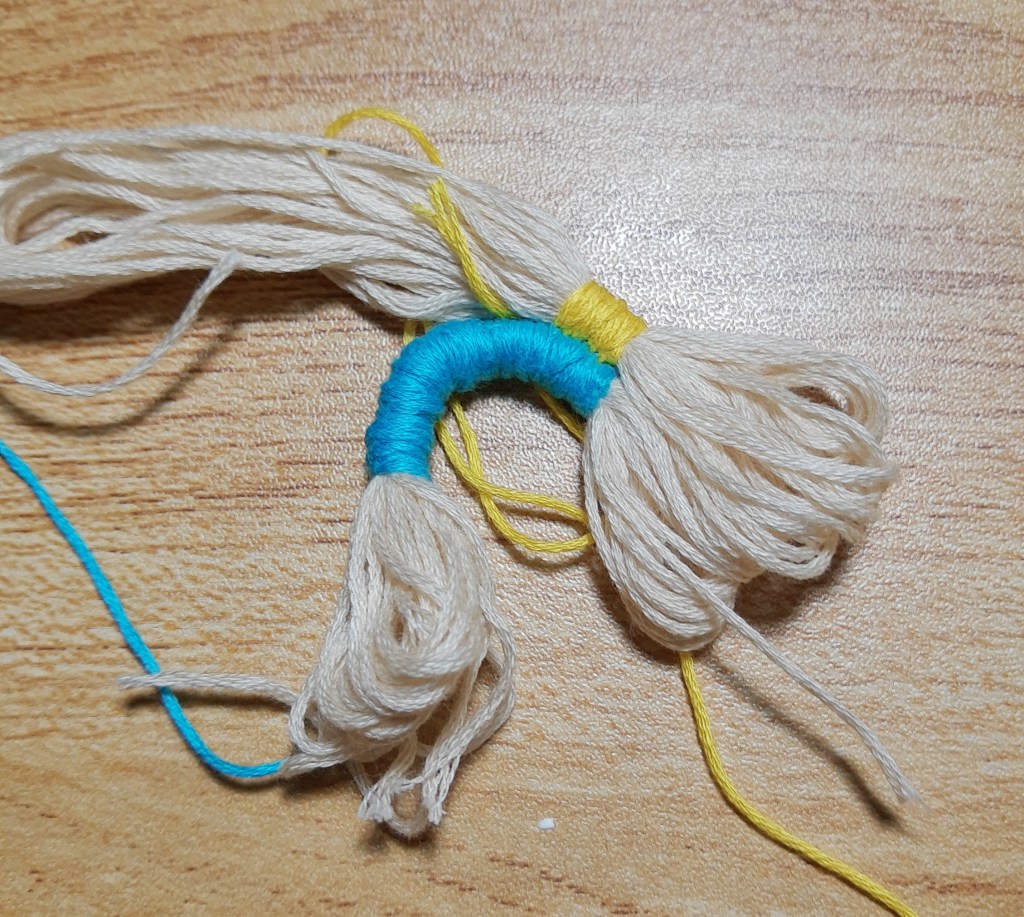
Start with the INNER ARC:
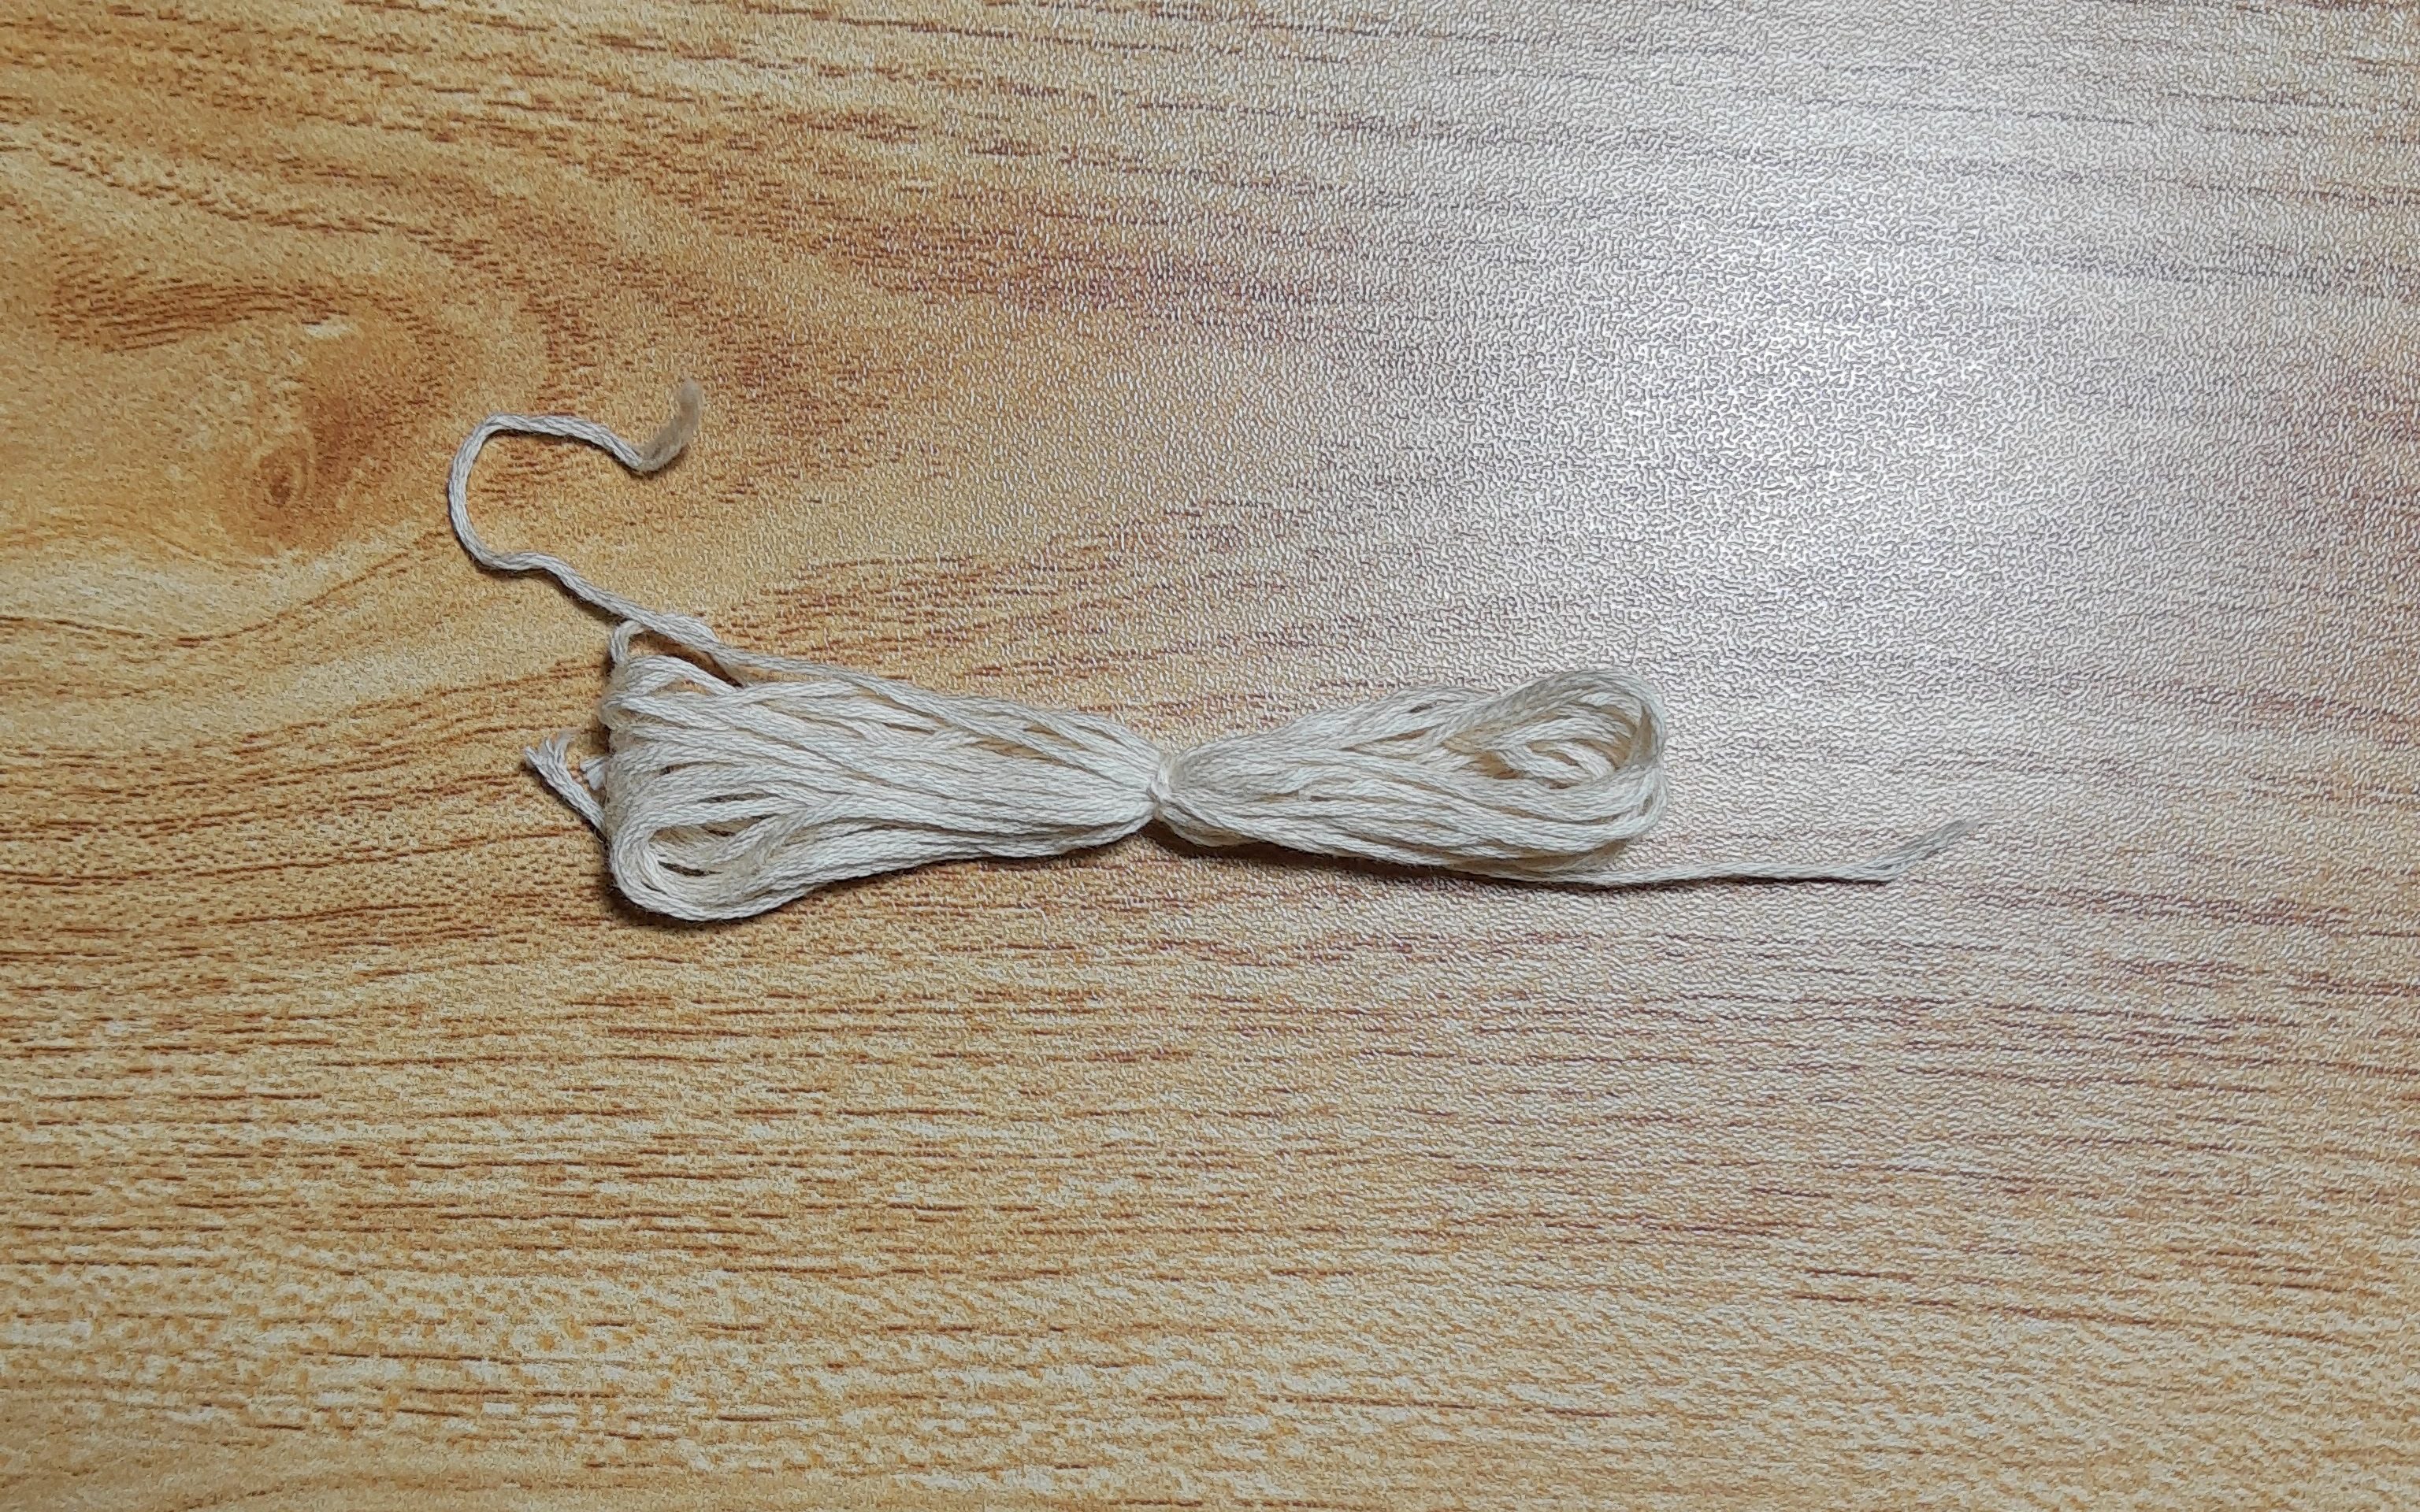
Using your neutral colored tassel embroidery thread, wrap it around your hand or a piece of cardboard. The inner arc strings should measure 10.5cm in length. Wrap around your hand/cardboard 20 times (so you have a total of 40 strings).
Tie a knot in the center of your thread bundle.
Measure 1.9cm away from the center and begin wrapping the thread. As you wrap, shape the thread so it becomes an arc shape. Wrap the thread until you have wrapped about 3.8cm of the thread. Tie off the thread at the end. Leave a long string at the end.
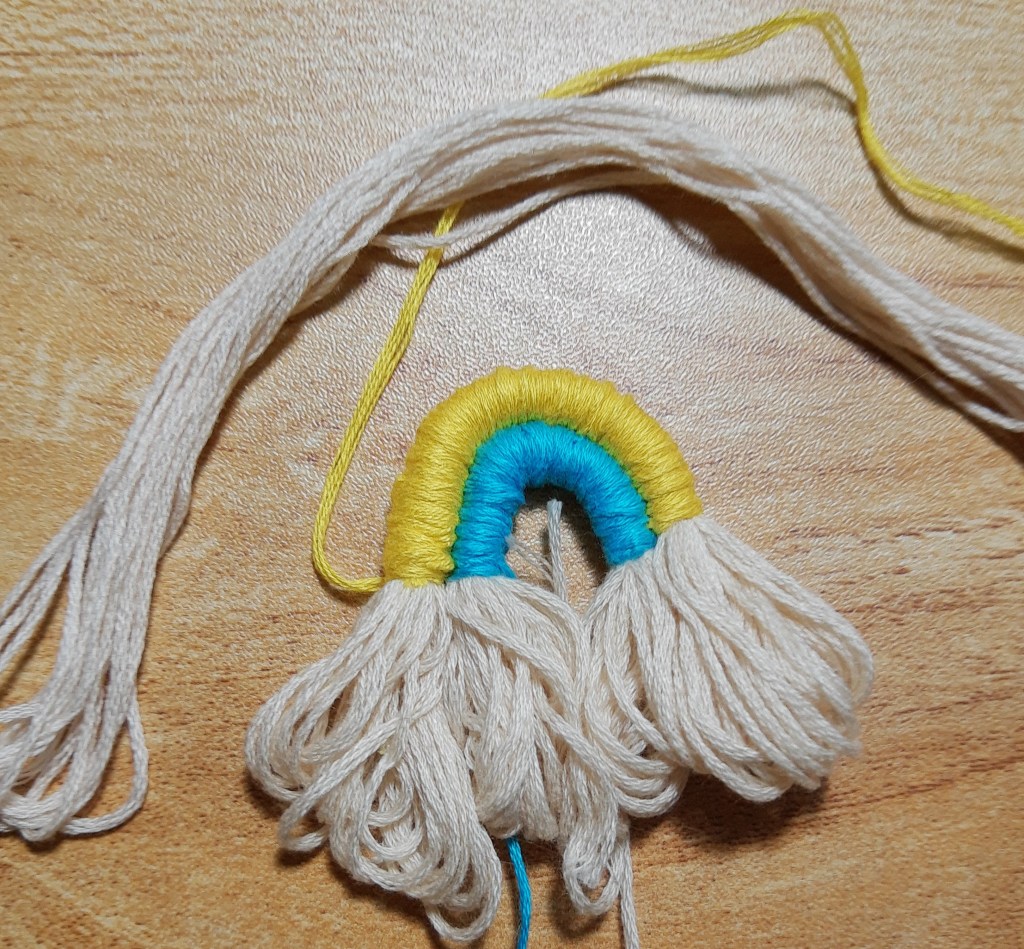
MIDDLE ARC:
Prepare your neutral/tassel thread by wrapping it around your hand/cardboard. This thread will measure about 14cm. Wrap the thread 20 times (so you have a total of 40 strings).
Starting with the extra string from the previous row, tie a knot at the beginning of the second row.
Sew and wrap the next color around each previous row until you get to the end. Knot it off and tie to secure. Leave an extra piece of longer thread at the end to secure it to the next row.
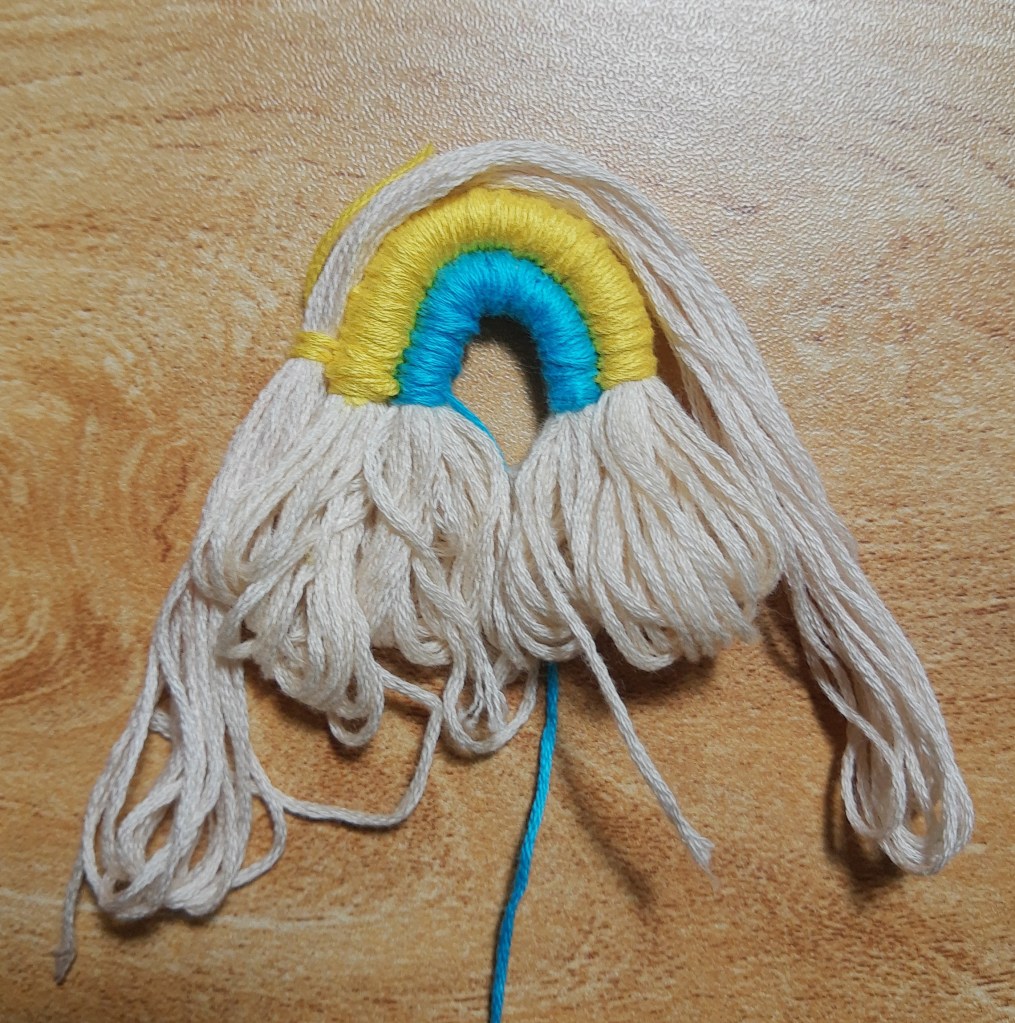
TOP ARC:
Prepare your neutral/tassel thread by wrapping it around your hand/cardboard. This thread will measure about 16cm. Wrap the thread 8 times (so you have a total of 16 strings).
Repeat the same process as the middle arc. When you get to the middle, loop on a jump ring and secure it by wrapping around a few times. Attach the earring hook to the jump ring.
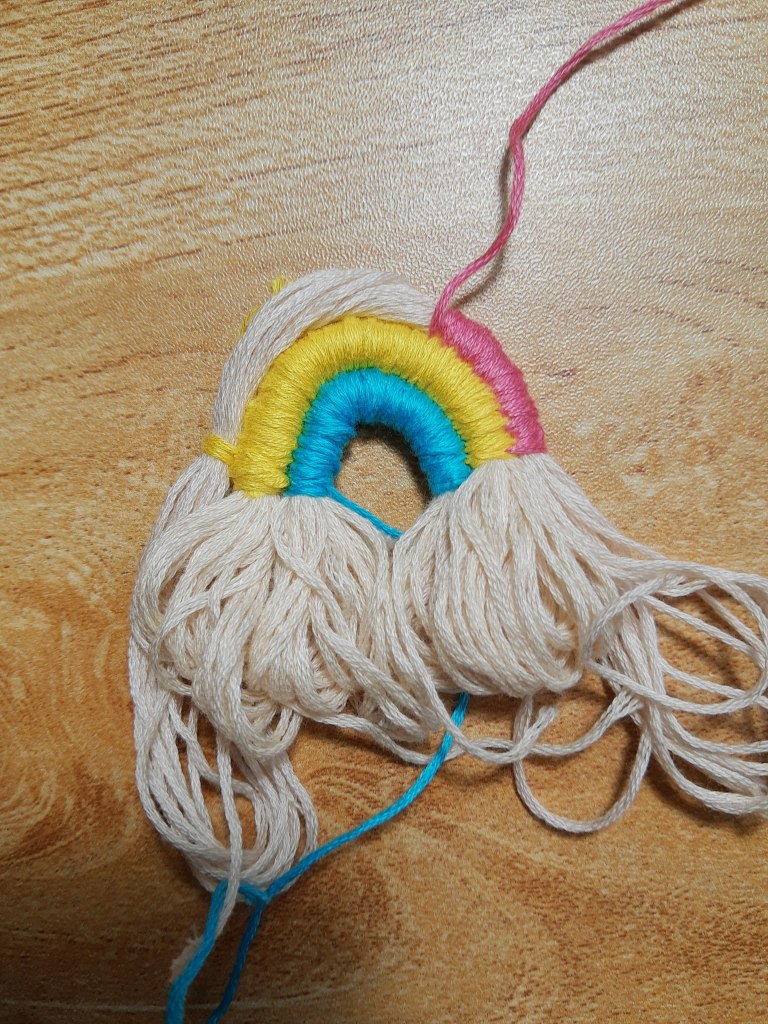
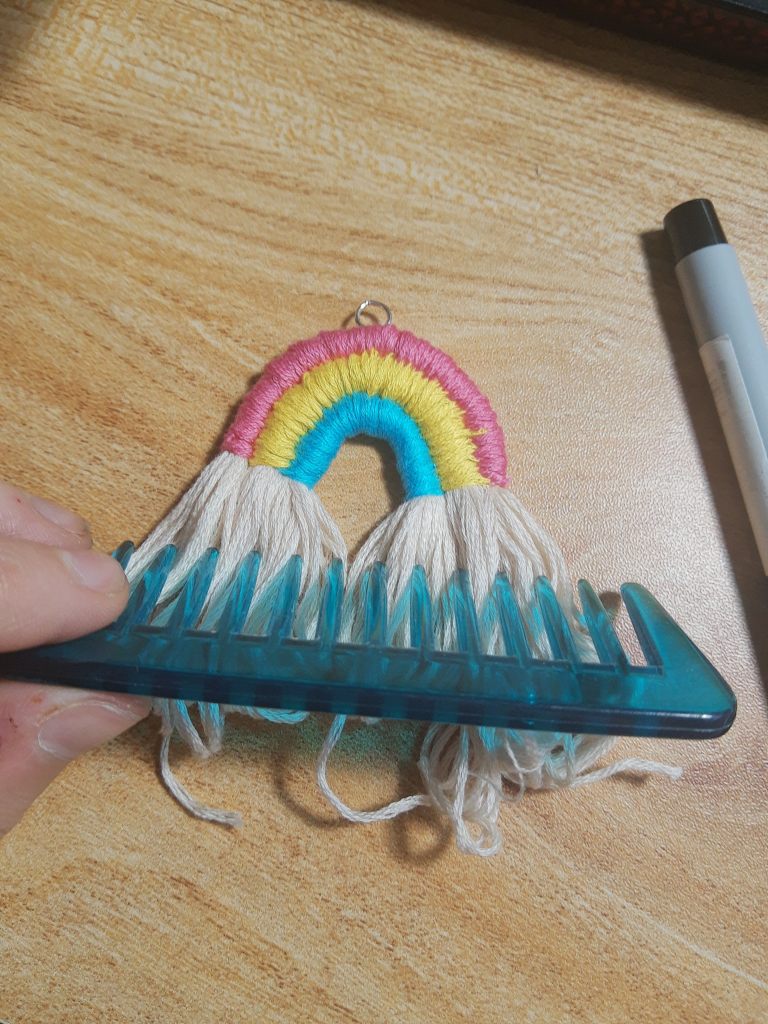
TRIMMING THE TASSELS:
Cut the loops off of the tassels. Brush the tassels so they are even and neat. Trim the tassels so they are the same length.
TA DA!! The finished earrings. I am so happy with how they turned out!