DIY Rainbow Tassel Earrings

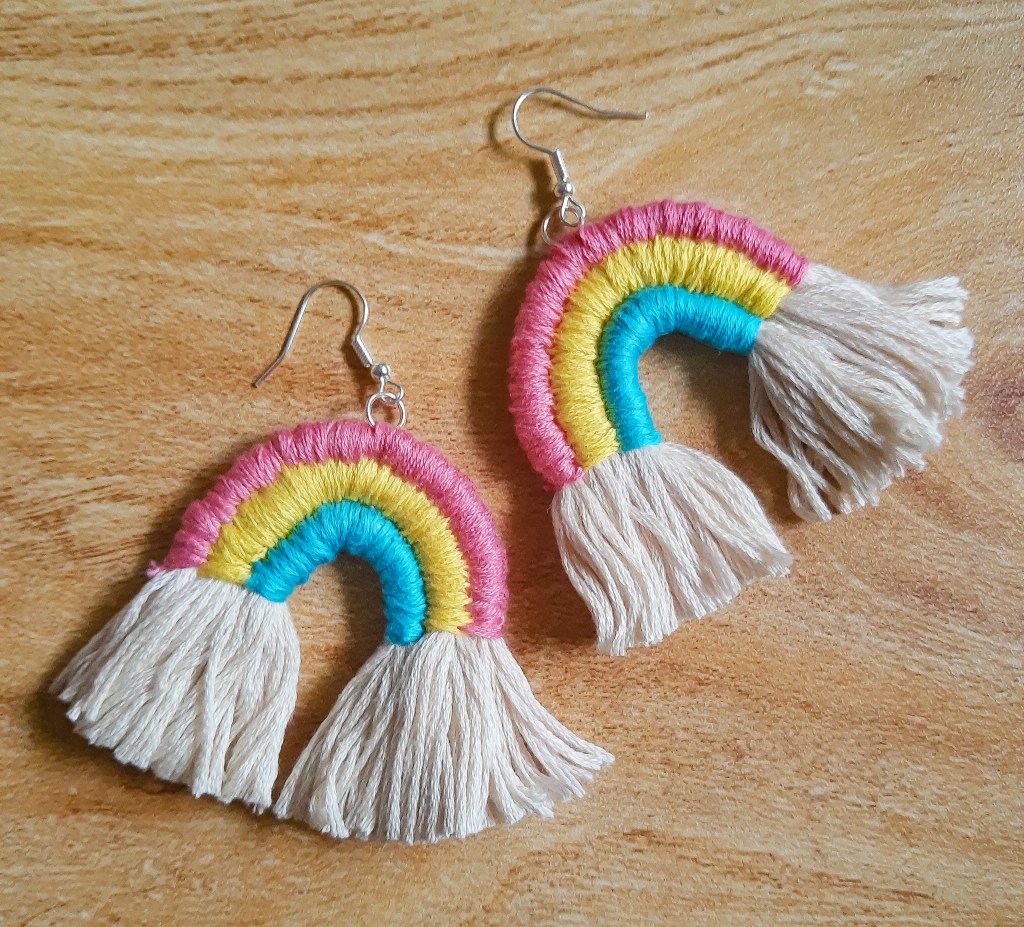
I found a pair of earrings I really liked from Amazon, so I decided to try to make them on my own, since I already had a ton of embroidery thread laying around. They are actually very simple to create.

My earrings:

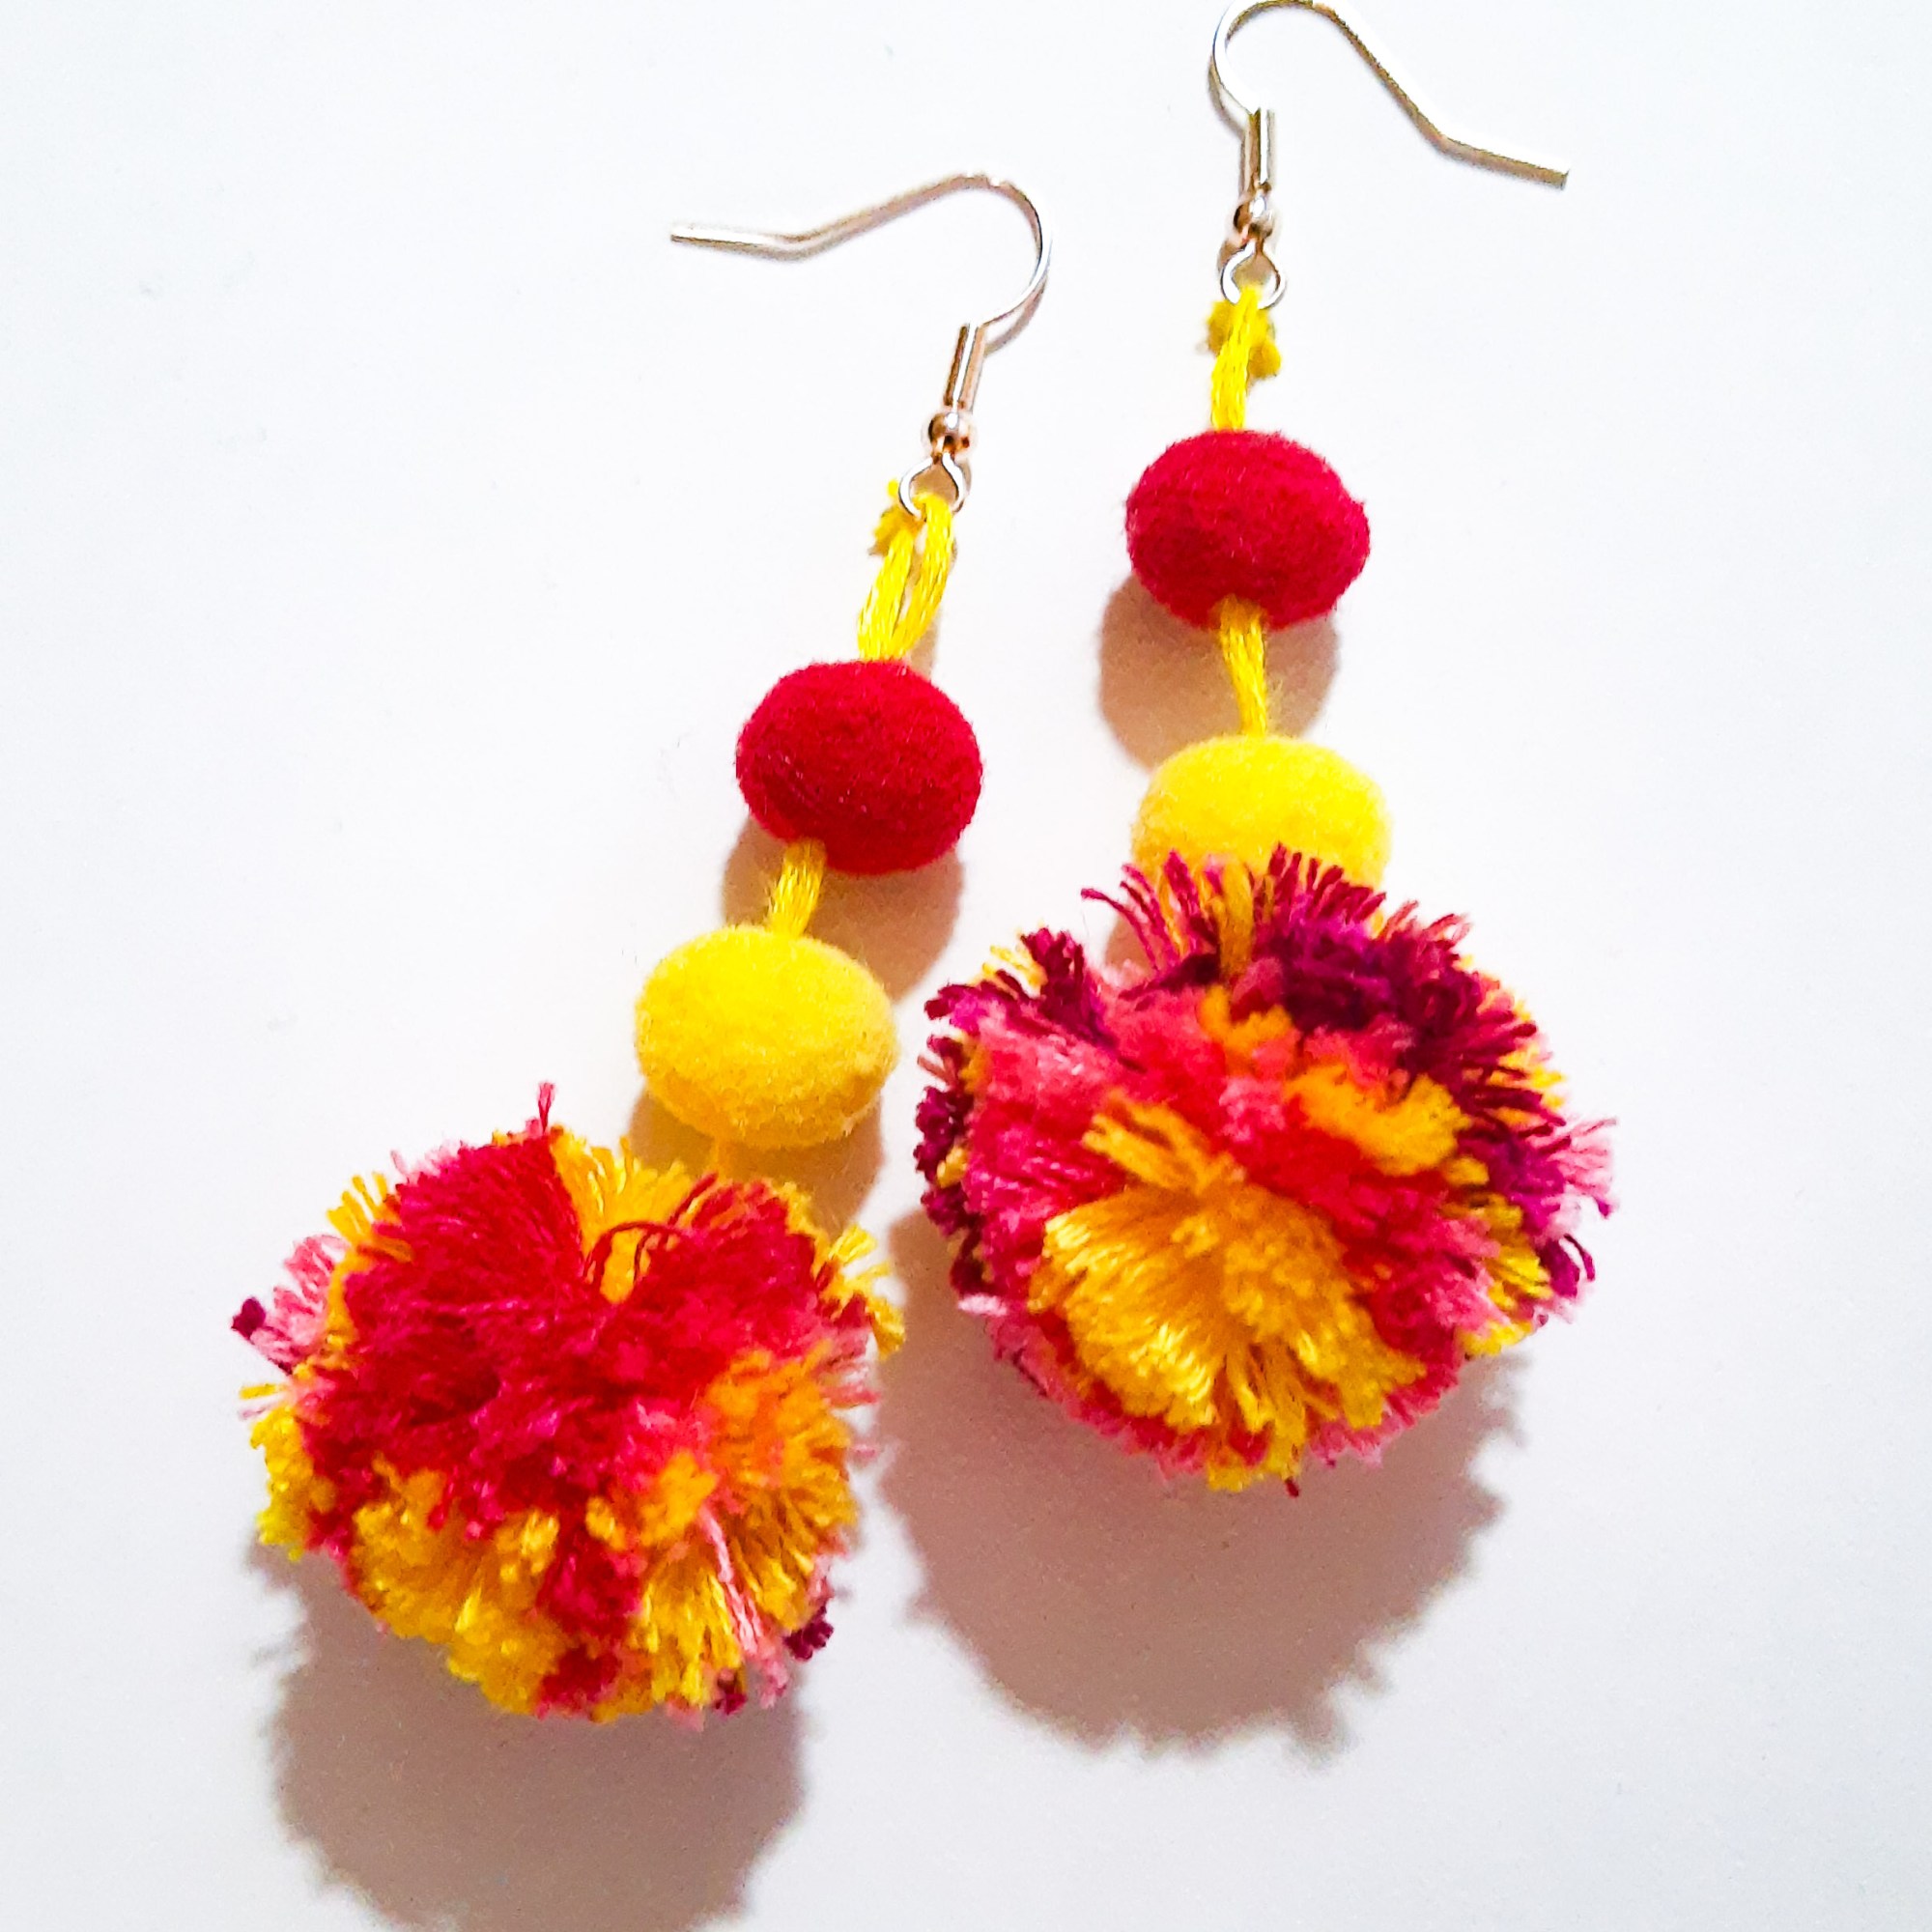
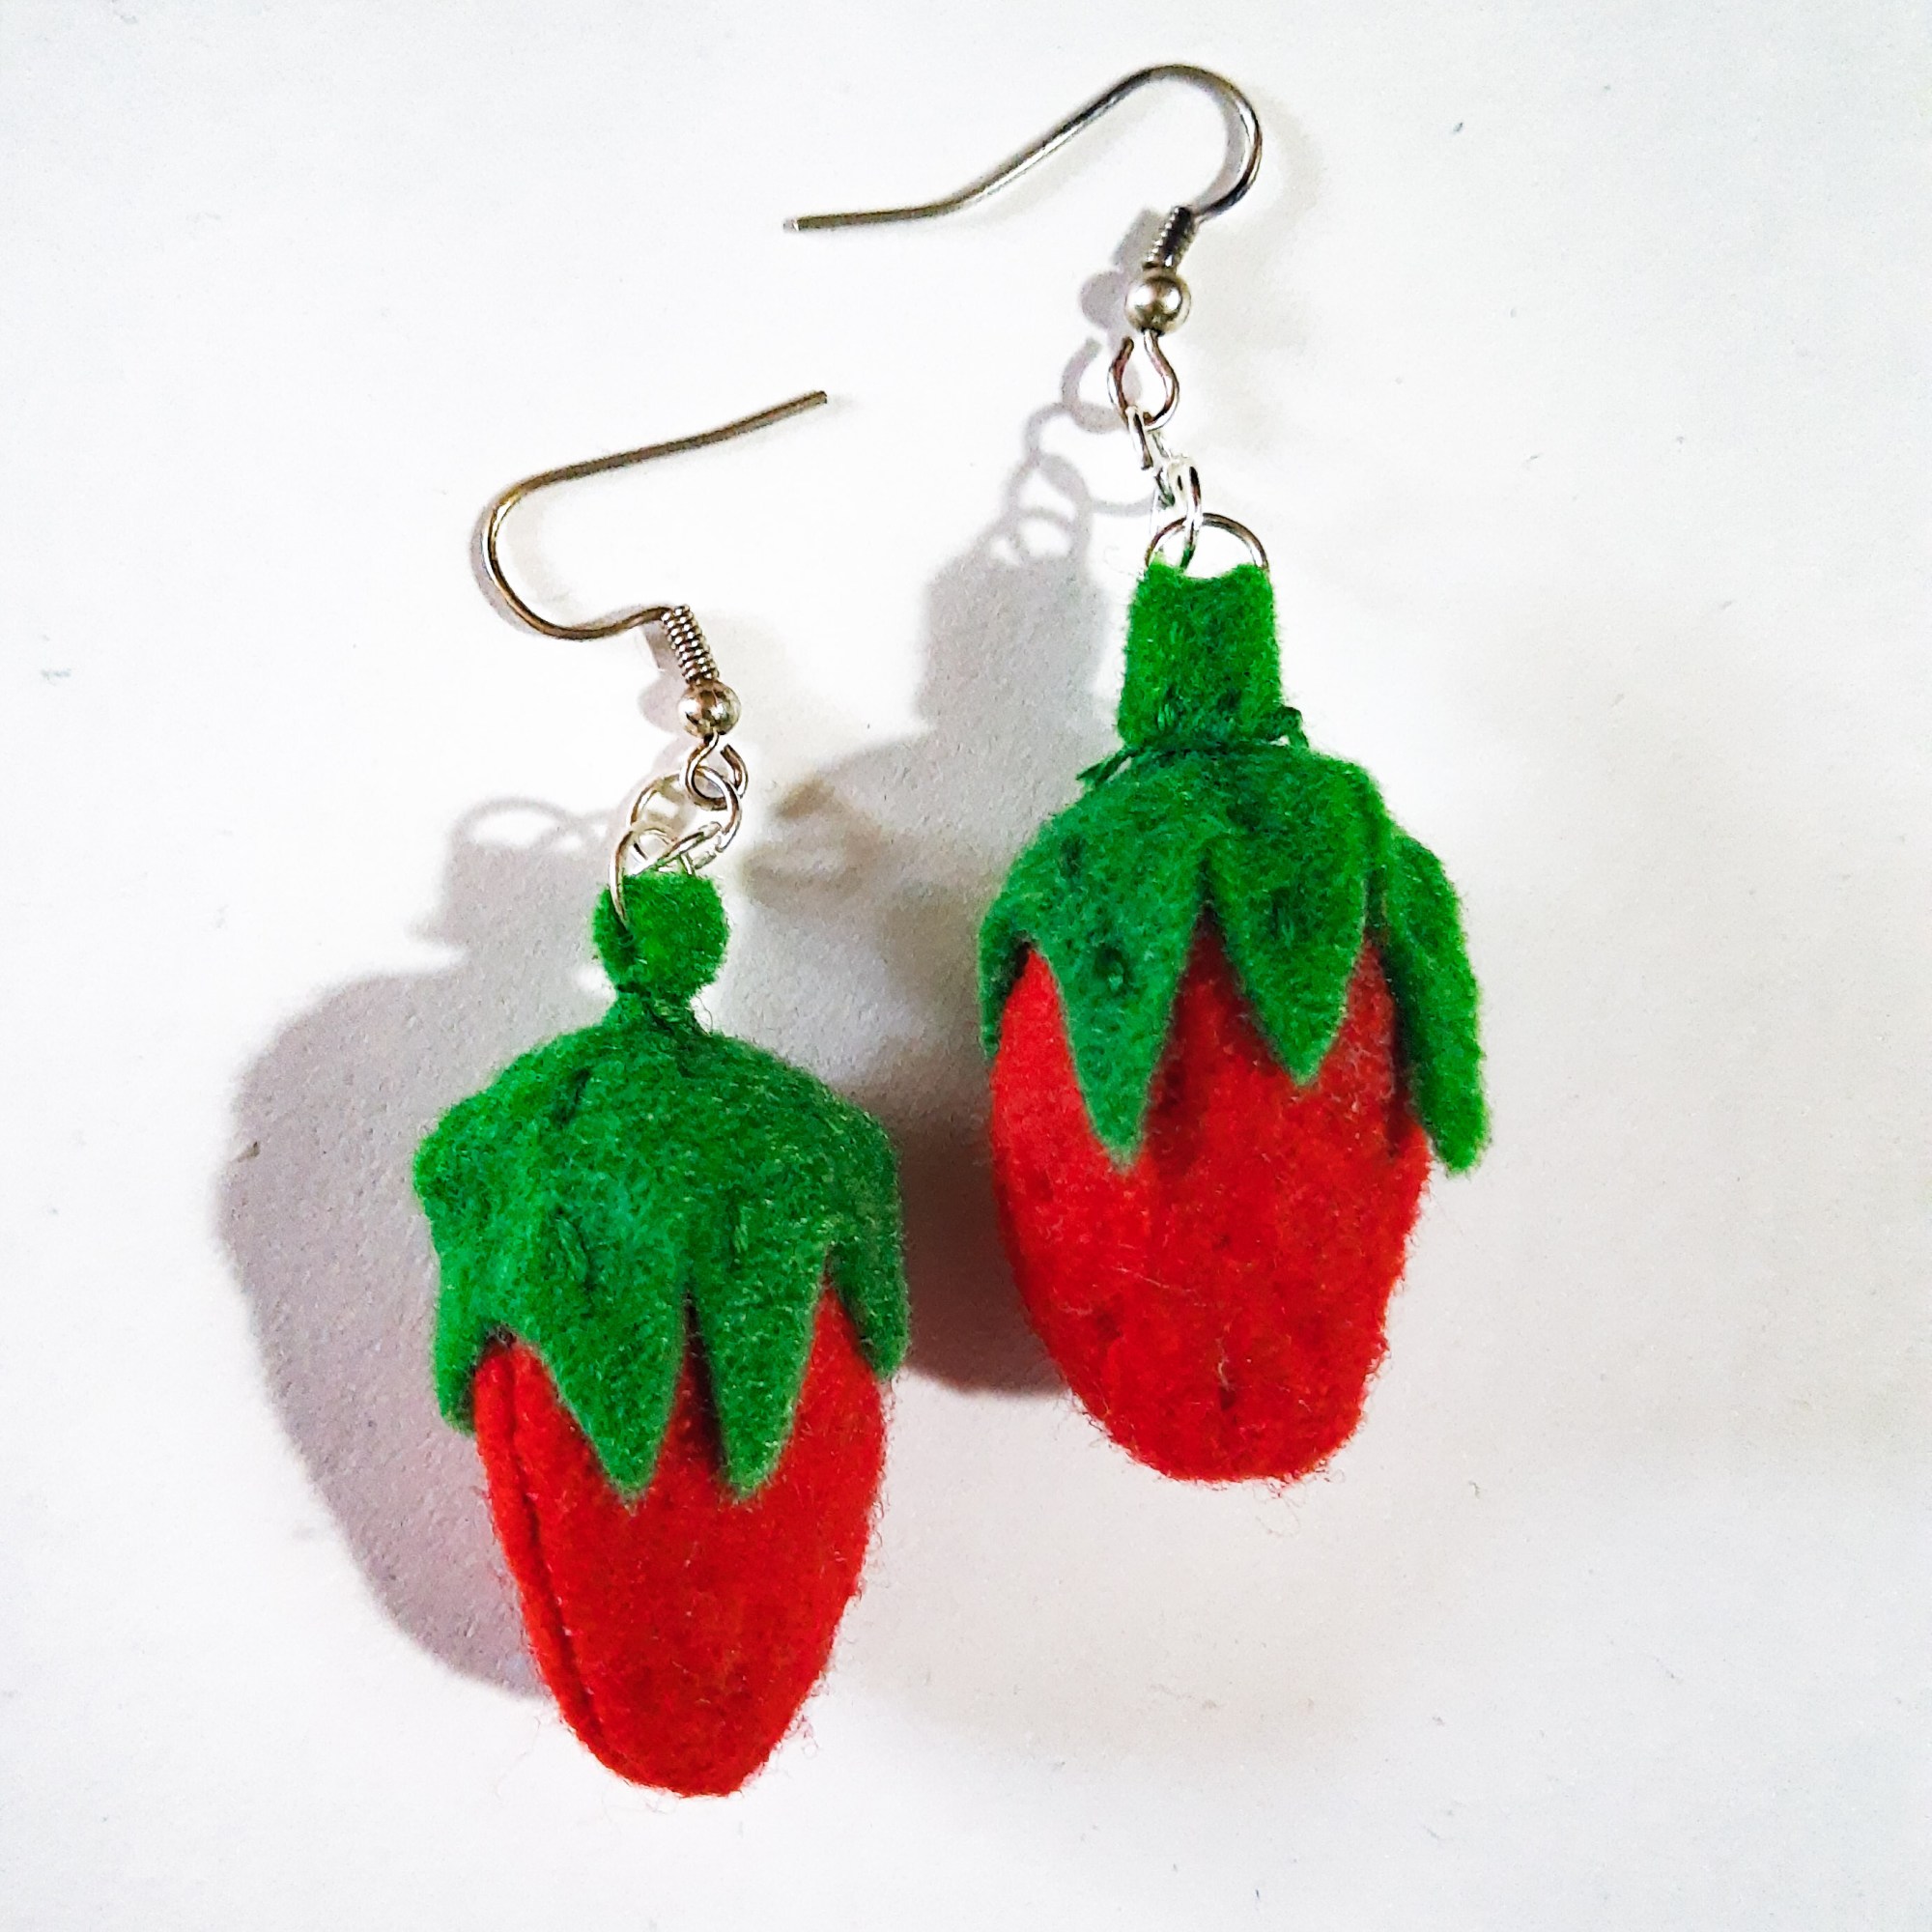
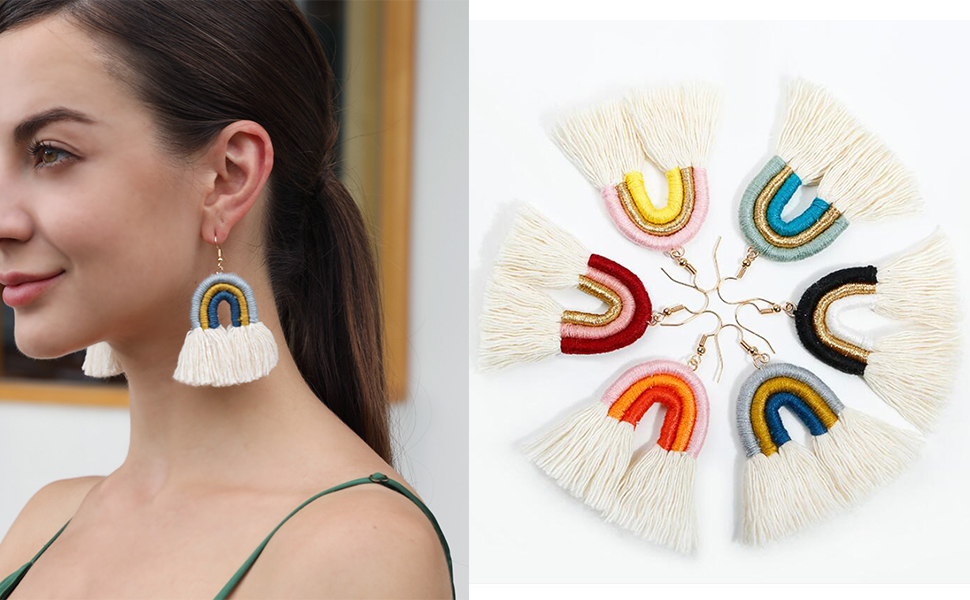
The original earrings from Amazon:

How I Made My Earrings:

Materials:

  • embroidery thread (one neutral color & 3 colors for each arc of the rainbow)
  • jump rings
  • earring hooks
  • scissors
  • embroidery needle

Process:

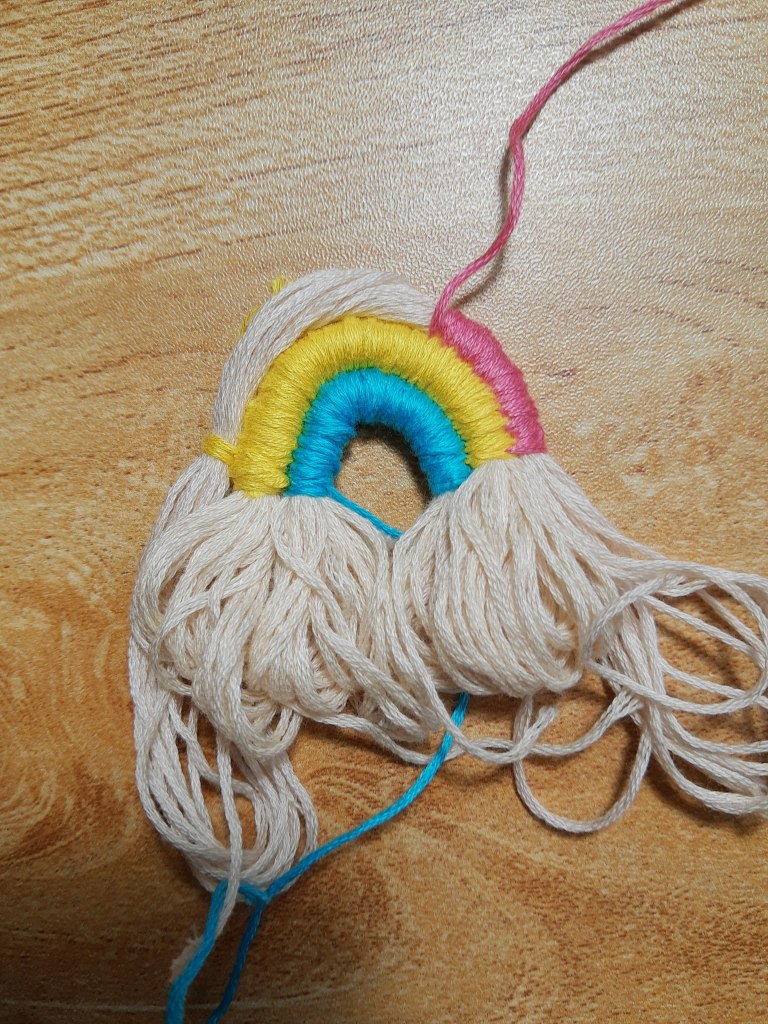
Start with the INNER ARC:

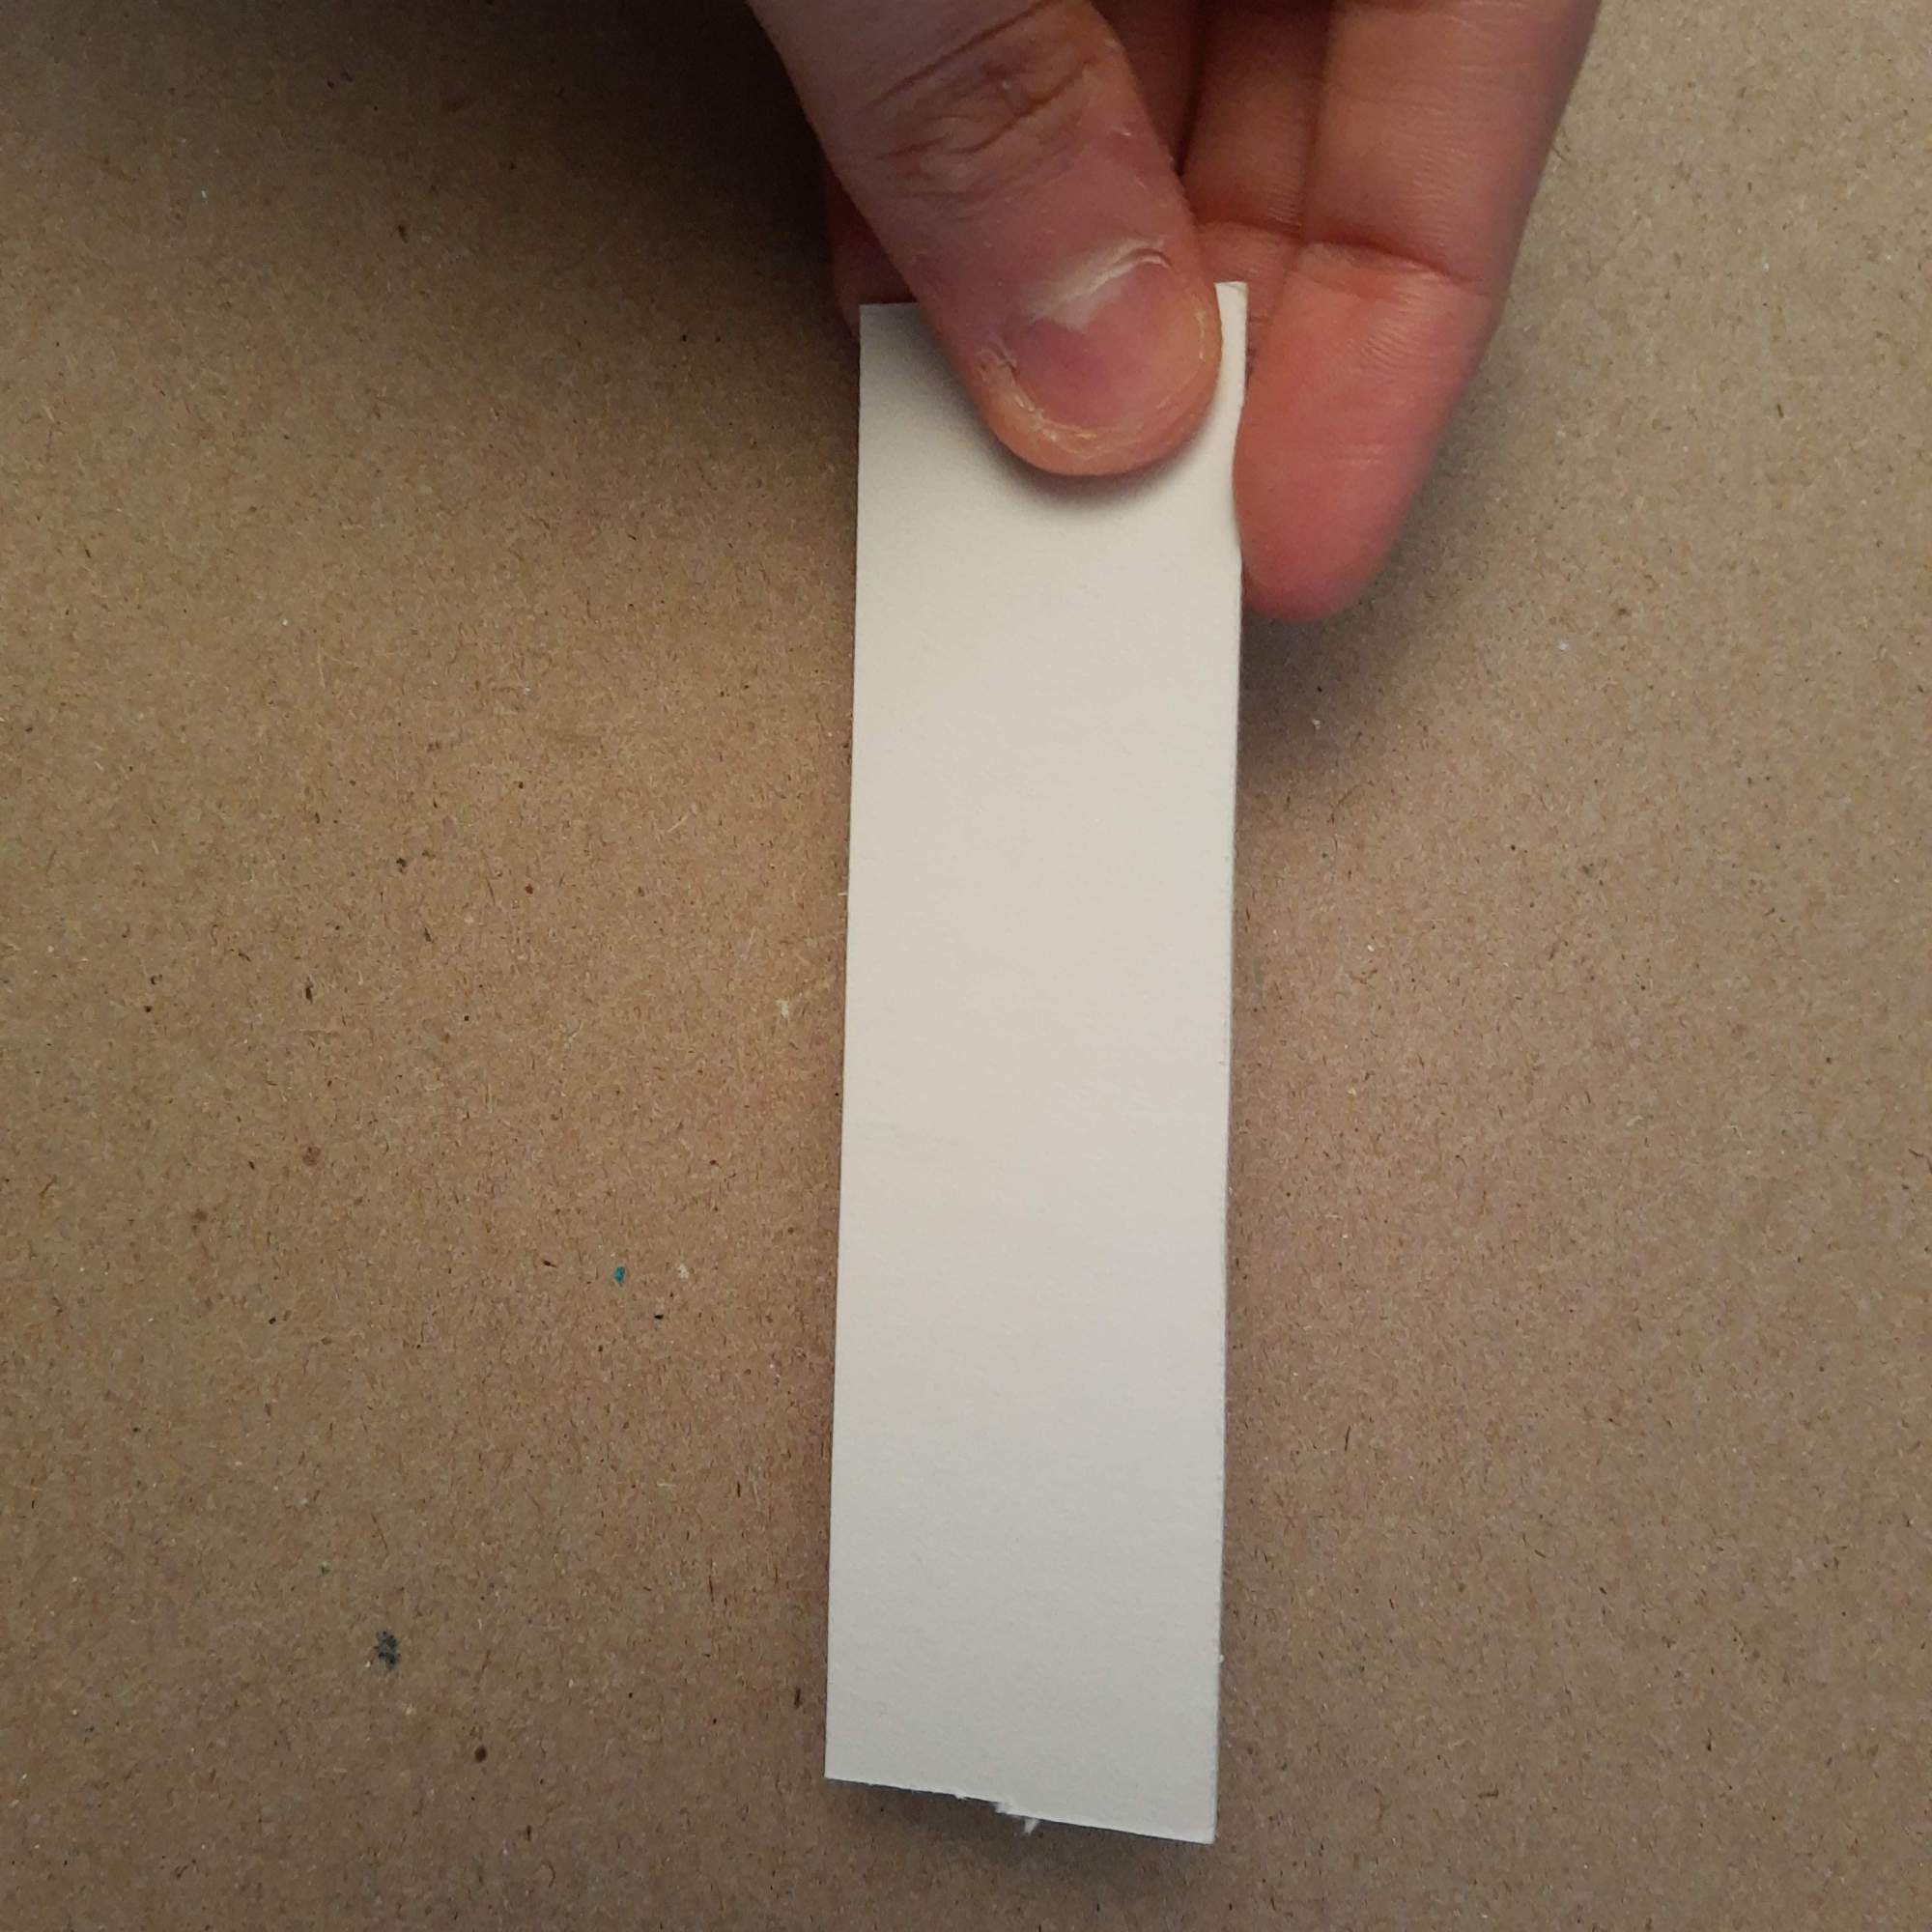
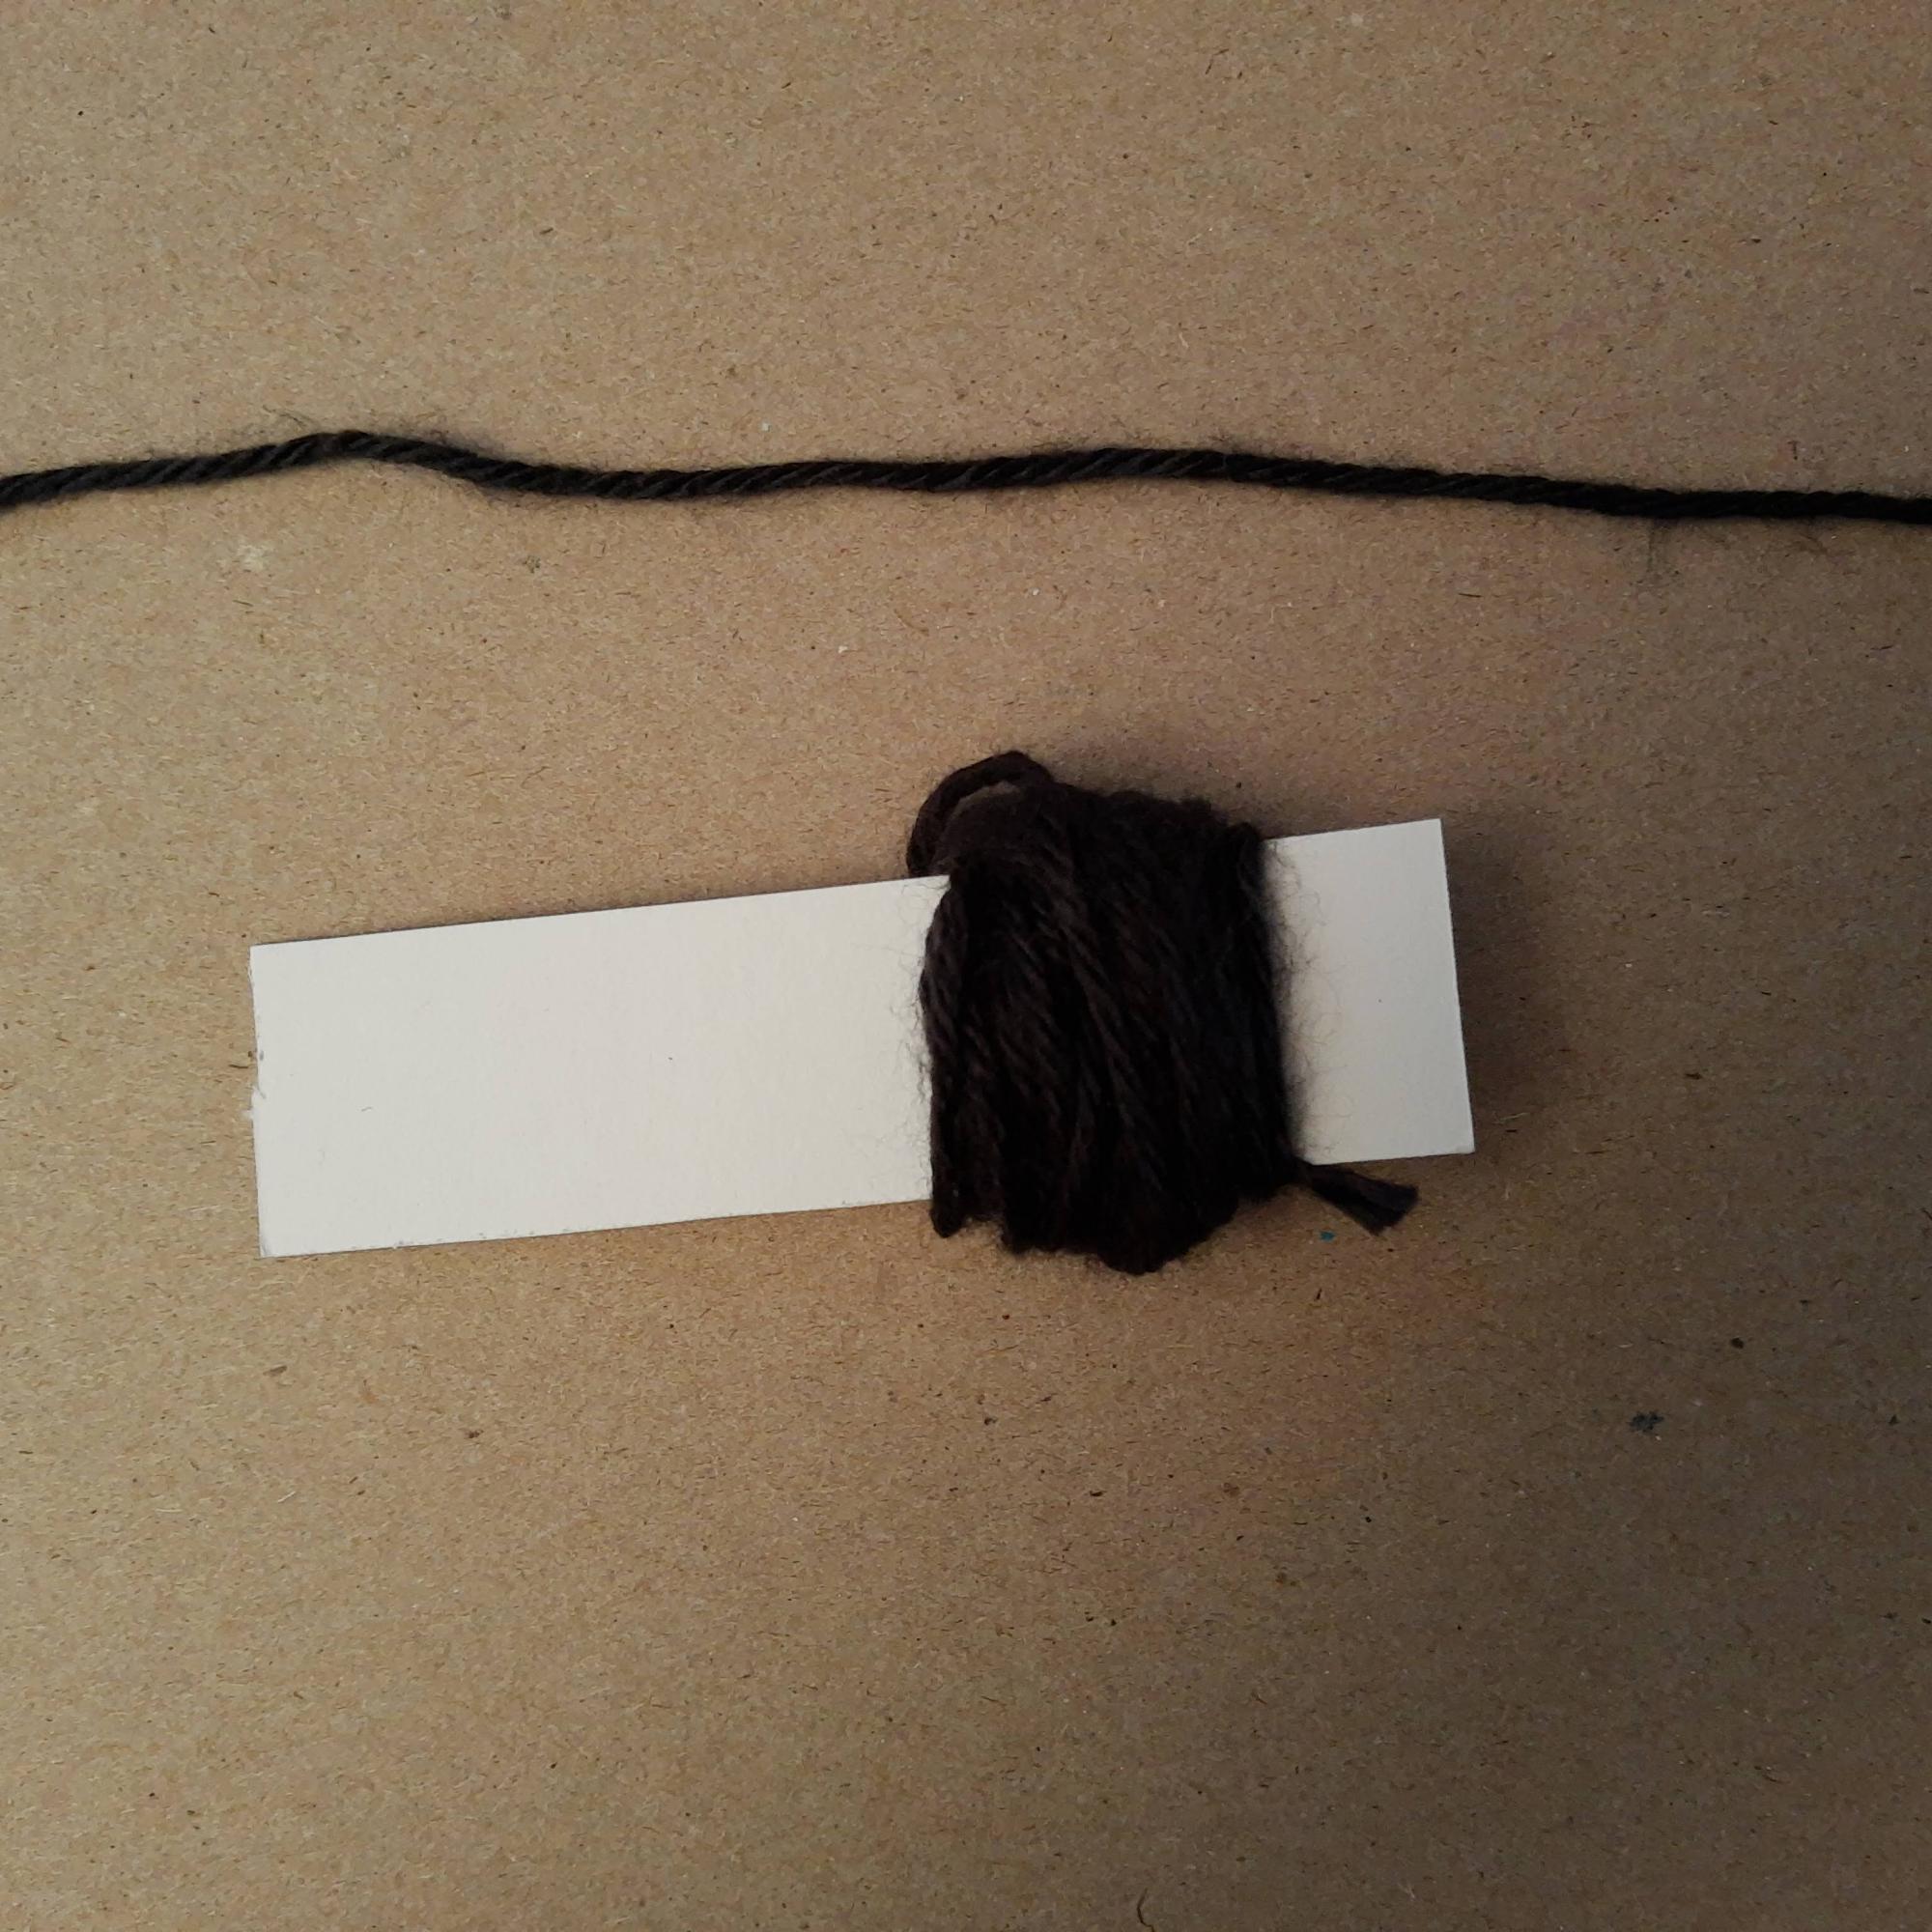
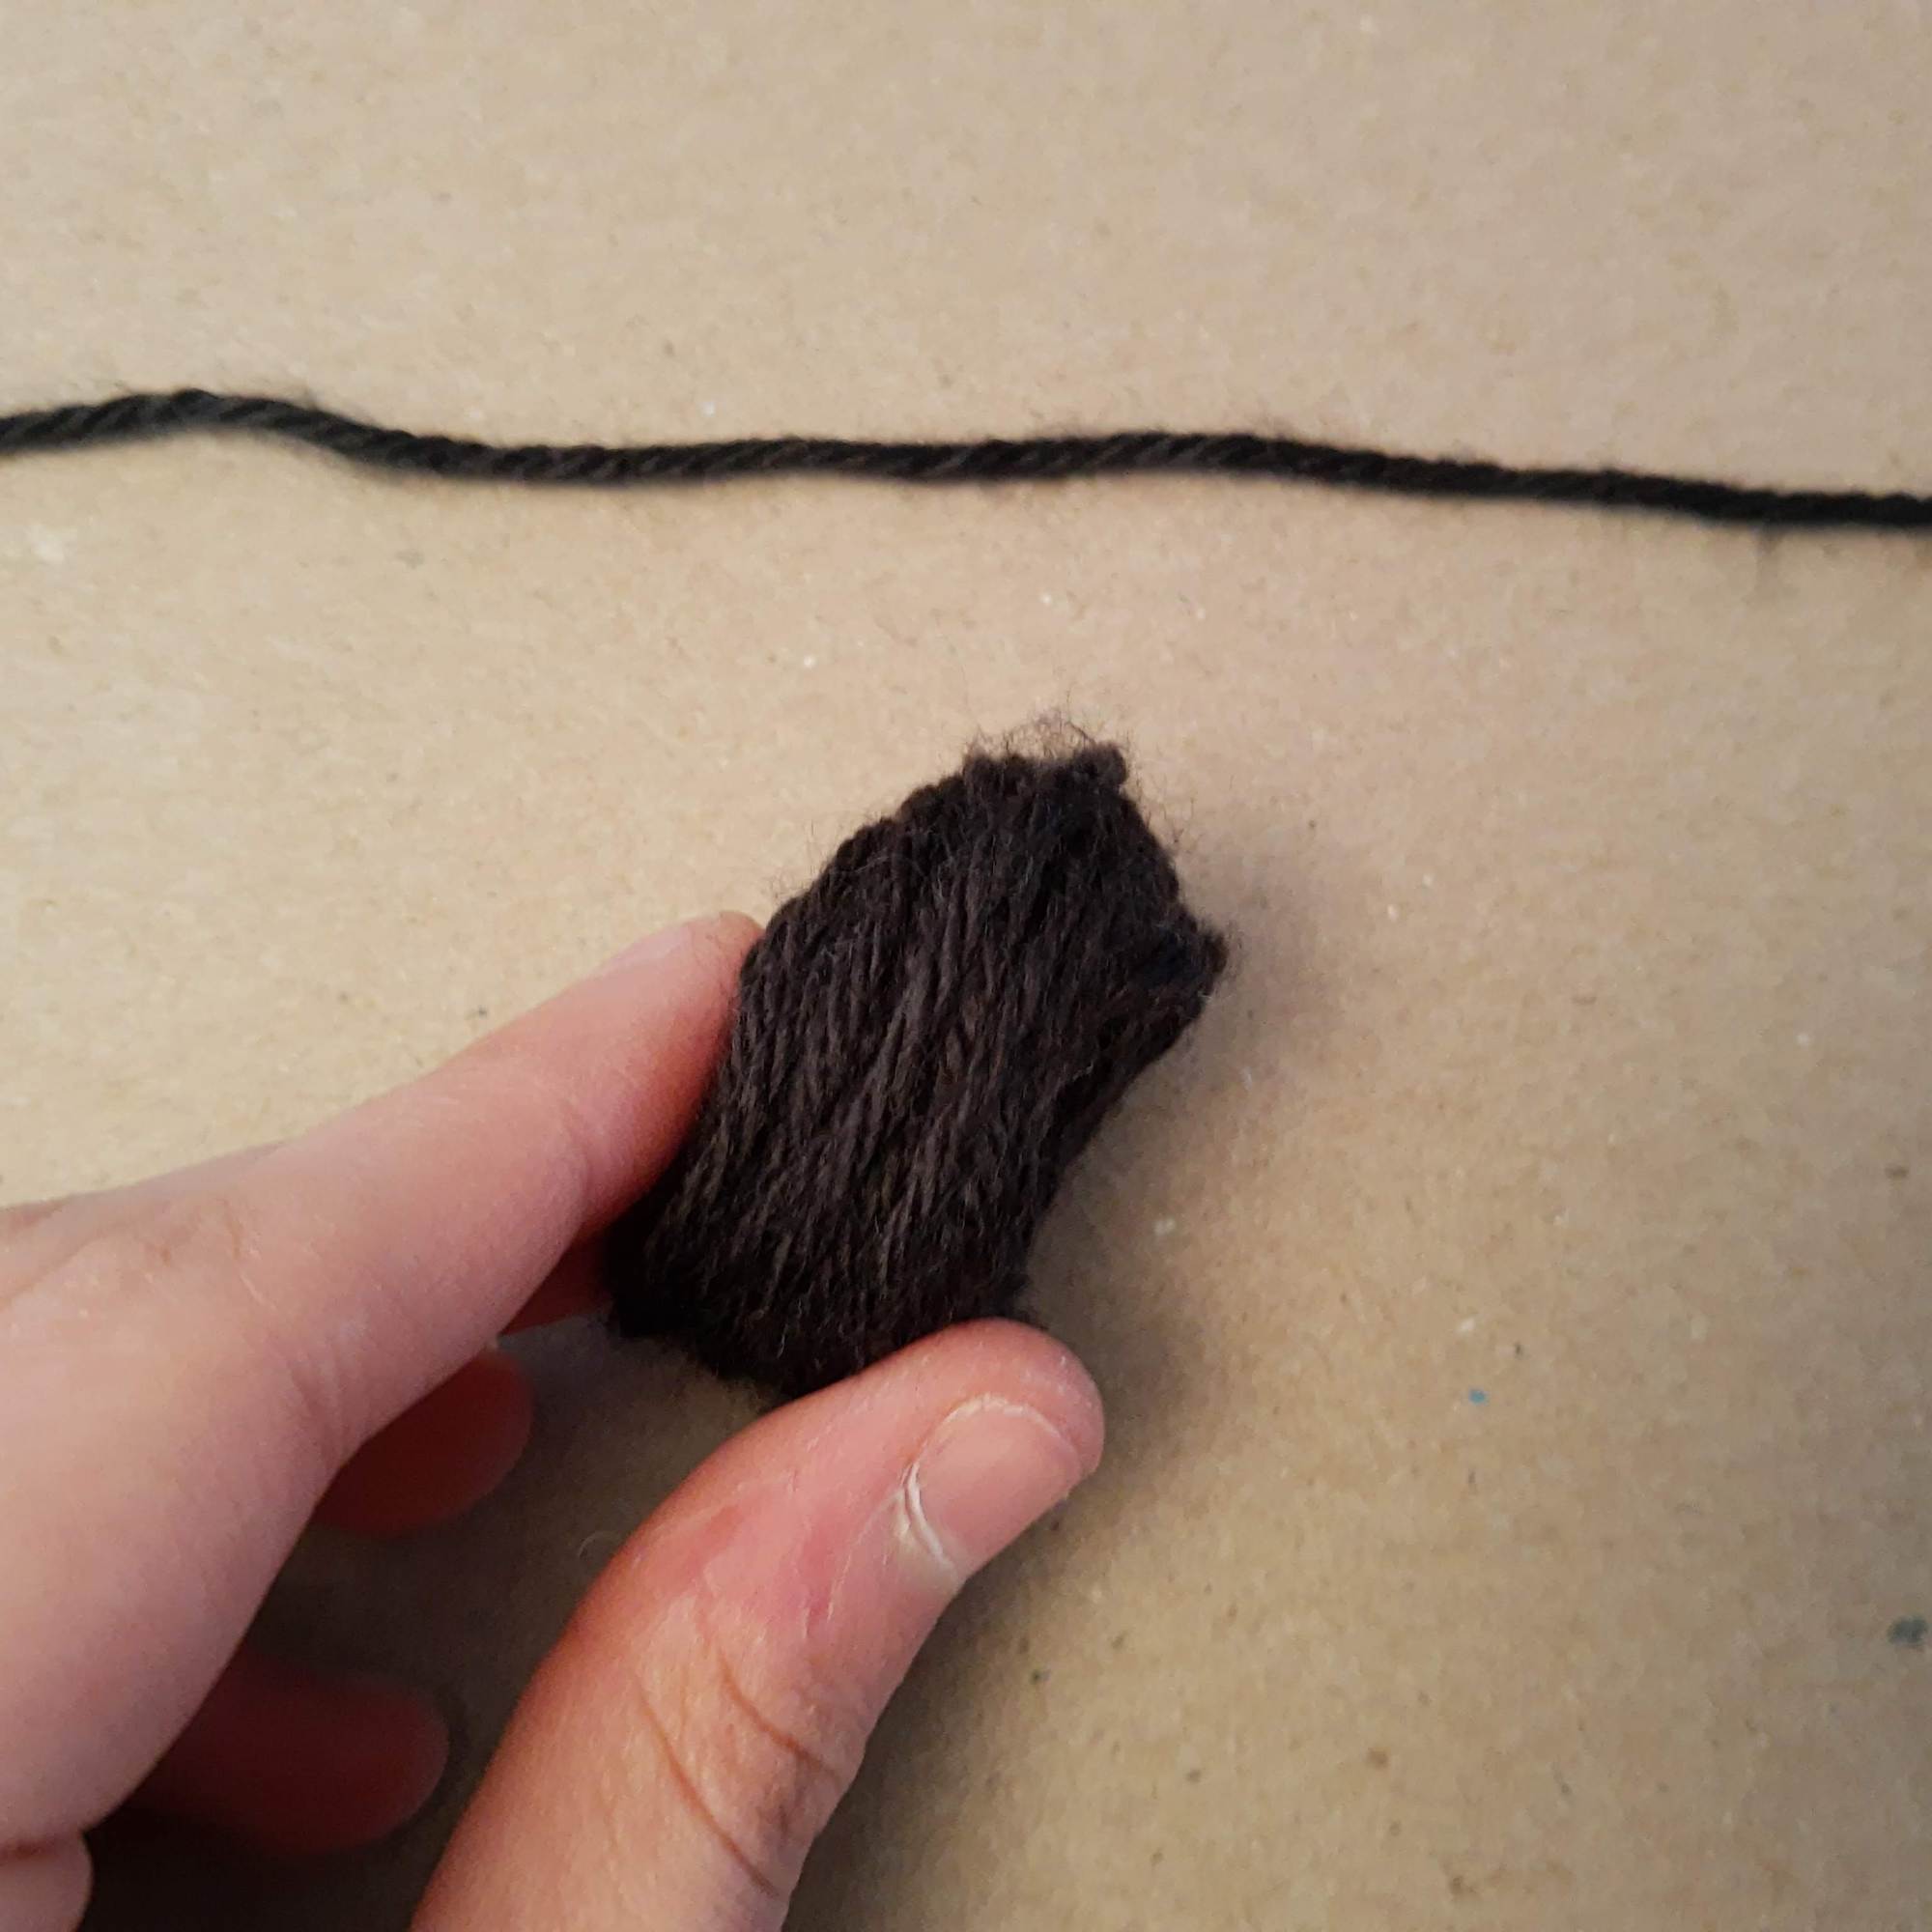
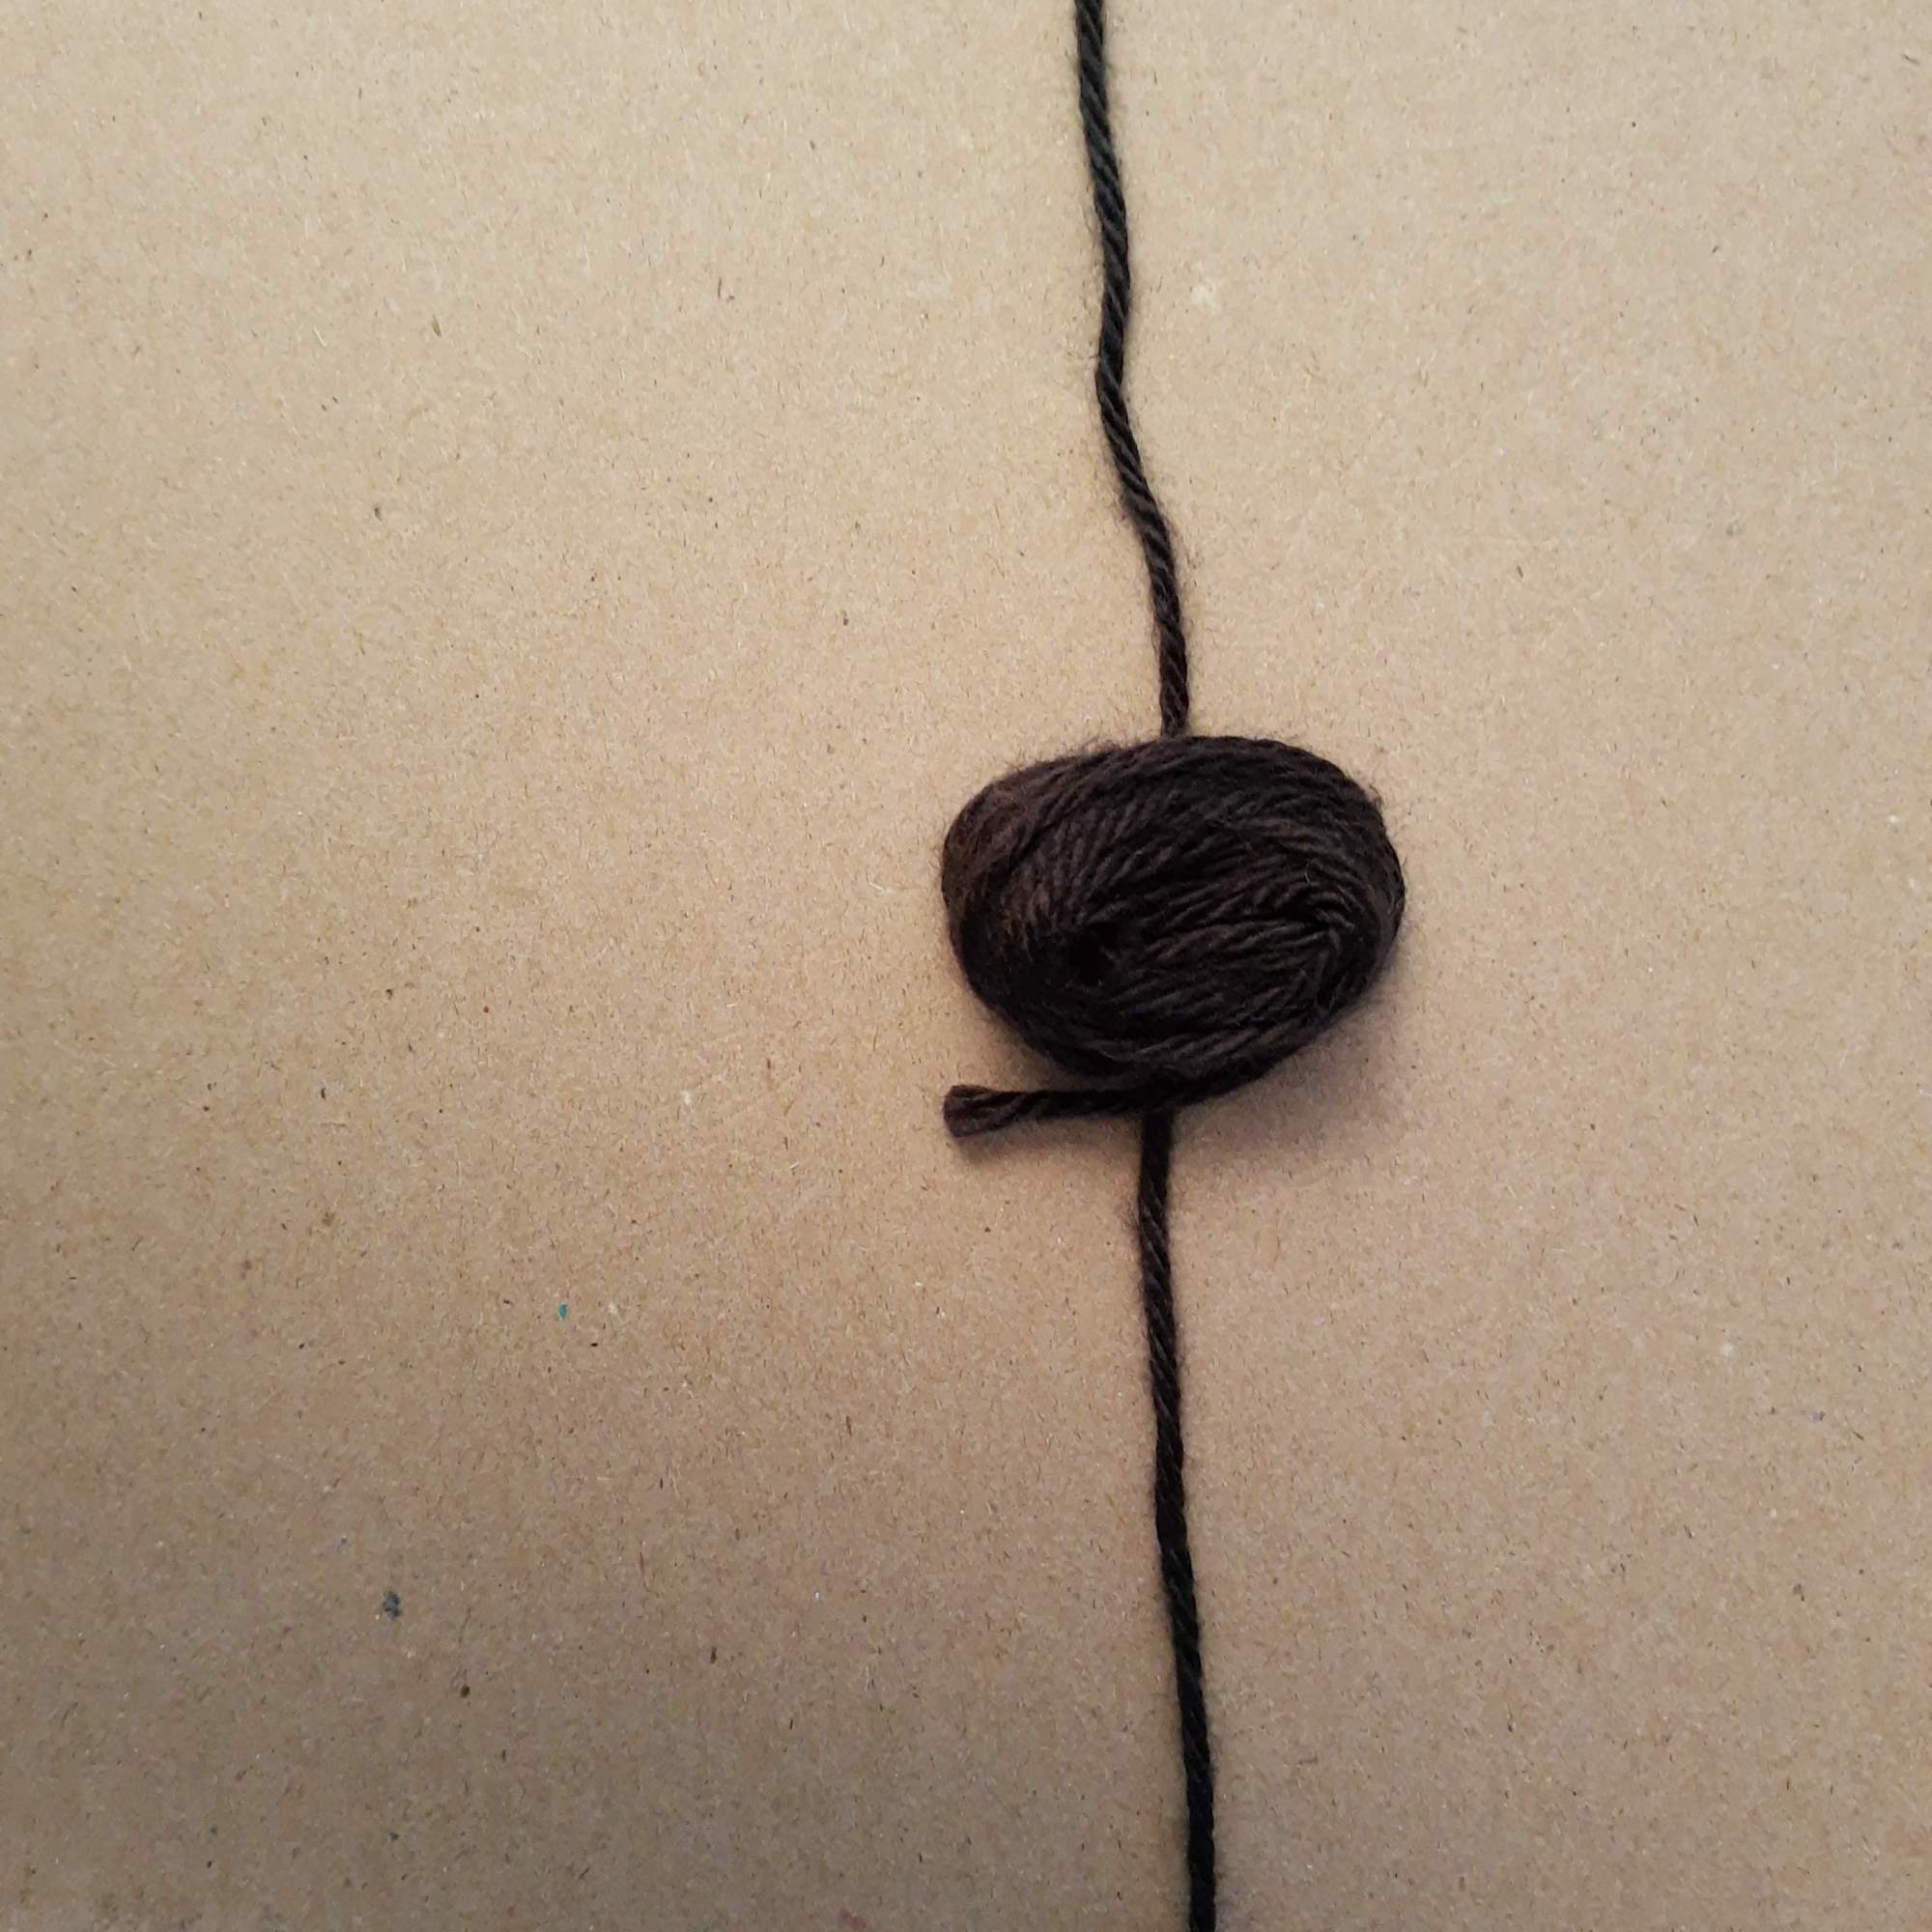
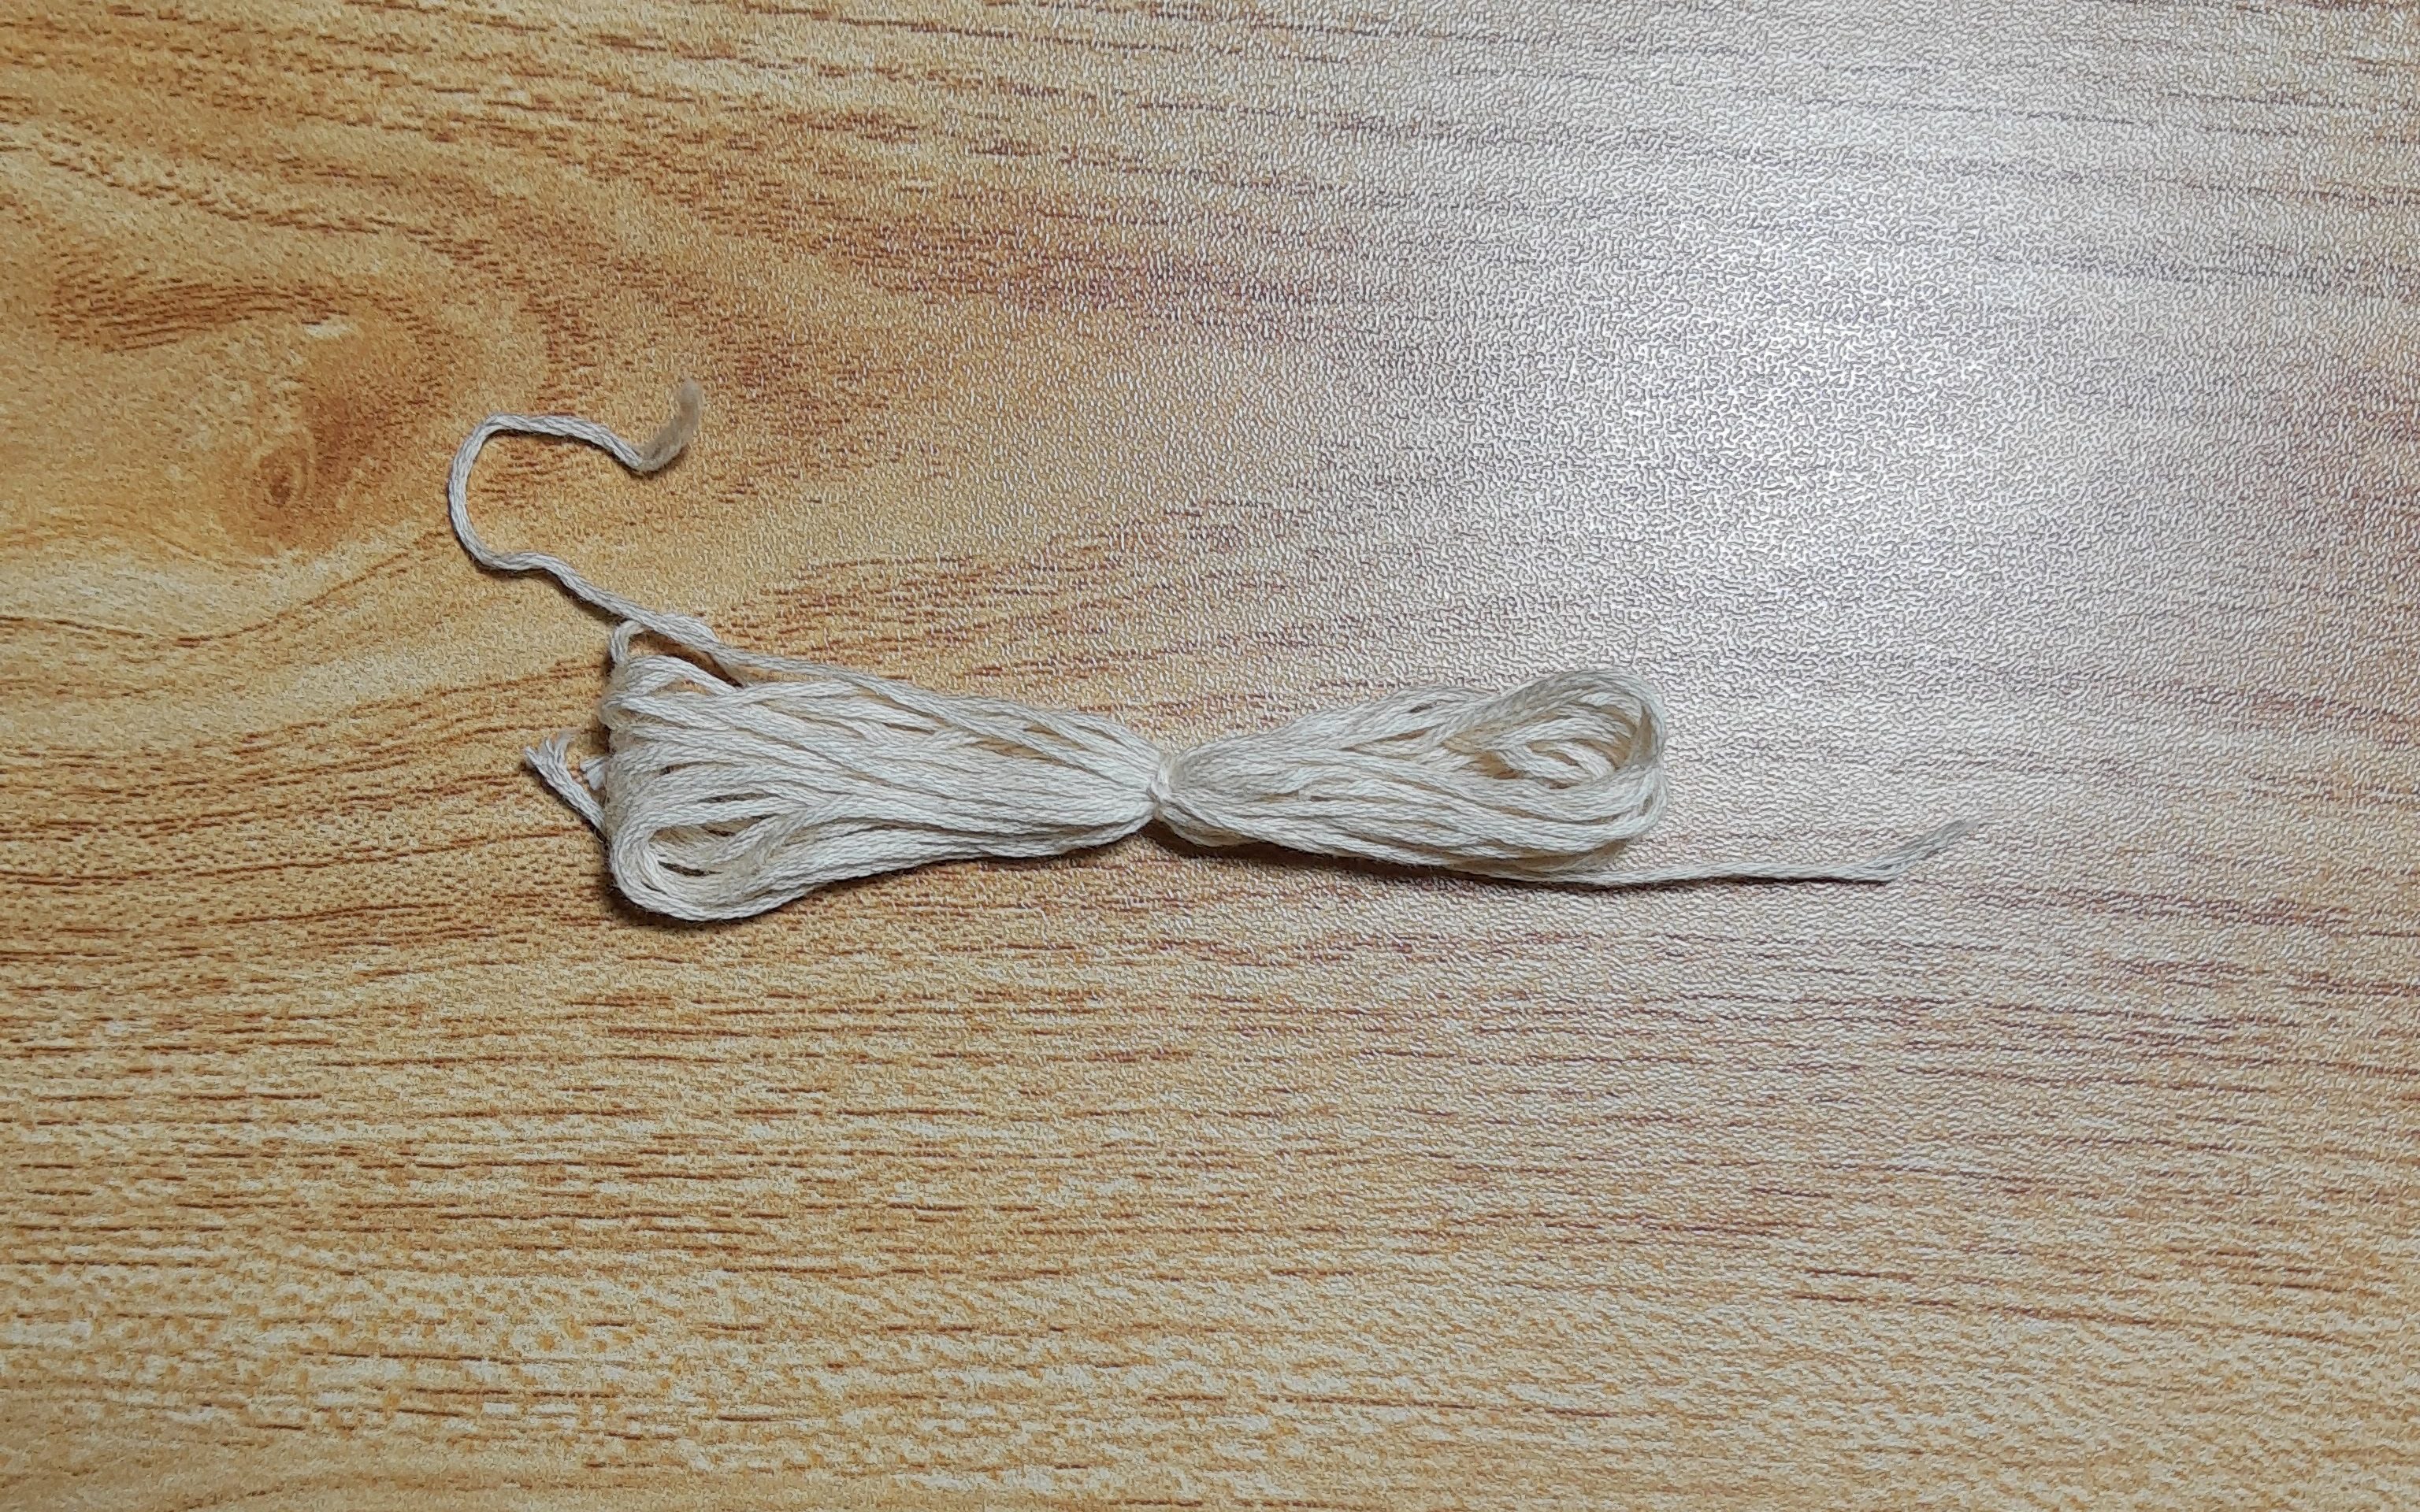
Using your neutral colored tassel embroidery thread, wrap it around your hand or a piece of cardboard. The inner arc strings should measure 10.5cm in length. Wrap around your hand/cardboard 20 times (so you have a total of 40 strings).

Tie a knot in the center of your thread bundle.

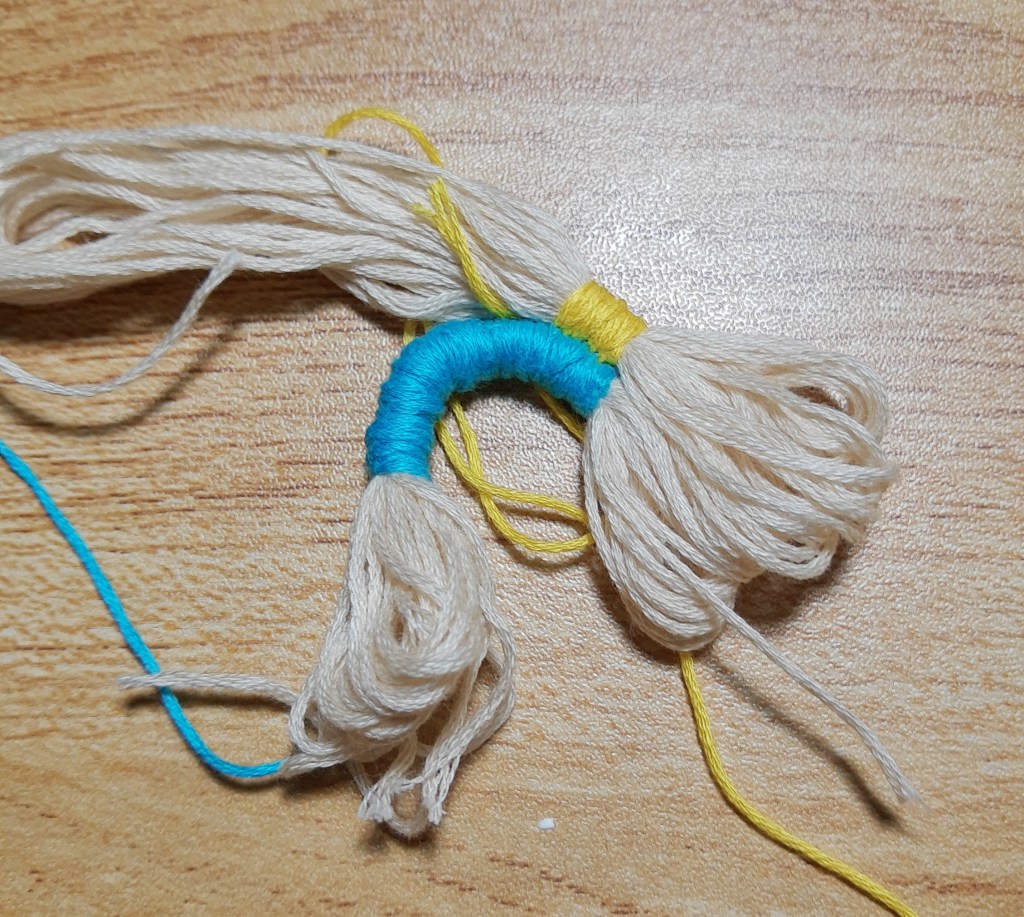
Measure 1.9cm away from the center and begin wrapping the thread. As you wrap, shape the thread so it becomes an arc shape. Wrap the thread until you have wrapped about 3.8cm of the thread. Tie off the thread at the end. Leave a long string at the end.

MIDDLE ARC:

Prepare your neutral/tassel thread by wrapping it around your hand/cardboard. This thread will measure about 14cm. Wrap the thread 20 times (so you have a total of 40 strings).

Starting with the extra string from the previous row, tie a knot at the beginning of the second row.

Sew and wrap the next color around each previous row until you get to the end. Knot it off and tie to secure. Leave an extra piece of longer thread at the end to secure it to the next row.

TOP ARC:

Prepare your neutral/tassel thread by wrapping it around your hand/cardboard. This thread will measure about 16cm. Wrap the thread 8 times (so you have a total of 16 strings).

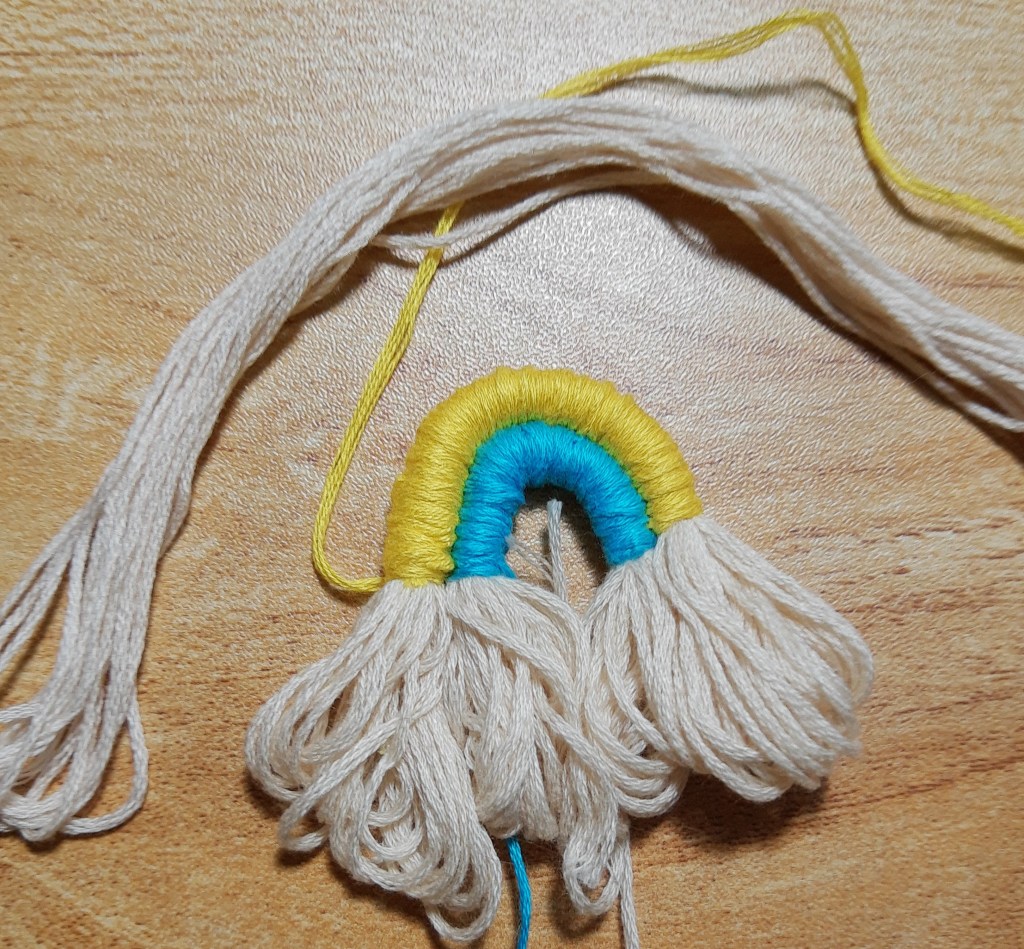
Repeat the same process as the middle arc. When you get to the middle, loop on a jump ring and secure it by wrapping around a few times. Attach the earring hook to the jump ring.

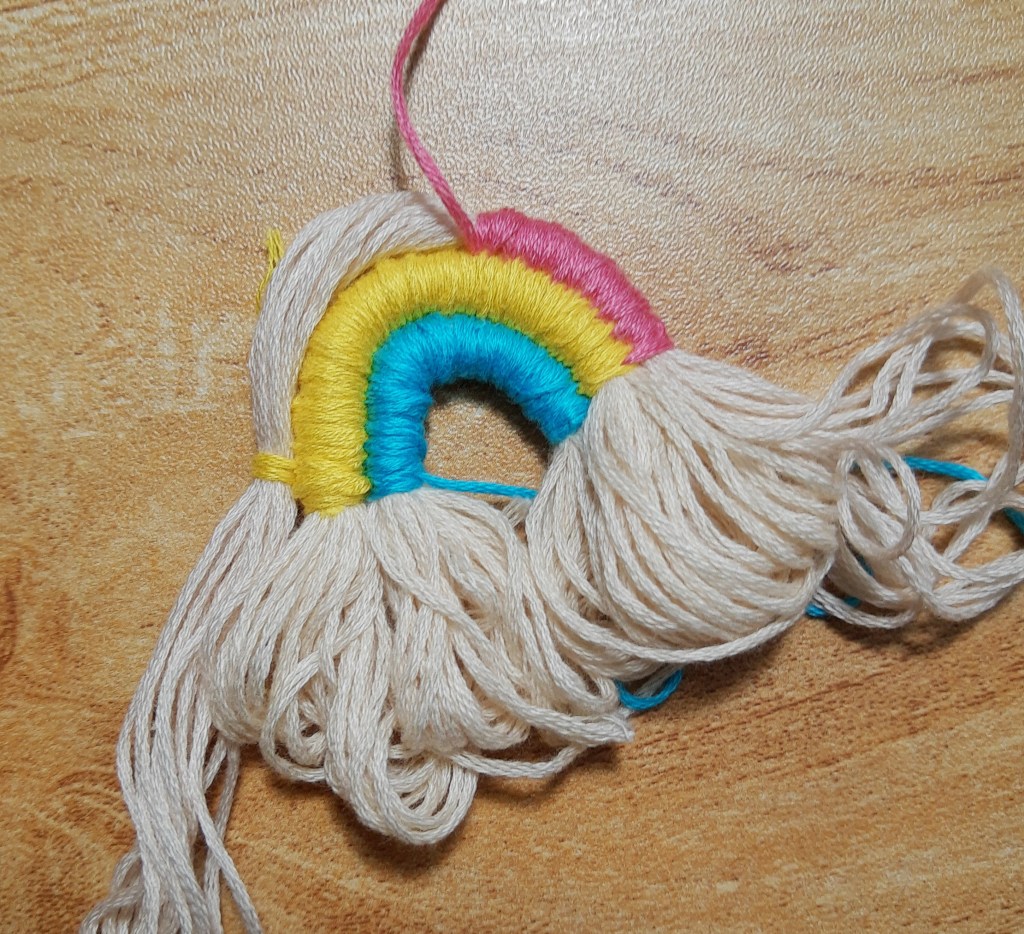
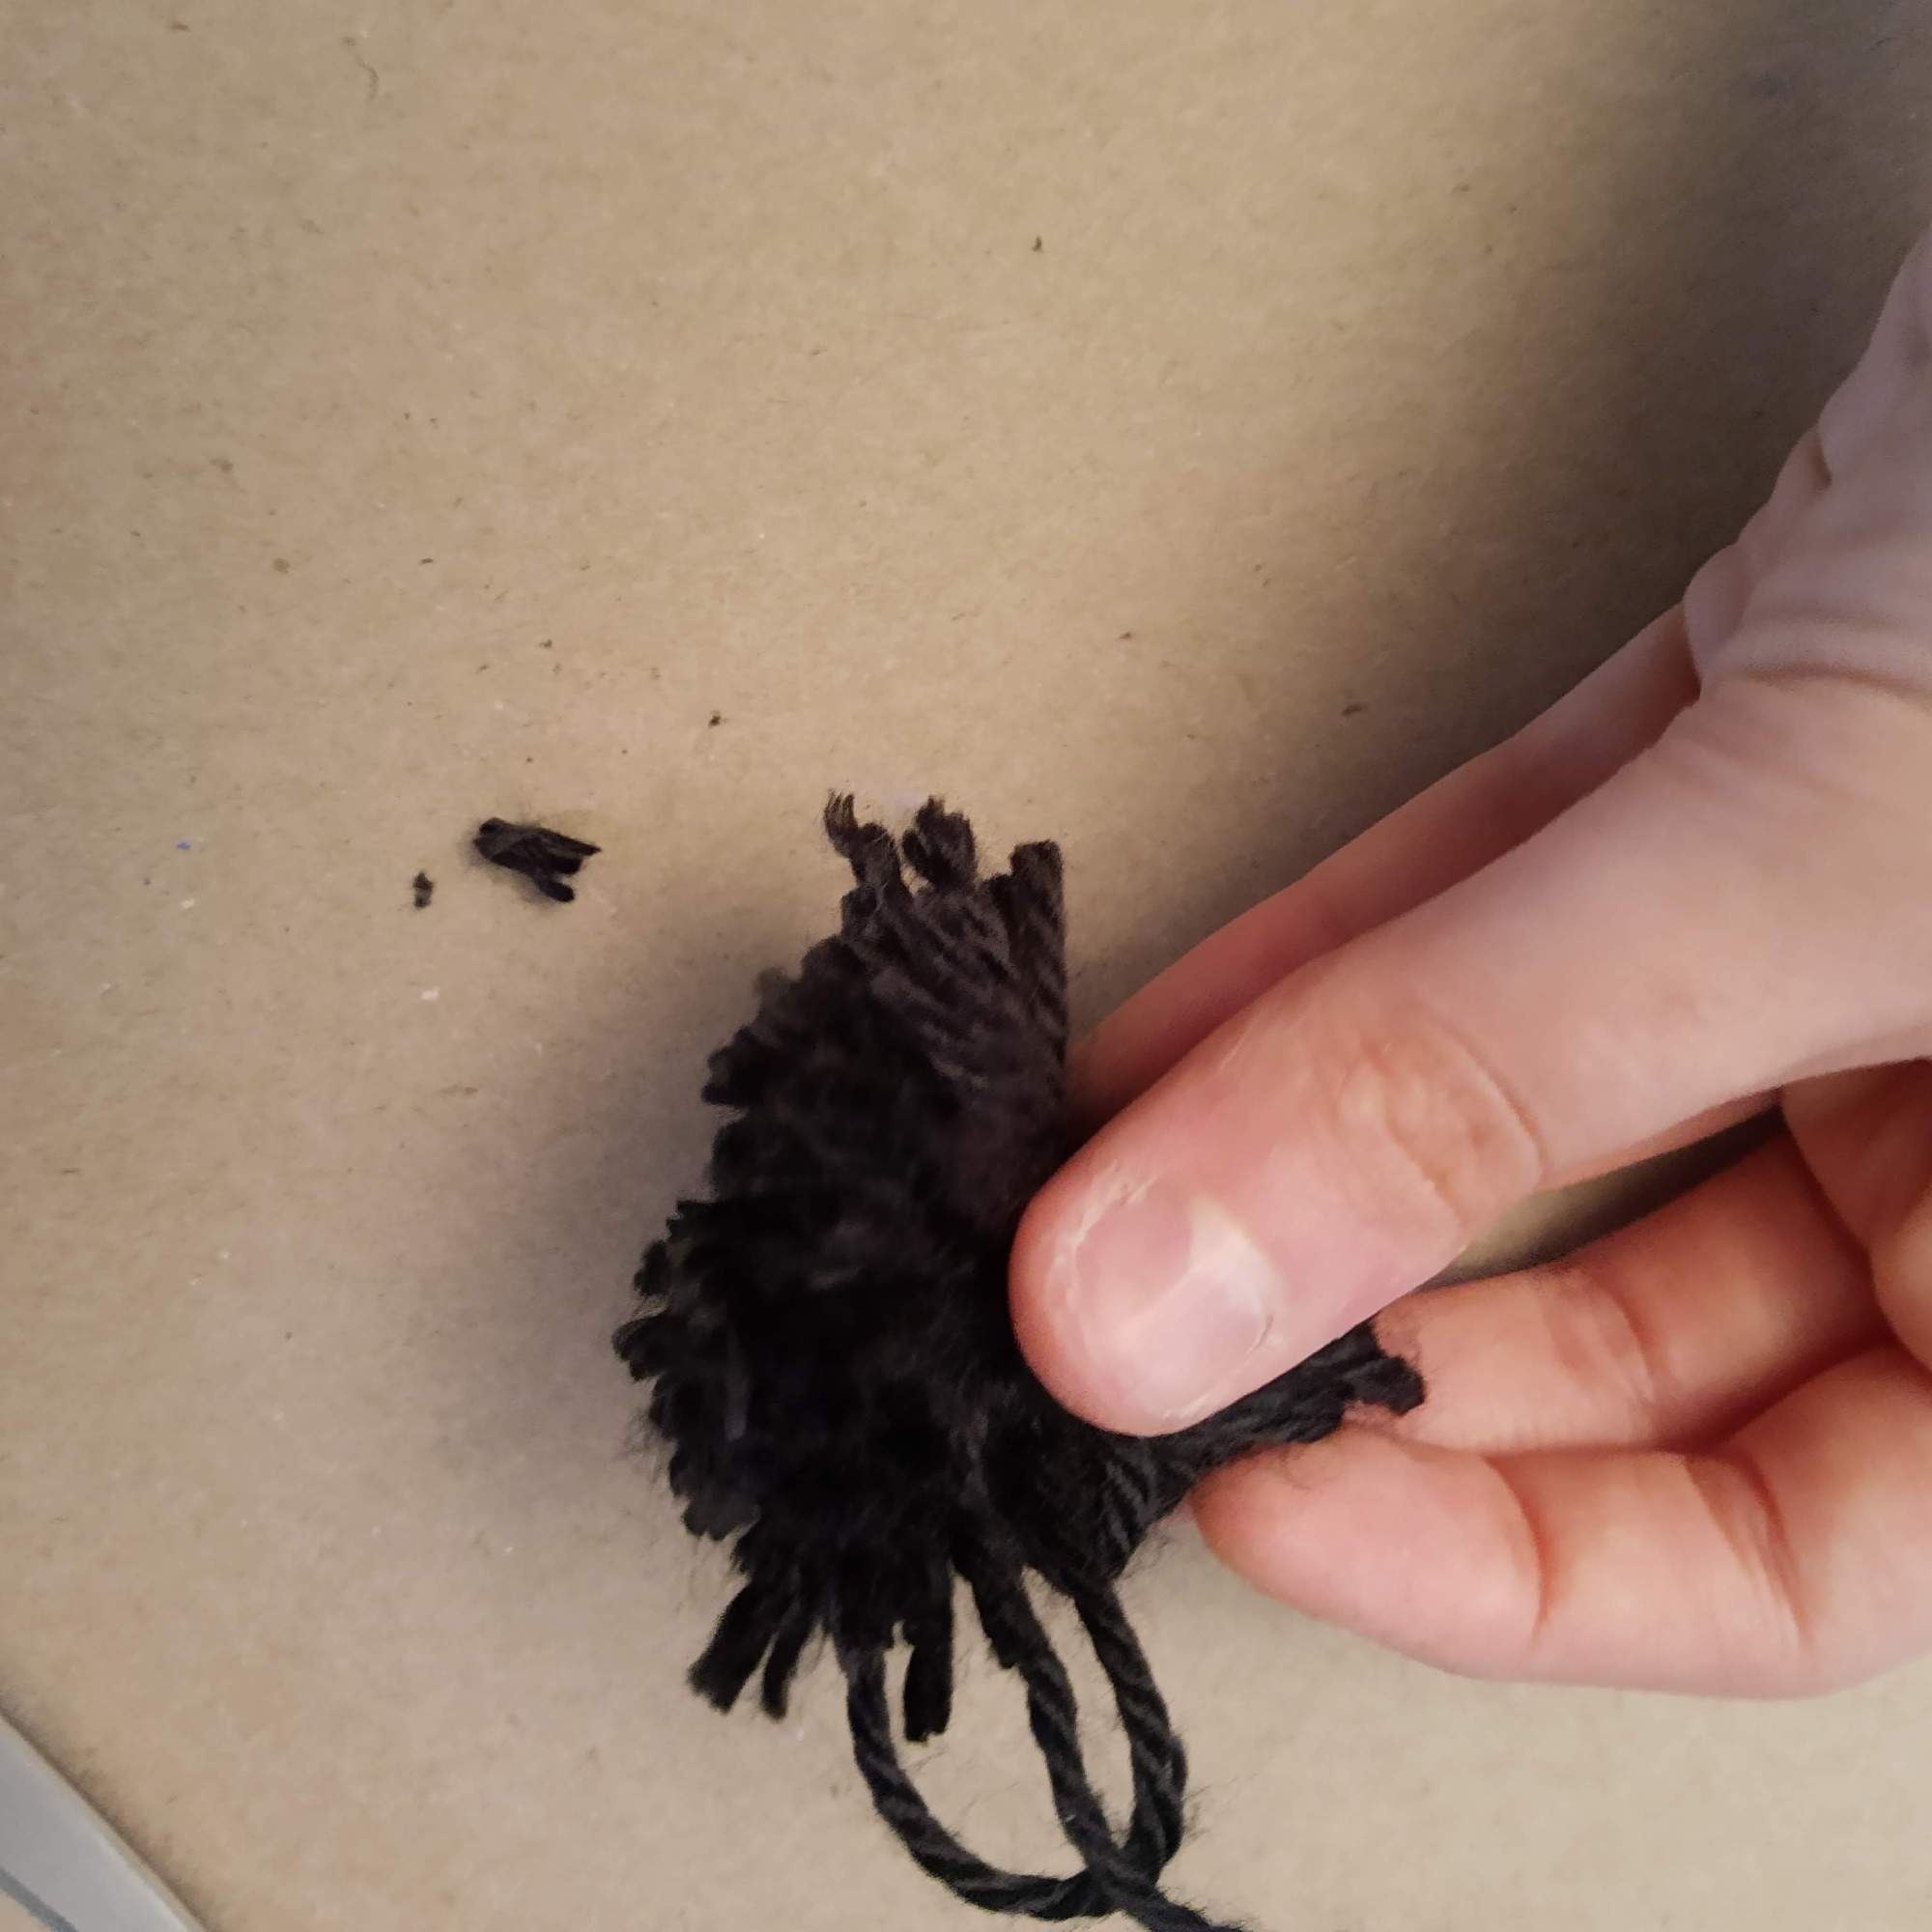
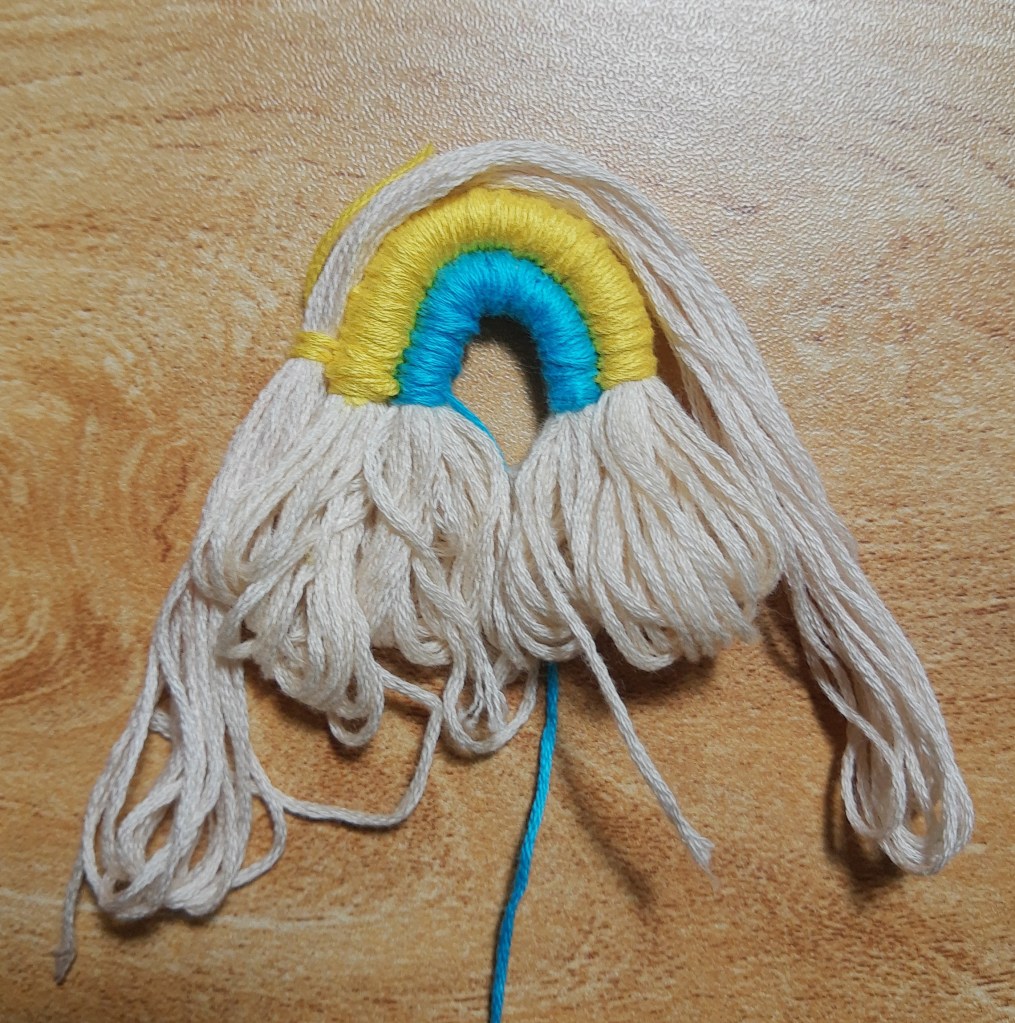
TRIMMING THE TASSELS:

Cut the loops off of the tassels. Brush the tassels so they are even and neat. Trim the tassels so they are the same length.

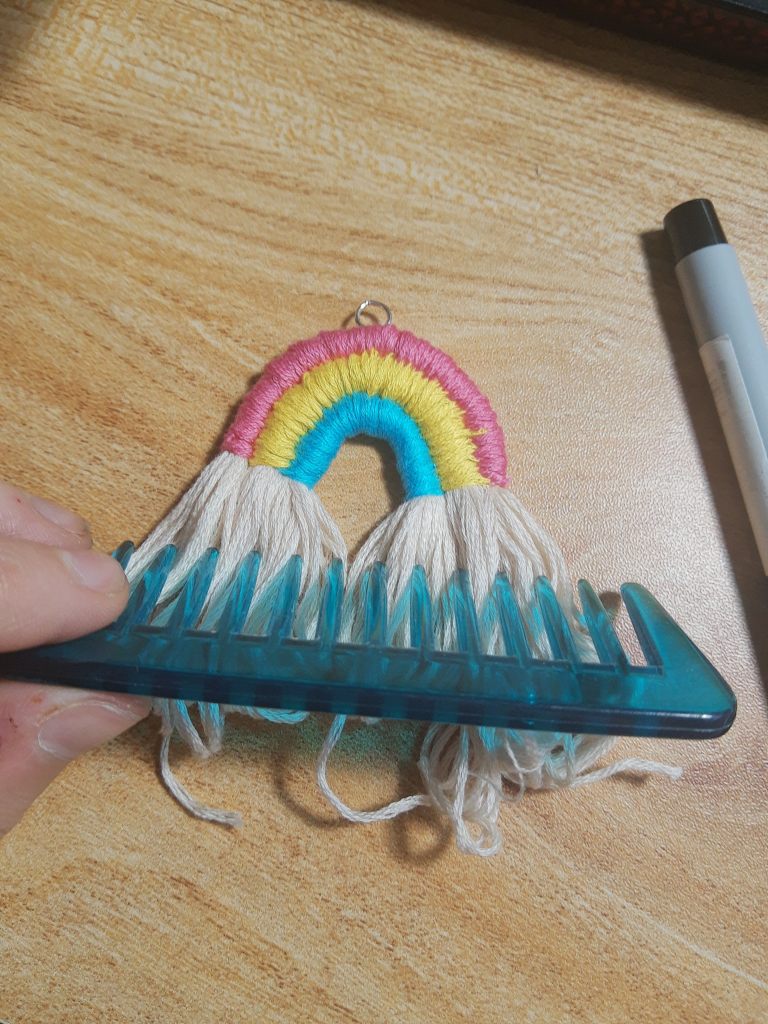
TA DA!! The finished earrings. I am so happy with how they turned out!

Setting Up An Art Classroom As A First Year Art Teacher

I graduated college in December 2020 and then I started interviewing and looking for a job as an art teacher. One of the places I applied to had an immediate opening, so after interviewing and being offered the job, I excitedly accepted it! I have been teaching K-8 art at the school since February 2021 and I love it! One of the parts I was excited about when starting my job was getting to set up the art room in a way that made students excited to learn and provided different centers and stations where students could use different art media. Currently, I teach all my elementary classes virtually, and only some middle school students come to the art room. Even though I don’t see a ton of students in my art room, I’ve used the time to get organized, take inventory of materials, and prepare for next year when I will hopefully get to see more students in the art room.

When I arrived in my new art room, my first steps were to go through everything and take note of what materials I have and don’t have so I can plan for future lessons. I am a bit of a neat freak, and I like everything to be labelled and have a set spot so I remember where it is.

Image Above: Process of organizing and labelling shelves in cabinets

Image Above: Me in my new art room before organizing or decorating

When I started teaching, at first everyone was still virtual as the second quarter ended. At the start of the third quarter, the school switched to hybrid, and at first I thought I would still be teaching virtually, but then I was informed at the last minute that middle school would come to the art room. I had to quickly throw my room together so it would be ready for students and have enough room in between each table so students were distanced from each other.

At first, keeping track of materials was tricky – I assigned each student a box with supplies for their personal use during class. But it was difficult when I wanted students to be able to use other materials. Luckily, I was subbing at the end of the day for another teacher and I noticed she had a shelf for materials in quarantine and I absolutely LOVED the idea, so I made my own materials in quarantine shelf. This has been a lifesaver. Whenever students use something from a regular materials shelf, they put it on the quarantine shelf and then I can keep track of which materials have been used and make sure I sanitize the materials before students use them again.

Image Above: Materials in Quarantine Shelf

DECORATING!!

Decorating is my favorite part. I love organizing too, but decorating brings everything together.

I decided to separate the room into different stations so all similar materials are together:

Painting Station:

Printmaking Station: All printmaking supplies are to the right of the paint station.

Paper Station:

Craft Station:

Early Finishers Station:

The whole art room:

For now, I am happy with how the art room is set up. I want to continue adding more activities to my early finisher station and figure out how I’m going to run the art room next year when I’ll have a lot more students.

Oh, and I almost forgot to add, I made most of the posters in the art room and once I placed the posters around the room, I discovered a whole drawer full of posters. I hung up some of the posters I found to fill in extra spaces with some splashes of color.

I hope to share more of my journey as a new art teacher and everything I’m learning 🙂

Symmetrical Creatures & Asymmetrical Backgrounds

I think this has been one of my favorite lessons I’ve taught to lower elementary this year. The project is fairly simple, but students came up with so many creative ideas! I taught the lesson virtually, but for whenever in-person lessons resume, I would definitely have the students use construction paper for their creatures and paint for the background.

My teacher examples:

Objectives:

Students will be able to:

  • Identify symmetrical and asymmetrical images
  • Create a symmetrical creature using folding, drawing, and cutting
  • Create an asymmetrical home for their creature using drawing/painting
  • Write an artist statement

Day by Day Breakdown:

Day 1:

  • Introduction to symmetrical balance – stand on one leg, what happens?
  • Symmetrical identification game
  • Looking at symmetrical photos/art
  • Art demo – how to create symmetrical creature
  • What does your creature look like?
    • Does your creature have:
      • fur?
      • scales?
      • patches?
      • a tail?
      • arms/legs?
      • eyes?
      • clothes?
      • fins?
  • Student work time

Day 2:

  • Introduction to asymmetrical balance
  • Review of symmetrical balance
  • Symmetrical or asymmetrical identification game
  • Art demo – how to create asymmetrical background
  • Where does your creature live?
    • underwater?
    • the woods?
    • mountains?
    • beach?
    • house?
    • island?
  • Student work time 

Artist Statement:

For lower elementary, I have students write a mini artist statement including the title of their artwork, describing their artwork, and explaining how they used one of the concepts in the lesson. This is my Google forms virtual version:

Student Artwork:

Katharina Grosse: Is It You?

I’ve seen photos of Katharina Grosse’s art, but it was so different seeing it in person.

I walked around the outside of the hanging canvases, seeing glimmers of color peeking through. To say it’s massive is an understatement. 50,000 square feet of canvas, suspended and draped from the ceiling to the ground.

When we finally found the entrance, we walked into a different world.

Yes, I have way too many photos of this installation. It’s just so cool! It was such an immersive and calming experience. Even though the colors are chaotic, being inside this massive cocoon of an artwork, I felt safe and comforted and enveloped. The thick, canvas walls muted the sounds outside. The echos of the galleries were gone. Everywhere I looked, I found new corners of a landscape – shifting, oscillating nooks.

So. Cool!

This piece is called “Is it you?”. The title confuses me. To me, it means people can get lost in this piece. It’s so colorful and busy and so large that you blend in with your surroundings.

After I listened to Grosse discuss this installation, she mentioned how

“you are as strange to the painting as it is to you”.

-Katharina Grosse from “Katharina Grosse.” Art Matters from WYPR, 6 March 2020, https://www.wypr.org/show/art-matters/2020-03-06/katharina-grosse

You enter this painting and can interact with it how you wish. I also found it interesting how she discussed how there’s so much information to take in that depending on where you are within the artwork, you have to process and adapt and view it differently. You can experience this art, you can walk on it, through it, around it.

Artsy Earrings

I decided I want to be like Ms. Frizzle. I had free time this weekend and started making earrings, and then I was inspired by Ms. Frizzle (from The Magic School Bus) to make earrings that match my lessons.

The earrings I made: Top row (from left to right): PCBs, Pom Poms, Cherries. Bottom row (from left to right): Still Life Vases, Strawberries, Wrapped Stones and Pom Poms

The pom pom earrings don’t really match with any of the lessons I’m planning, but I am teaching still life art to lower elementary this week so I can at least match with some of my lessons 🙂

Materials I used to make my earrings:

  • PCBs (Printed Circuit Boards) – I found tiny printed circuit boards from inside an old speaker and from old phones (and my brothers helped me take apart the old technology and unsolder them). I added jump rings through each loop and a button and other electronic part above the PCBs, and then I added the earring pieces.
  • Pom Poms – I made two pom poms with different colors of embroidery thread. I used the excess thread and sewed on two smaller pom poms that were storebought.
  • Cherries – Green wires, embroidery thread, & felt
  • Still Life Vases – Green wires, felt, small chains
  • Strawberries – Felt, embroidery thread
  • Wrapped Stones and Pom Poms – stones, pink wire, embroidery thread

How I make pom poms:

  1. Cut out a small strip of cardboard.
  2. Wrap embroidery thread or yarn around the cardboard.
  3. Wrap until you have a thick amount of yarn to make a fluffy pom pom.
  4. Cut a smaller string out and put it aside.
  5. Slide the loop off of the cardboard.
  6. Place the loop of yarn on top of the string
  7. Tie a knot around the center of the loop.
  8. Tie another 2 or 3 knots around the center to make it secure.
  9. On one side of the knot, cut through the loops.
  10. Cut out the loops on the other side of the knot
  11. Trim excess yarn so the pom pom is even and fluff it up.

Art Rut

I miss making art. Not making art makes me feel lost. I have lost my art soul and I don’t know how to find it again. Art used to make me feel something, I used to channel my feelings into my art. I used to spend every second of free time painting and sketching.

Now, I try to draw or paint, but it doesn’t feel right. I miss being an artist but I don’t know how to be an artist again. I want to make art that I care about again. I miss making art with people in an art studio, I miss being surrounded by art people, I miss myself. I miss feeling the art, I miss the creative flow state and I don’t know how to get it back.

I’m trying – I try to draw almost every day, but it doesn’t feel right. I made myself draw a self-portrait every night at 8pm for 2 months. I laid out all my art supplies on my desk so I can easily begin creating when the feeling arises. Yet I’m still stuck in the rut. I need to find my art to find myself and feel right. I don’t feel right without my art.

Normally when I’m uninspired, I go to museums or figure drawing sessions at my local art center (neither of which I am able to do right now), or I go on walks and photograph things that interest me. And I write. I have notebooks full of writing, I have photographs of trees and buildings, but I am still uninspired. Maybe I need to put less pressure on myself to make “good” art. Maybe I need to let go and stop trying to force myself to find my art right now. I suppose getting out of an art rut is a process. It really sucks being so artistically uninspired, but maybe it’s okay to let go of the idea of needing to make something “good” and focus simply on creating something.

And at least I am drawing, even though the drawings are sloppy and rushed, maybe that’s okay. I will make what I can and see what happens. I suppose most people go through ruts of some sort, whether it’s writer’s block or artist’s block or another obstacle. Maybe I need to stop fighting with the rut and just embrace my lack of ideas and just make bad, ugly art since that is all I can make right now.

I think I need to accept my art rut and commit to it, stay in it, see what happens, let go of any idea of who I am as an artist and simply make whatever I want to make.

My sketchbook:

Why do people make art?

I’ve been thinking about why people make art. Mostly because I am questioning why I make art. I stopped painting for about 10 months – the longest I’ve ever gone without painting. Before my hiatus from painting, I made art for different reasons. In elementary school, I liked to draw because it was fun. In middle and high school, I worked on my observational drawing skills and I began to make art that represented the world. Art became a way for me to observe a scene or object and translate it into a two-dimensional space. At the end of high school and throughout college, art became a way for me to express myself. I’ve always been introverted and quiet, and art became a way for me to put myself on a canvas, to display all the emotions, thoughts, and feelings I couldn’t express out loud. Creating art was a therapeutic release for me – when I was sad or lonely, I went to the painting studio where the familiar smell of oil paint made me feel at home. Painting was my home.

My freshman year of college I was very homesick and I began to paint the ocean. The ocean is peaceful, calming, cool colors which made me feel at ease. Then I began to paint memories and moments, things that reminded me of home and my childhood. Painting became a way to remember who I am. To paint things that were meaningful to me.

Left – a drawing from elementary school; Right – a painting from high school
Above – works in progress from my freshman year of college

In my college studio art classes, we were often encouraged to think conceptually about art and make art with a greater purpose and intention. But we also learned about process-based art – creating something with no clear product in mind and seeing what happens with the paint or sculpture or object. Letting go of thought and letting the brush guide your hand, experimenting with marks, gestures, lines. Not having a preconceived notion of the final product. Making art without an end product in mind was intimidating at first, but as I began to experiment more with abstraction and marks, I couldn’t stop painting like this. It was freeing to let go of realism.

Above – Some paintings I made without an end-product in mind (process-based art)

While my own artistic practices have crossed between varying levels of realism and abstraction, I’ve come to rely on artmaking as a way to feel free and to express myself. I think anyone who creates anything is showing aspects of themselves in their handiwork. Even the earliest known forms of art, such as cave paintings, were perhaps a way of communicating – relaying information about animals to other humans, or simply a mark telling others, “I was here”. Other early forms of art, including small votive figurines, could have been created as offerings to gods/goddesses, symbols of fertility, or as good luck charms, though the exact purposes of these artifacts is unknown. When art intersects with craft (weaving, textiles, pottery, etc.), art has a function – it holds water or lays on the ground protecting the floor.

Left – Ardabil Carpet at the V&A Museum; Right – Pottery at the Metropolitan Museum of Art

I suppose there are two avenues of artmaking – making art with a purpose and without a purpose. Art made with a purpose can be many things: communication, self-expression, commentary on the world/social issues. Art made without purpose may simply be a collection of marks, colors, experiments. And some art lies in between the purposeful and purposeless. Except even art made without a purpose, while not initially meant to have a purpose, may still be meaningful.

Does there need to be a reason? Can people make art just because they want to? Do people make art for themselves or for the world? Is it selfish to make art for yourself? Can art be created simply for the purpose of being created?

People Looking at Art

I always find it interesting to see how people look at art in museums. I feel like there’s 3 different types of museum-goers:

  1. The Caption Reader – spends more time reading the caption than looking at the artwork
  2. The Photographer – rushes through the entire museum, snapshotting as many works of art as possible; also the Instagram photographers, posing in front of famous works of art, ready to share it on their feed
  3. The Absorber – sits/stands in front of a work of art, staring at it for a long time
Van Gogh’s Starry Night at the MoMA
Henri Rousseau at the MoMA

I’ve fallen into all of these categories. I have so many photographs of artwork at museums, and I never look at them, I don’t know why it’s so important for me to photograph a work of art. I guess it’s just a memory, like any photograph.

And while captions are important, I realized that I was spending more time reading the caption than looking at the artwork. It’s comical how the caption almost becomes another work of art on the wall, ready to be taken in by museum visitors. Would the artist want people to read the caption, or would they prefer people look at the art? I suppose both are important, context is important when looking at art, but I wonder sometimes if reading too much into the context of the artwork takes away from what is on the canvas.

After learning in one of my art classes that the average person only spends a few seconds looking at each work of art in a museum, I decided I would challenge myself and sit in front of an artwork for at least five minutes. It’s peaceful and slow, like watching rain fall, taking note of swirls of brushstrokes, colors meshing together, thinking about who the artist was, how they felt when they created the artwork.

It makes me think about how long it takes me to create art, and how much time the artist must have spent creating their artwork. Although maybe it doesn’t matter how long people look at the art. Musicians spend hours, days, months, years crafting the perfect songs and lyrics. And when it’s finished, there’s only 3 minutes of a song that people listen to and move on with the rest of their day. Do you have to sit with something for a while to appreciate it, or can you still appreciate art after only seeing it for a short time?

Regardless of whether or not time spent consuming art relates to level of appreciation, my favorite artwork to sit and stare at is Jennifer Bartlett’s 24 Hours at the Met. I first saw Bartlett’s 3 large paintings my junior year of high school, when my art class took a five hour bus trip to New York City. The clocks in each painting piqued my curiosity. Later, in college, I went to the Met many times, and I would always skip past all the Renaissance works until I made it to the modern art section, where I would sit and stare at the 3 large Bartlett paintings on the wall. When I was homesick and alone, I went to these paintings to find comfort. They were familiar.

Maybe art is about portraying the human experience. Maybe art is about finding connection, communicating what can’t be said in words.

What do people think when they see artwork? I guess if I’ve learned anything from the countless art critiques I had in college, everyone looks at art differently and everyone gets something different out of artwork. And the artist’s intention when creating the artwork is not always evident to the viewer. Do artists make art for themselves, or with an audience in mind?

a man reads the caption of a painting (I don’t remember which museum this was at)
3 of Jennifer Bartlett’s 24 Hours at the Metropolitan Museum of Art

confusion soup process

This slideshow requires JavaScript.

Confusion Soup helped me break free of painting the same old way I always had – realistic, detailed, and slowly. For this painting, I broke all of my internalized art rules. I splattered paint, let paint drip, used large globs of paint, let the colors mix on the canvas, and turned the painting upside down and all around as I worked. I had no plan. I started with a turquoise green and then I flipped through my phone camera roll until I found an image that I liked. Then I painted it on, without caring about composition or if it looked good. It was very freeing to throw paint around and not worry about making a “perfect” painting. I also discovered that I really enjoy working like this – going into the painting with no preconceived notions as to the end product.

As for the title, during the critique, my professor said she was very confused by the painting (but in a good way, I think), and later she said the painting reminded her of soup. Hence, the title “Confusion Soup” was created.

Ever since painting this back in November of 2018, I have become a lot more brave with my art. I used to worry about wasting paint and messing up the canvas, but now I feel more free to explore, experiment, and create.

fragments

Fragments 1/2
Fragments 1/2, acrylic on paper, 2019

Fragments 2/2
Fragments 2/2, acrylic on paper, 2019

two small acrylic paintings on paper

painted on may 10, 2019

fragments

I forgot I had painted these until today. I was cleaning my room when I found them – it was quite unexpected. I remember painting these during finals week, taking a break and creating a painting just for myself. The semester had been full of strict assignments, limited to charcoal and sculpture, but mainly lowenfeld and dewey. Fragments far away. Fragments of myself. Fragments of places, memories, emotions.